Product Support

Stay Connected with our Newsletter
How to create a Culture 20/20 Survey
1. Log into your EDASurveys account.
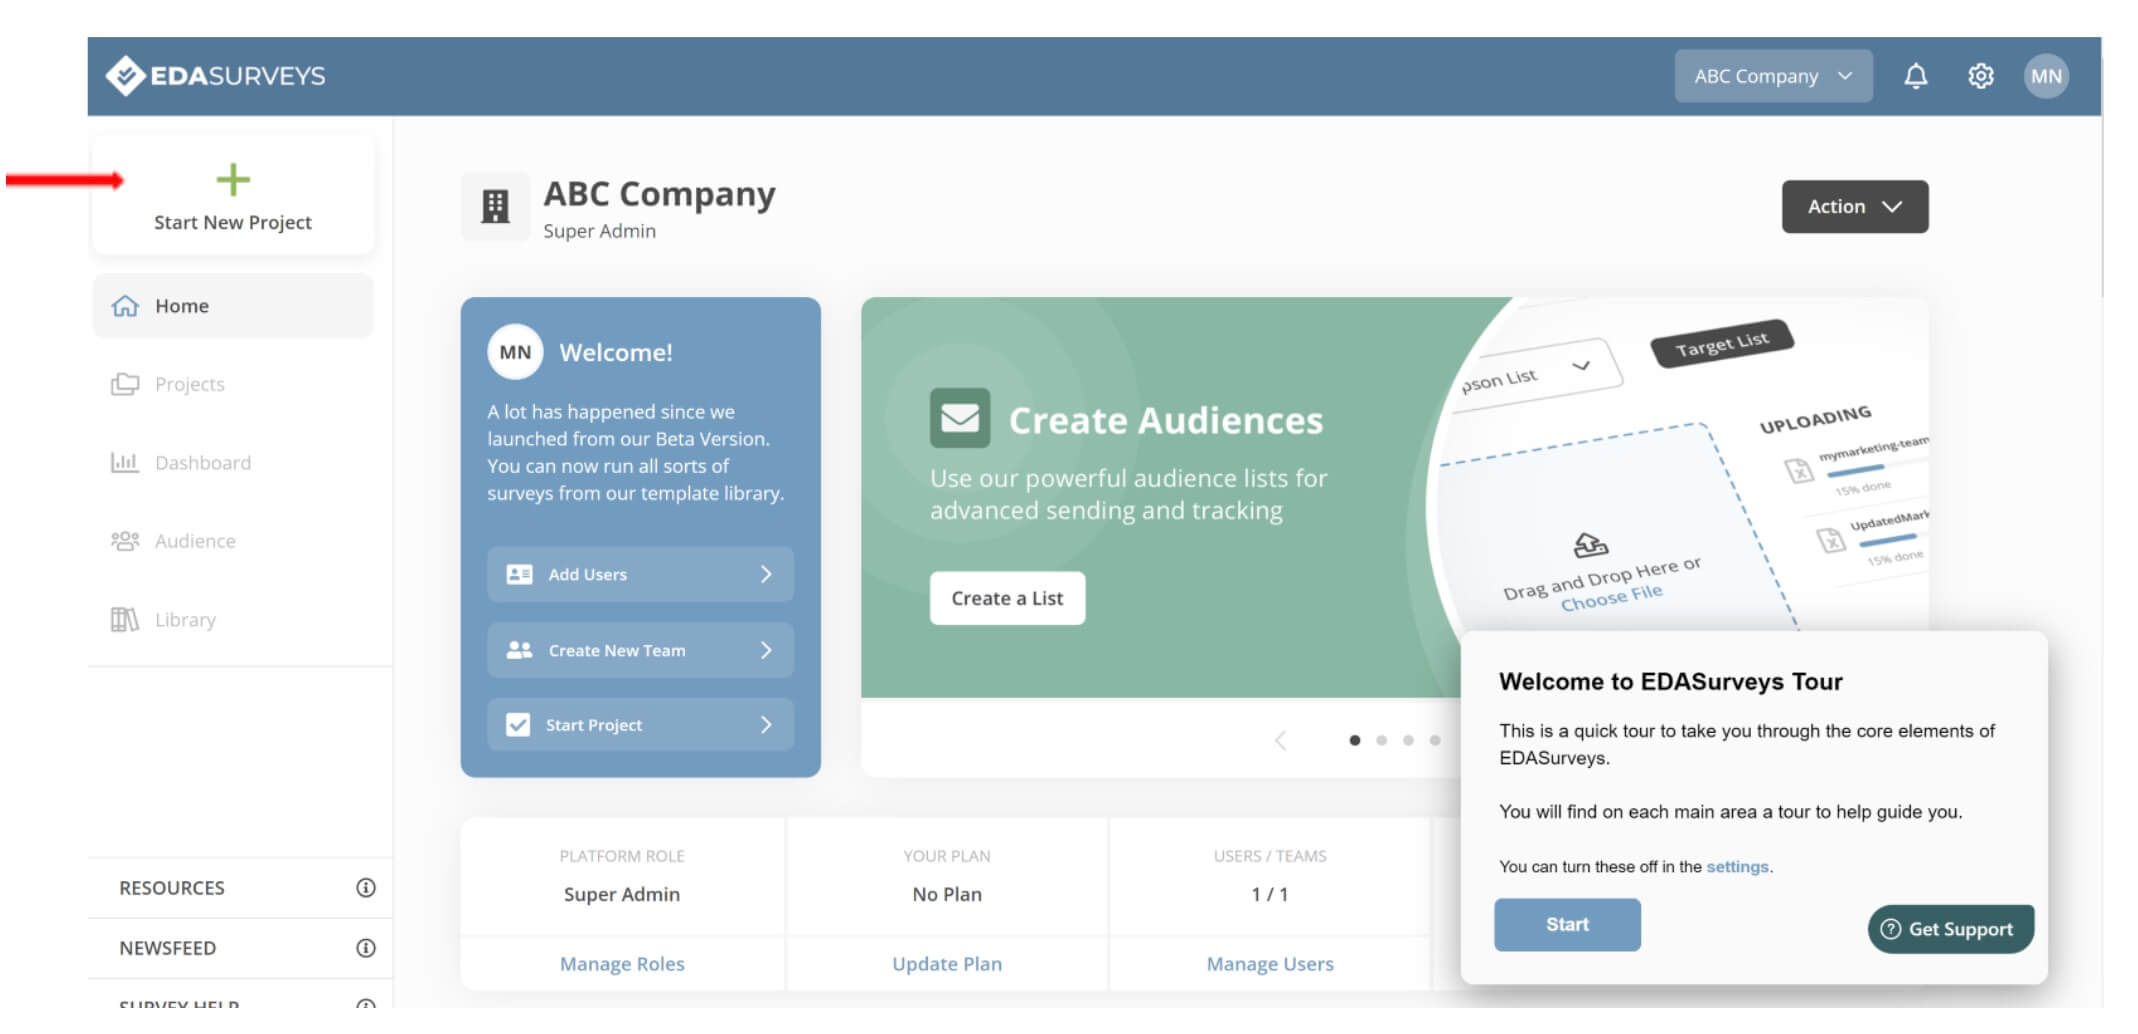
2. On the Home Page, click on Start New Project on the upper lefthand side.
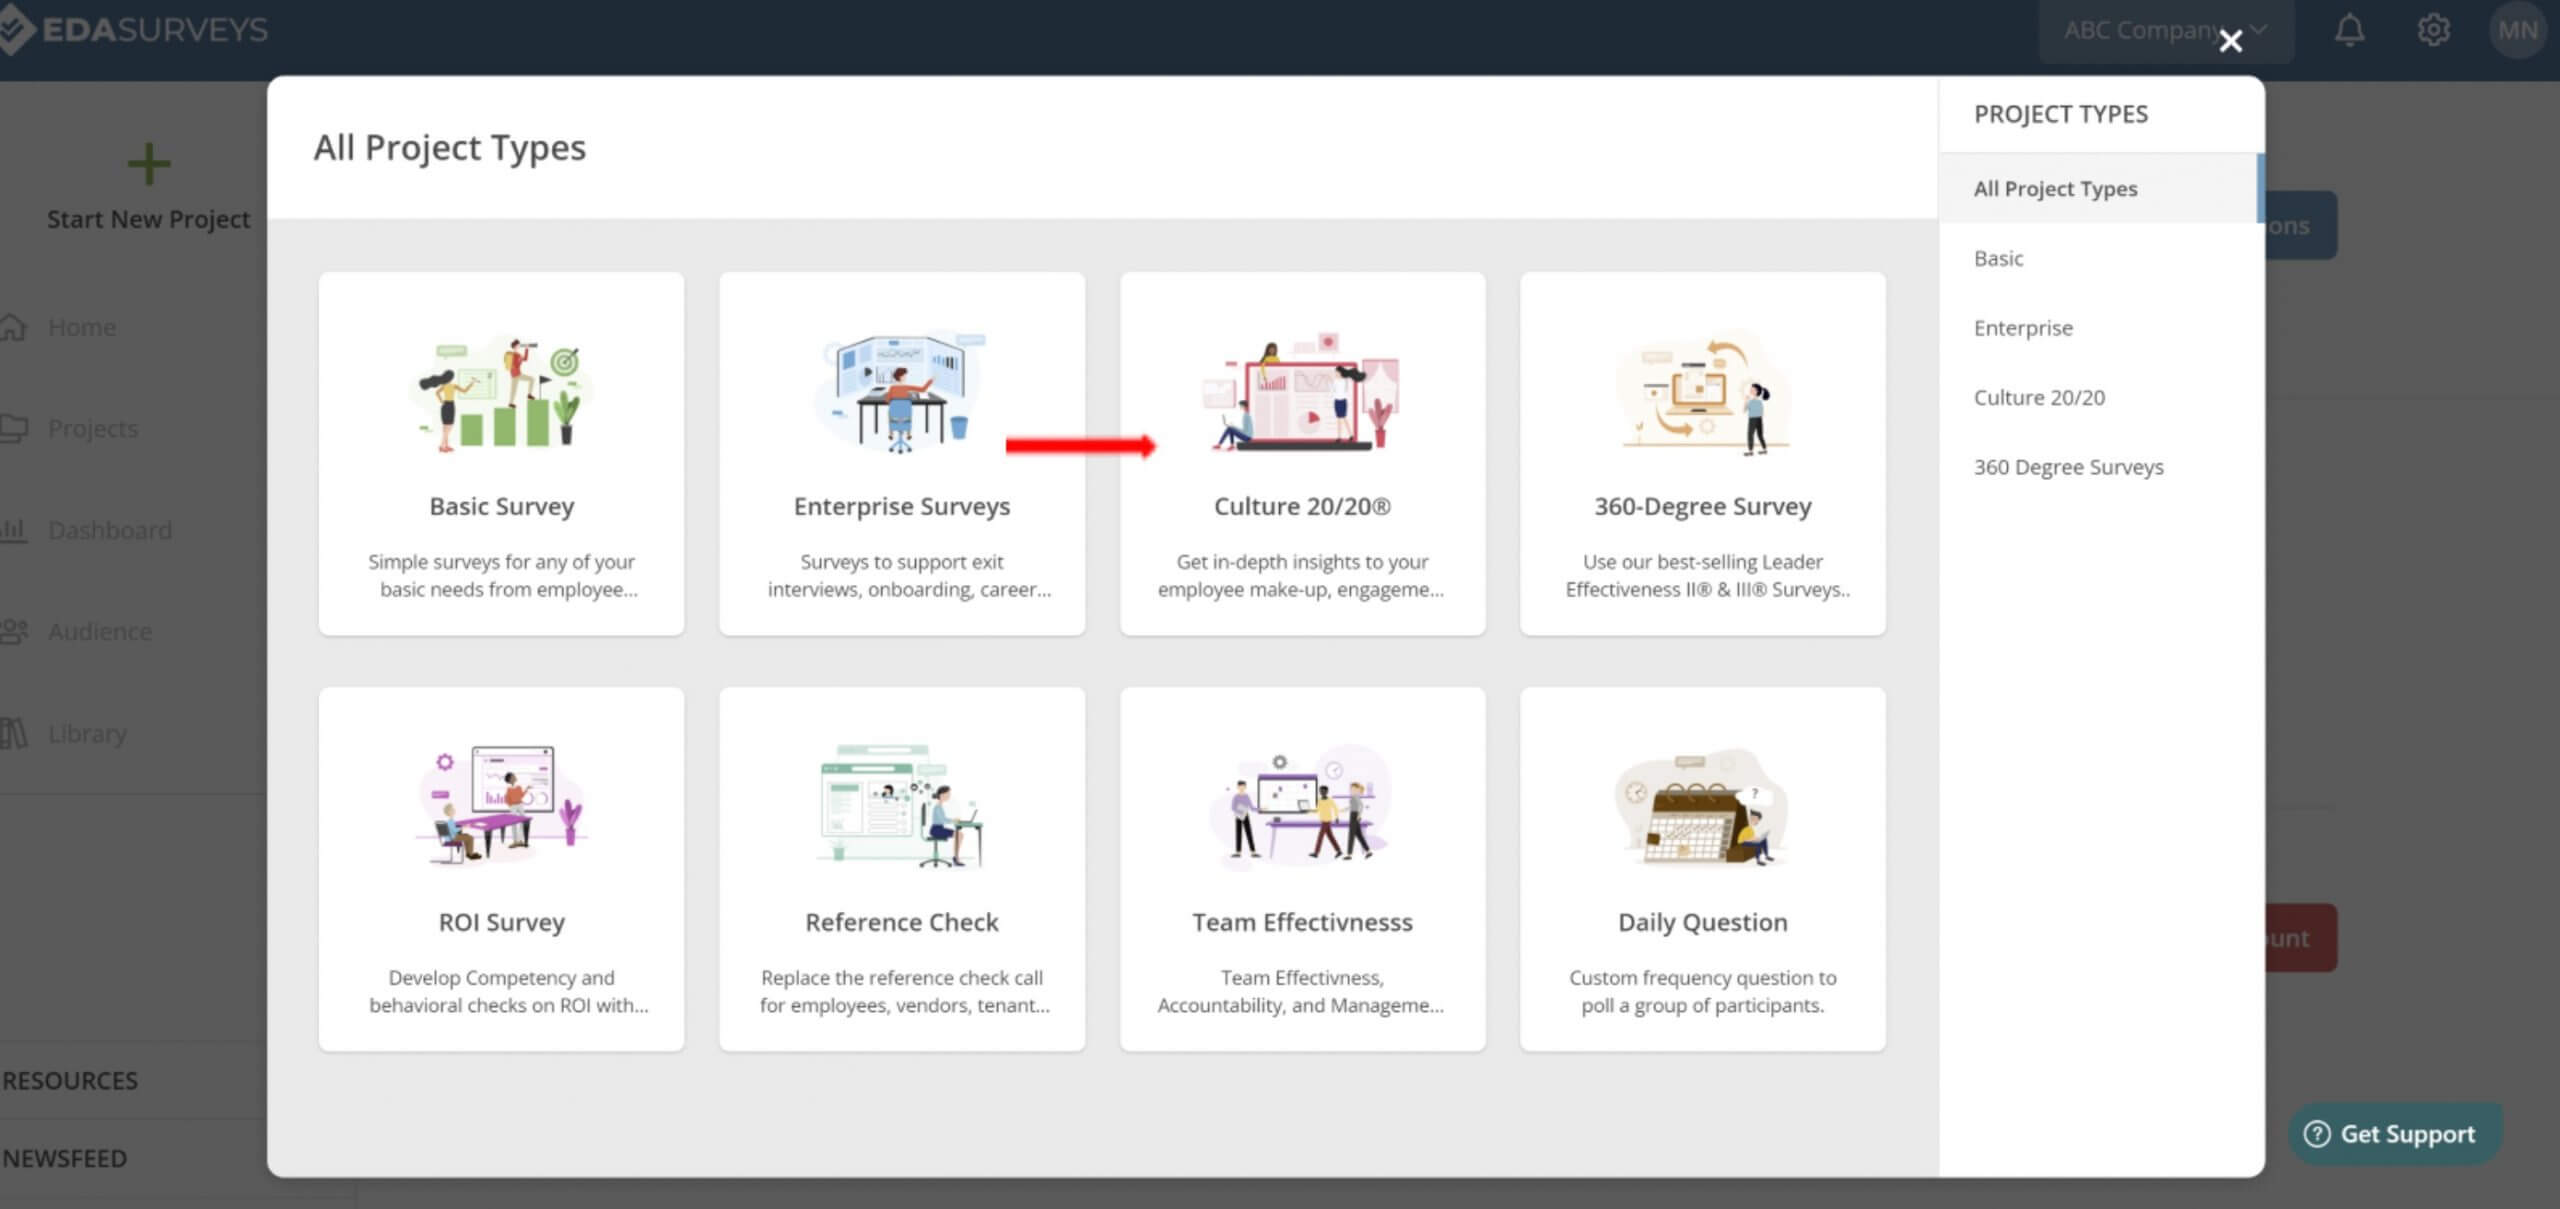
3. Hover over the Culture 20/20 Survey and click on Use This Template. If you make any updates to the template, you can save your template, and this is where you would see your saved template(s).
4. Next, a screen will appear where you can view the 12 mandatory culture health areas and the additional areas you can add to your survey. If you would like to add an additional area(s), check the box to the left of the area. Then, click Add & Next to continue.
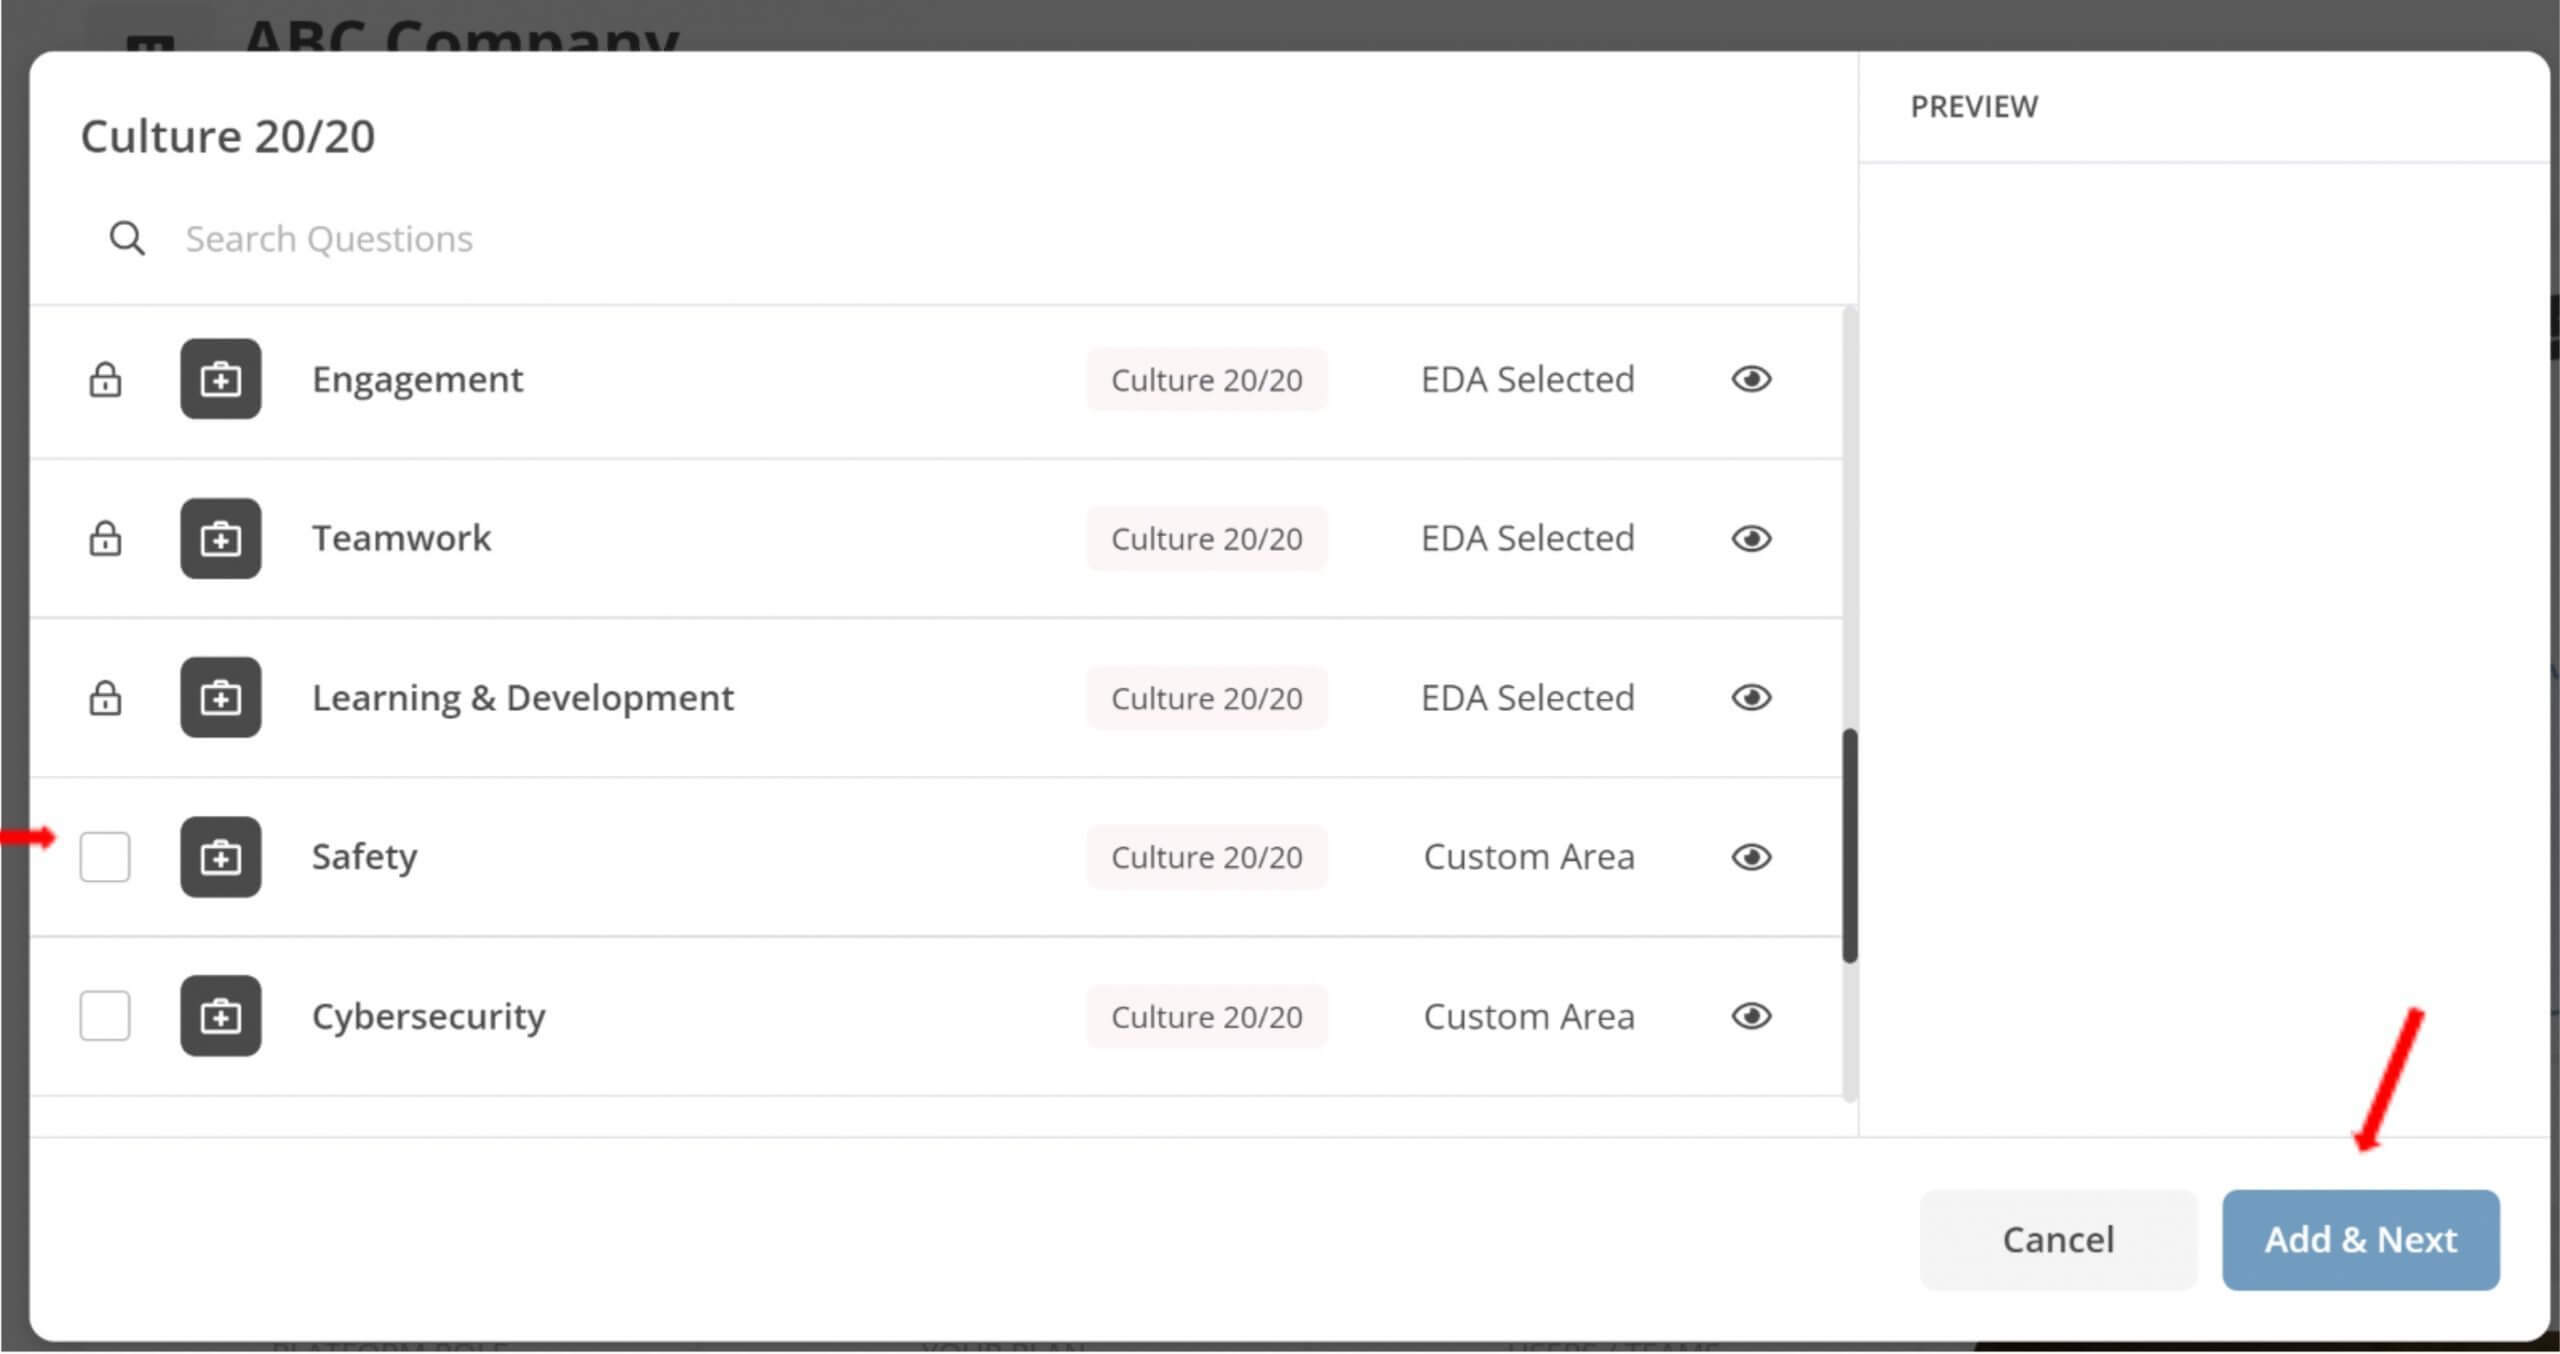
NOTE: You have the ability to build your own additional custom culture health area. Please see Guide on Building Custom Health Areas for instructions.
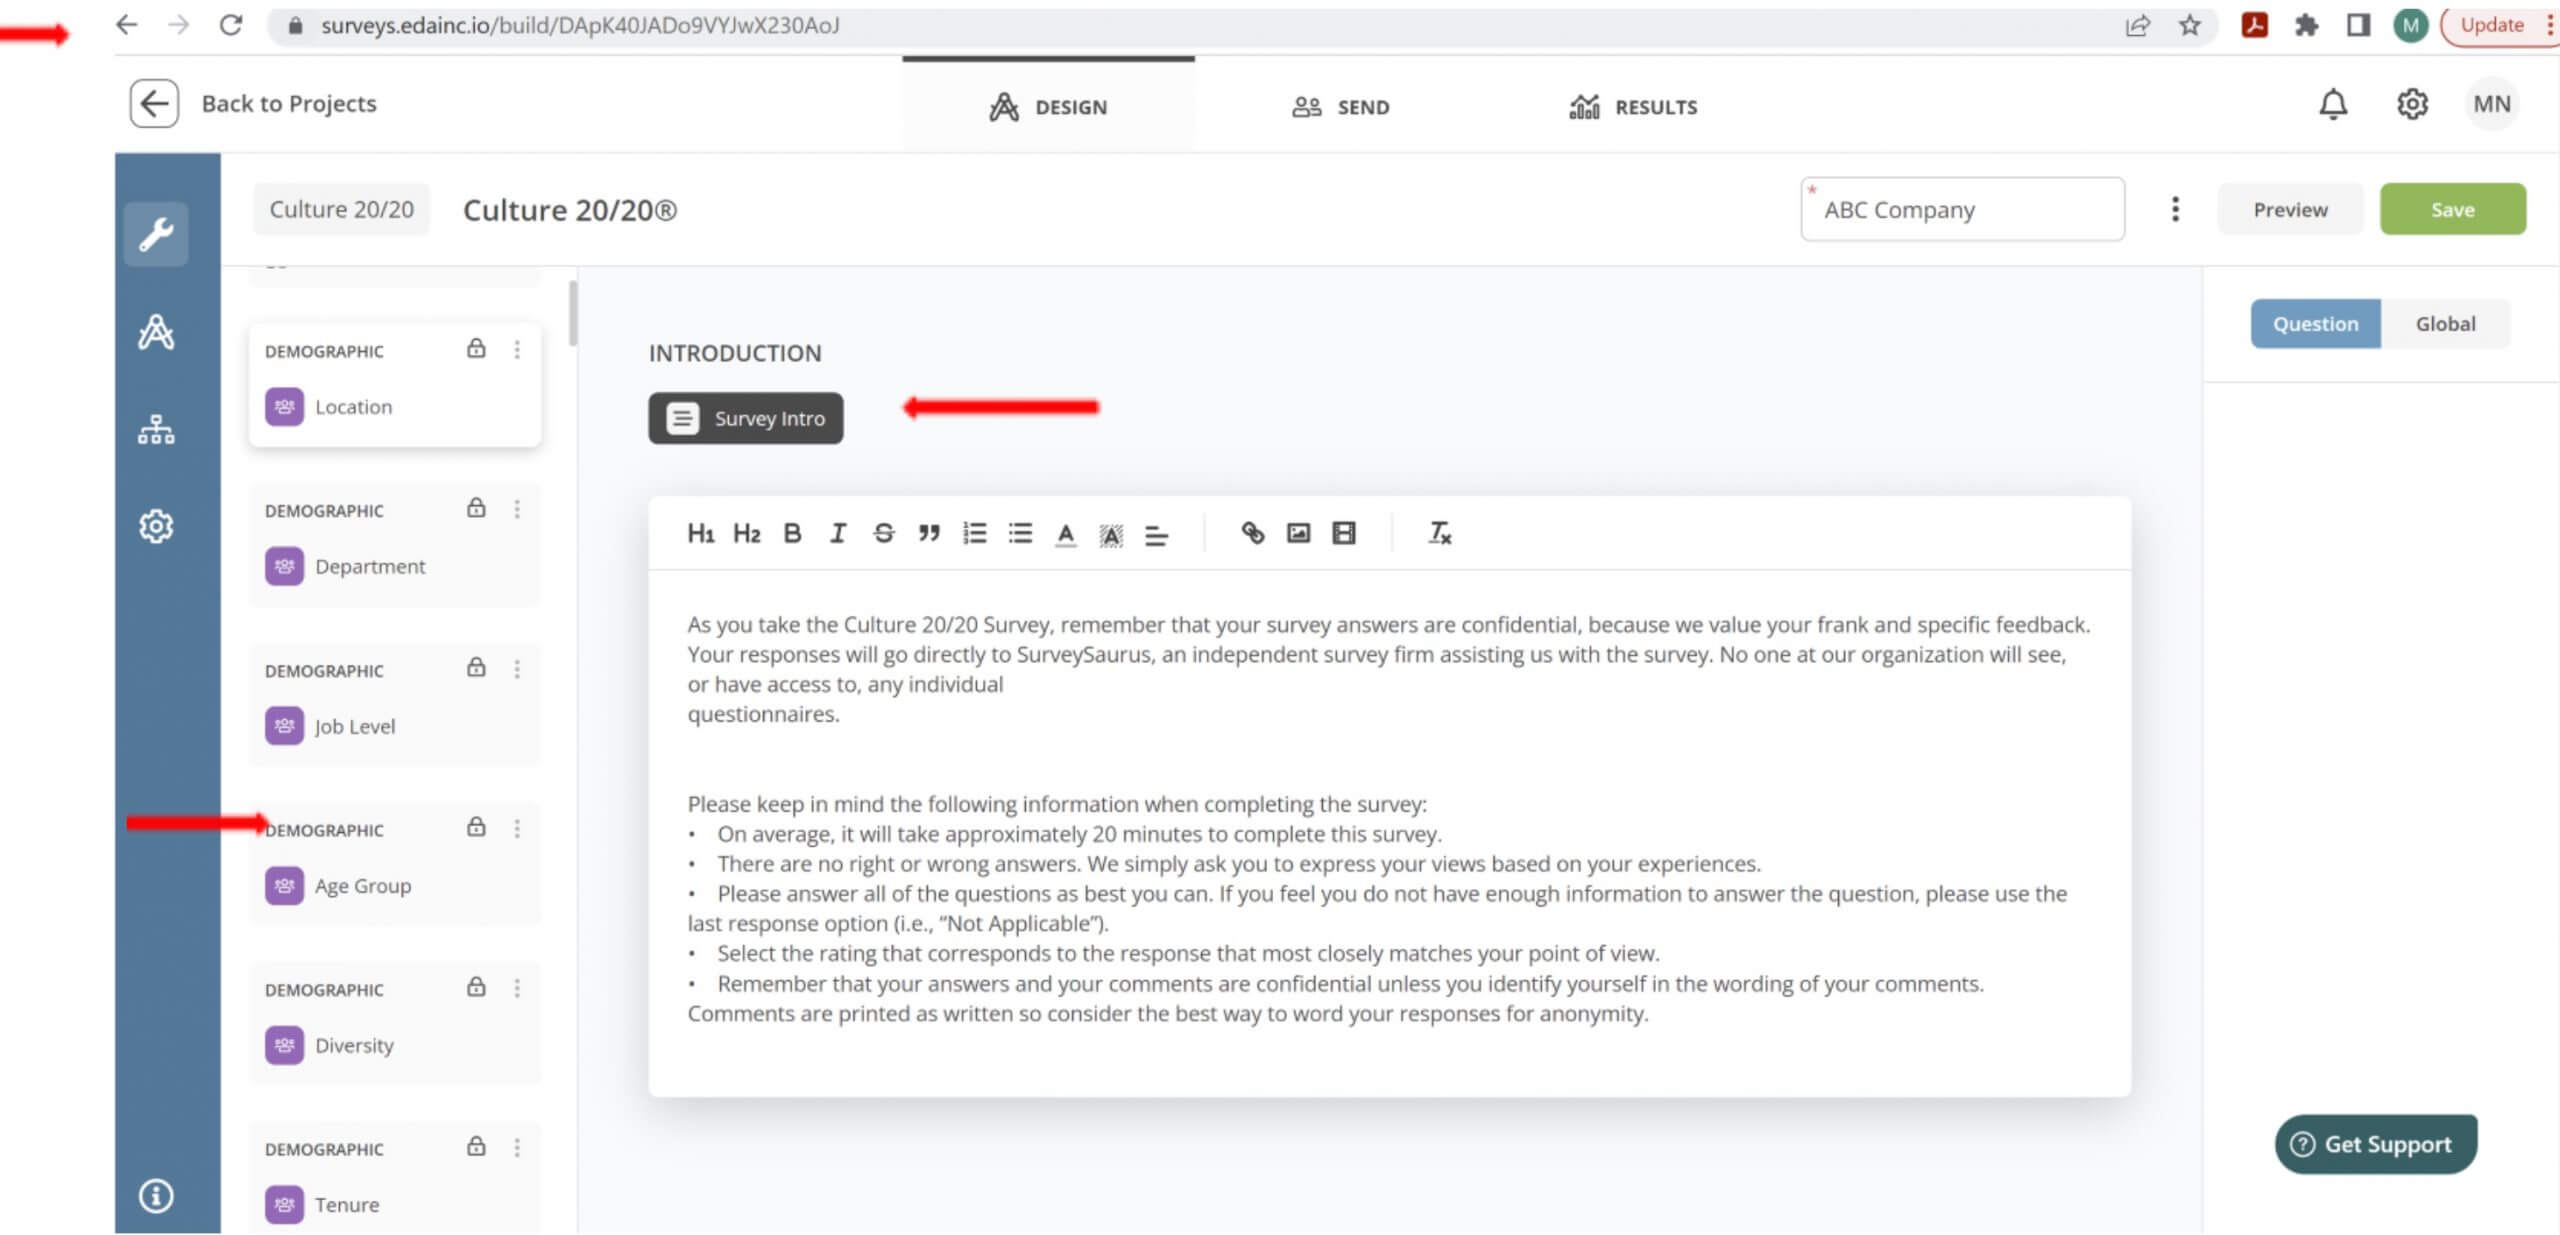
5. You are now at the Design page. Here you will be able to:
a. Add a survey intro
-
- The default Culture 20/20 Survey Intro shows up at the beginning of the survey and gives raters more information about the survey. Here you can add instructions or simply introduce the survey. The text area is fully customizable for your needs.
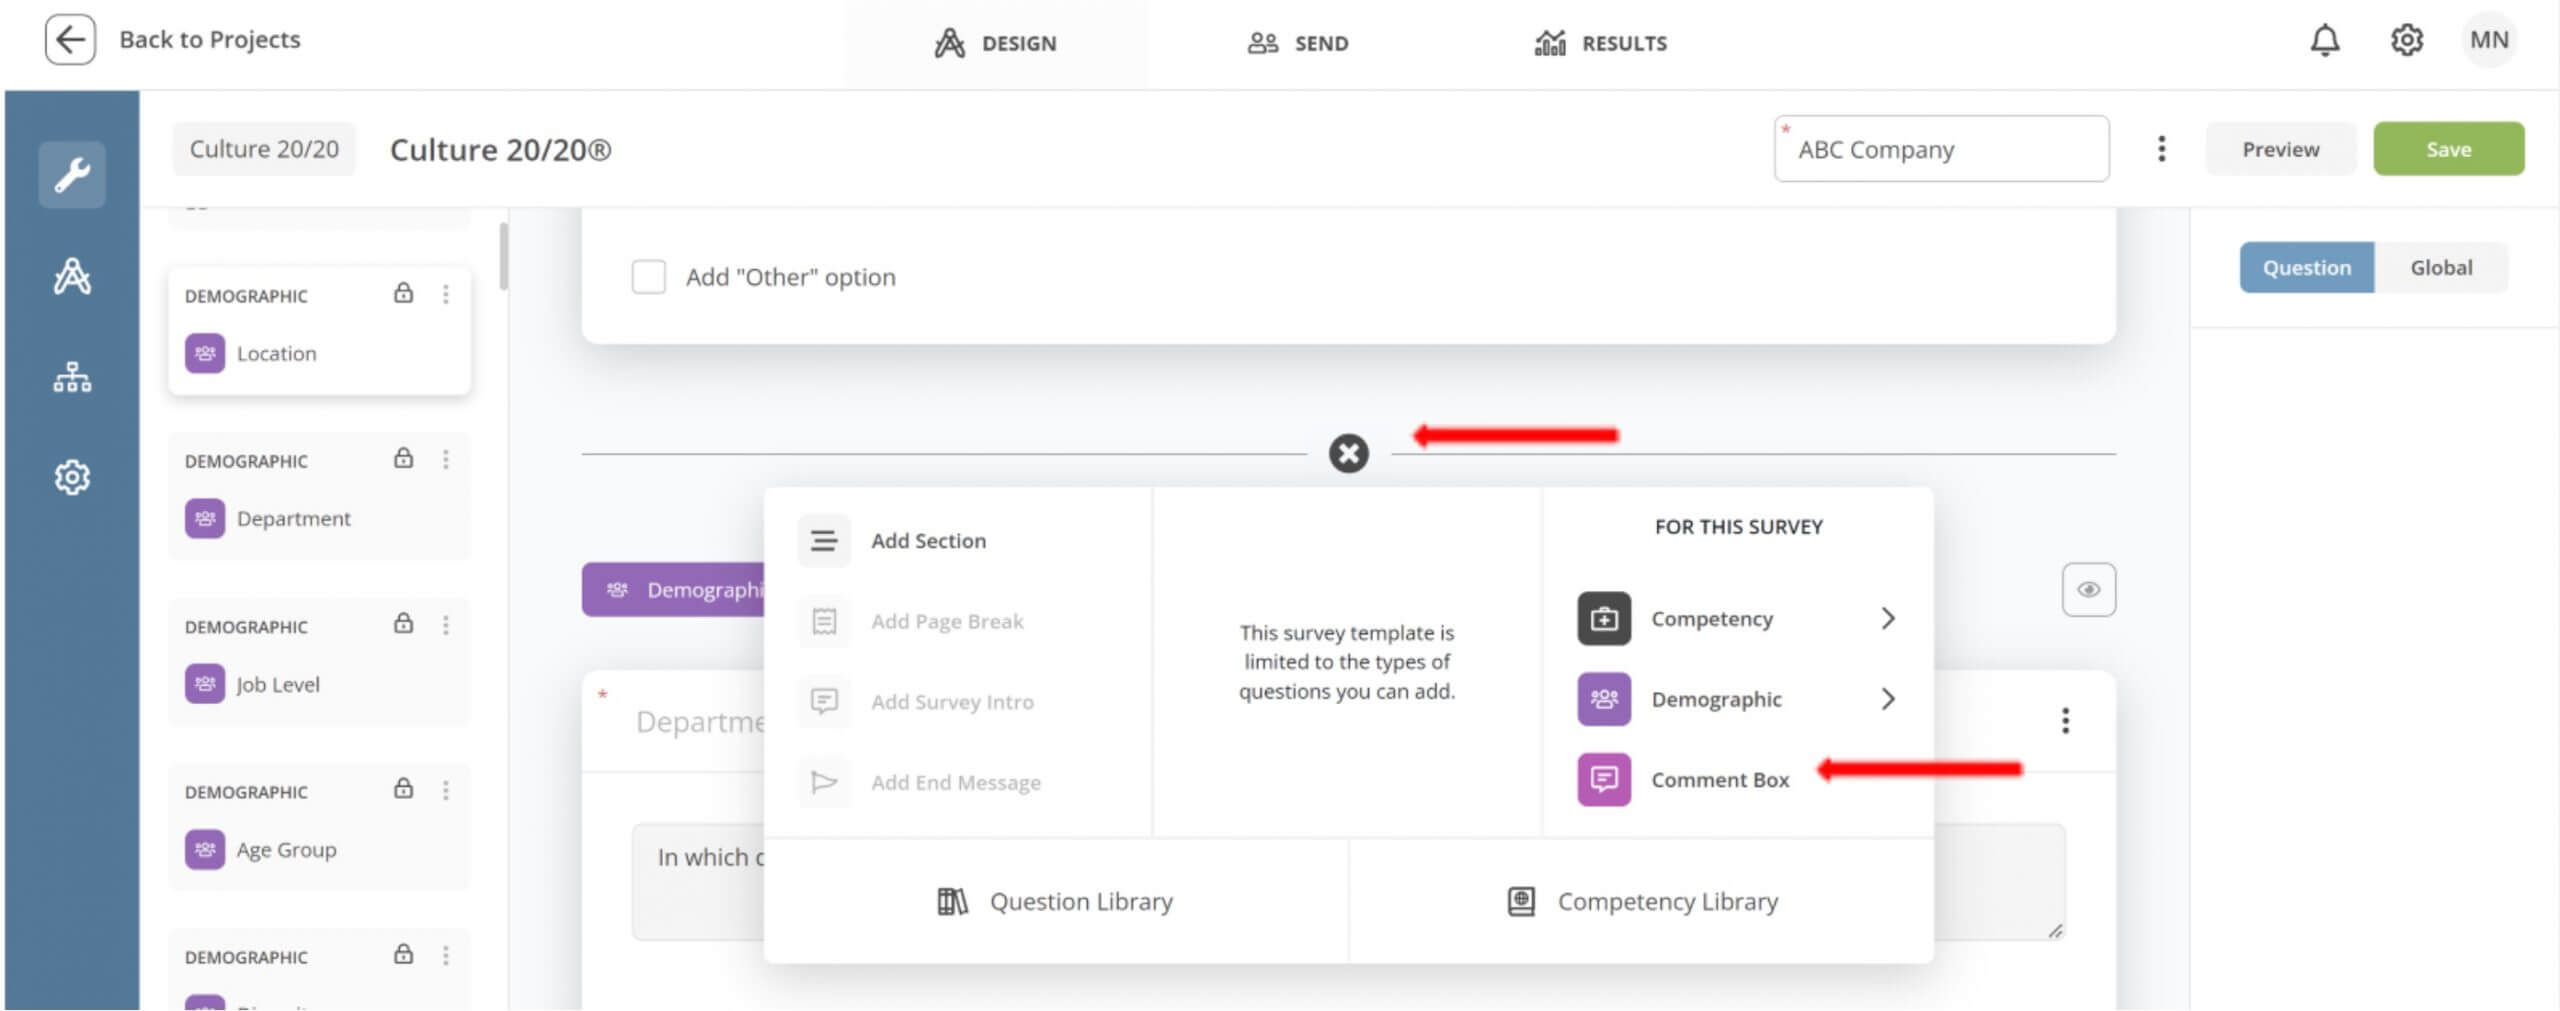
b. Add Sections by clicking on the + and then clicking on Add Section.
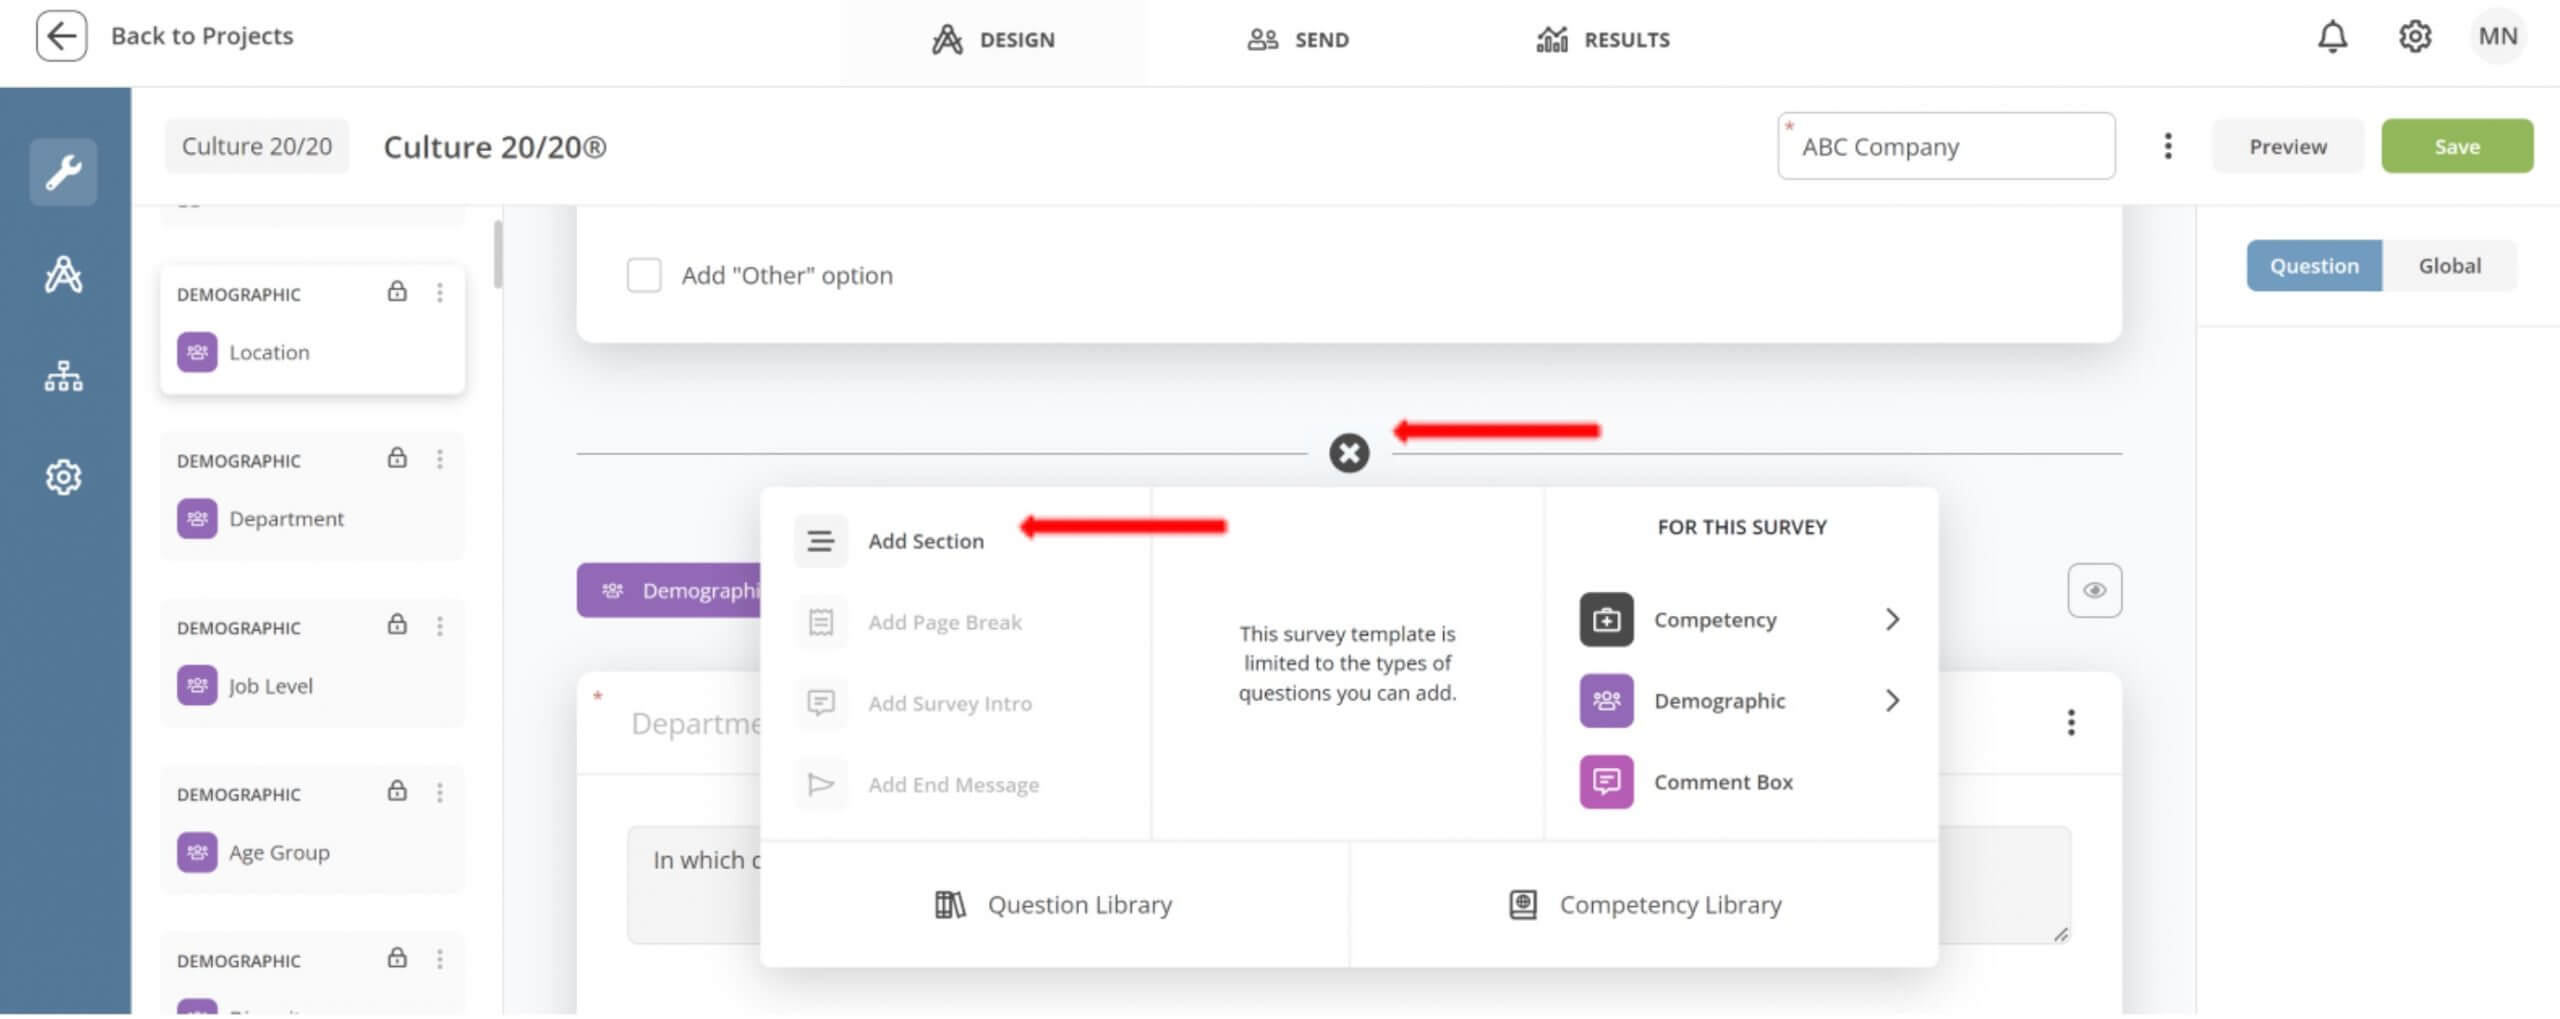
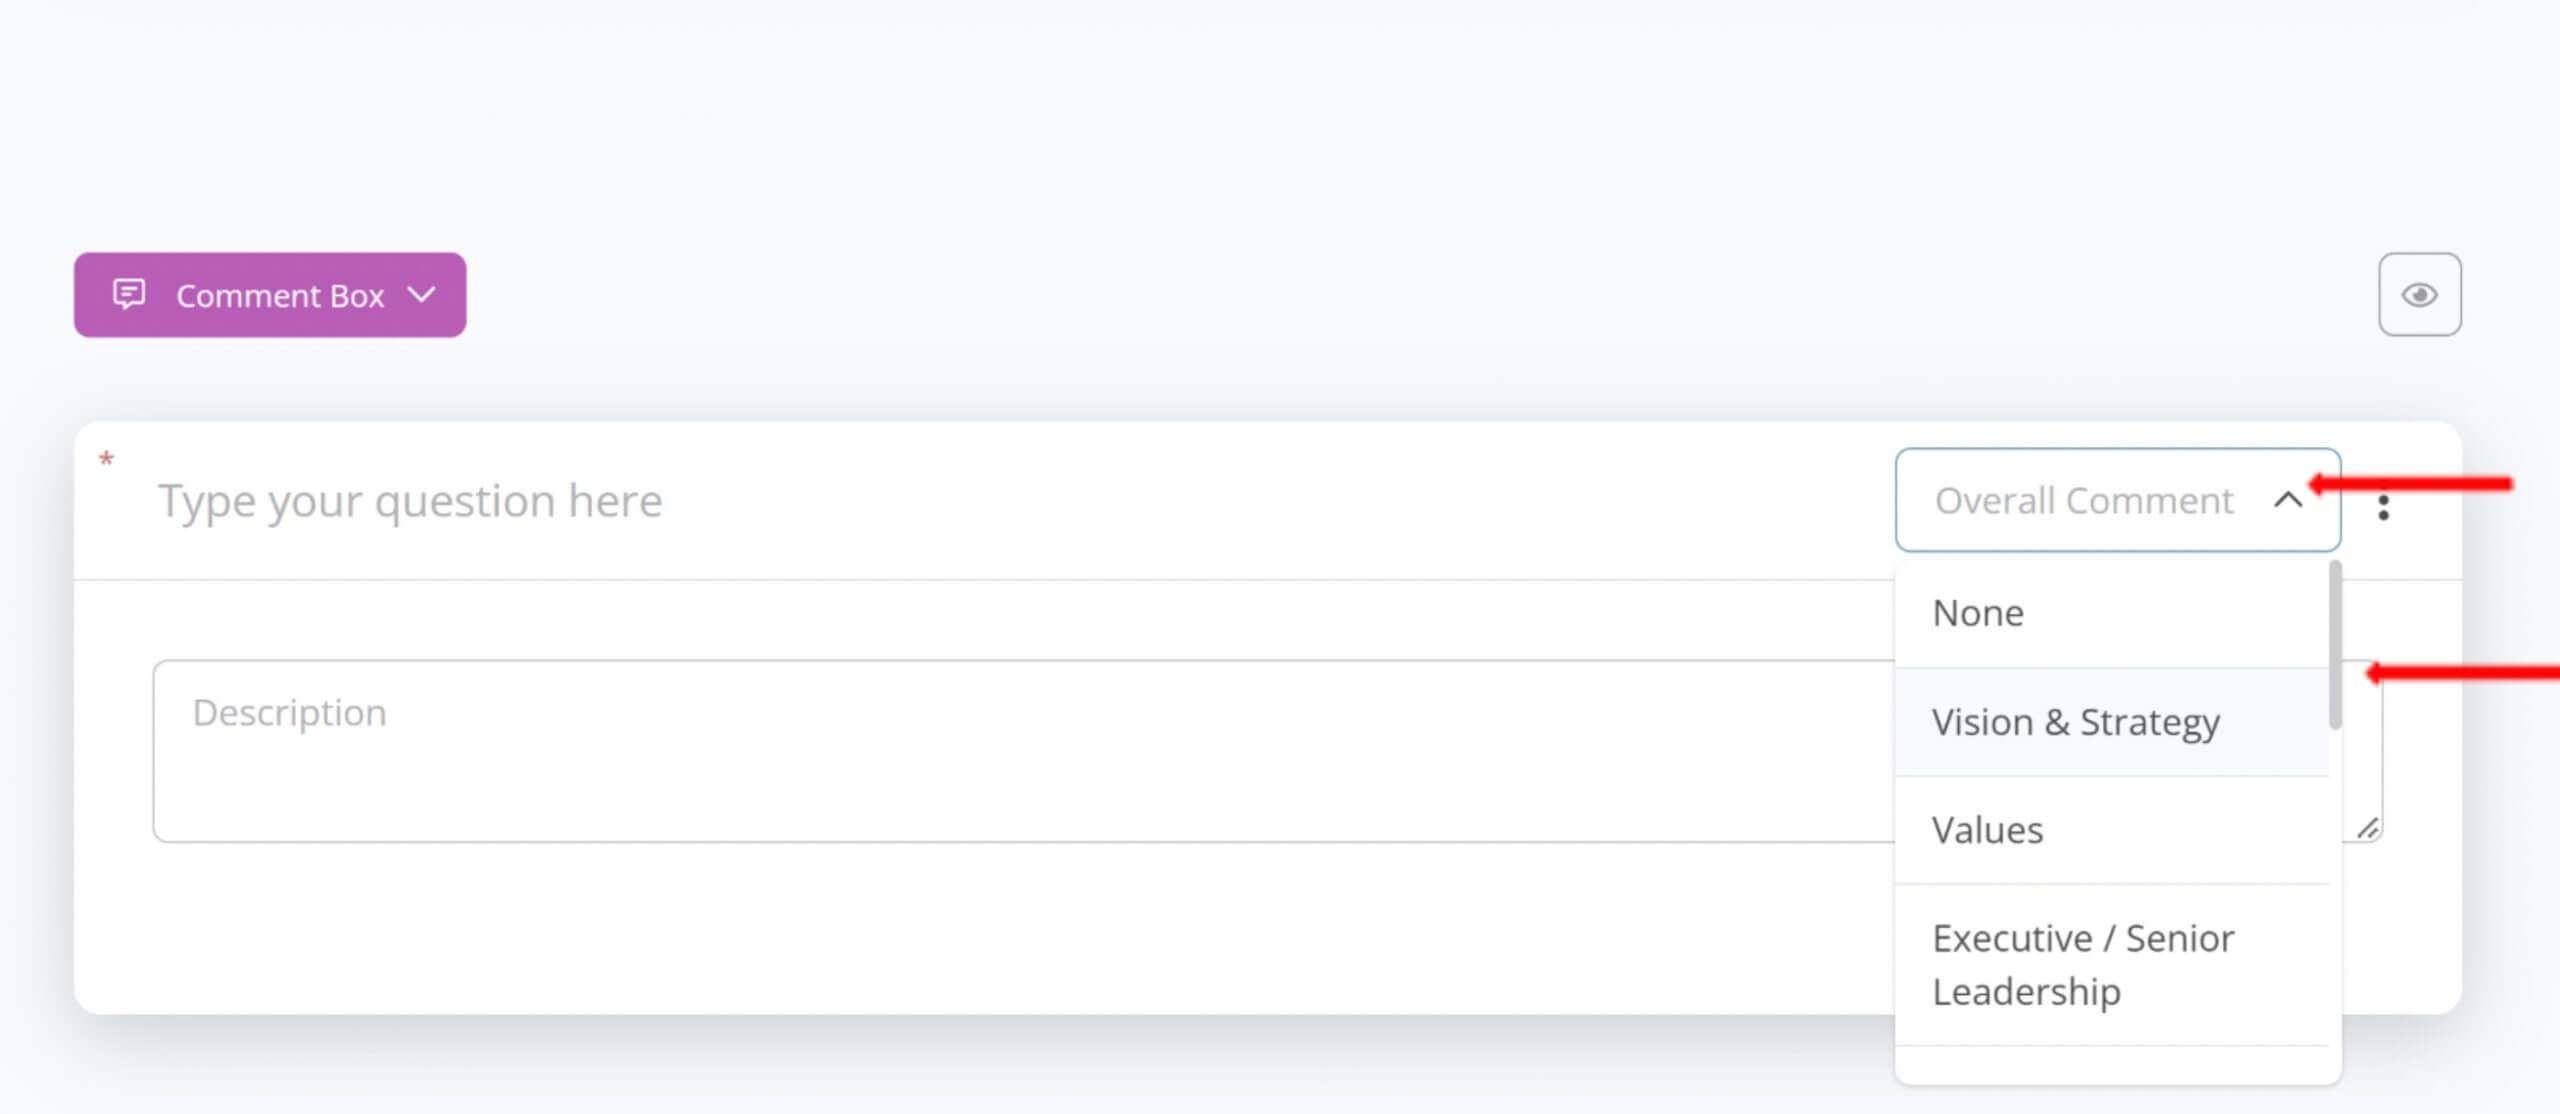
c. Add Comment Text Box
-
- Comment Text Boxes can be dragged to different areas of the page
- Comment Text Boxes can be related to a Culture Health Area or can be an overall open comment
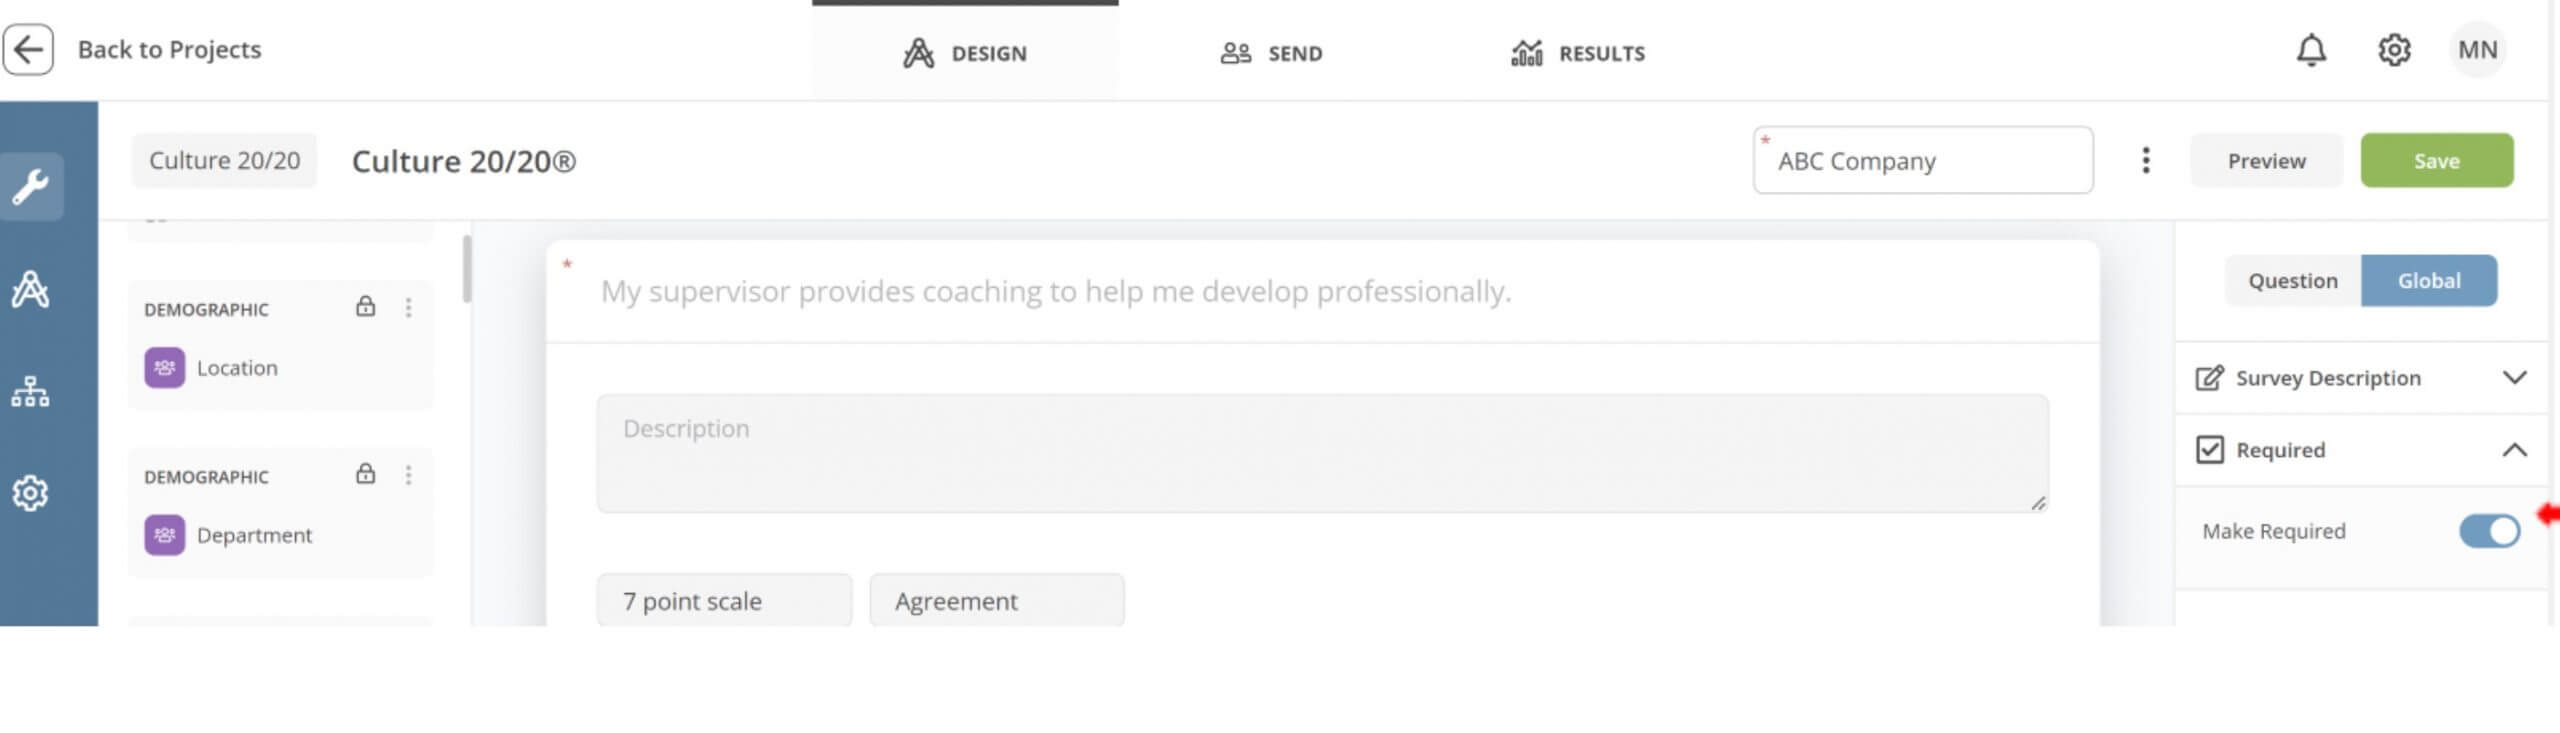
d. Make a question required
-
- On the left side, make sure Global is selected, and under Required, make sure that is turned on in order for questions to be required.
6. Next, review the Demographic questions and make any updates. The Culture 20/20 Survey Template will list the six Demographic questions available with sample answer choices under each question. To delete an answer choice, simply delete the answer choice. Additional answer choice spots will appear as you fill in your answer choices.
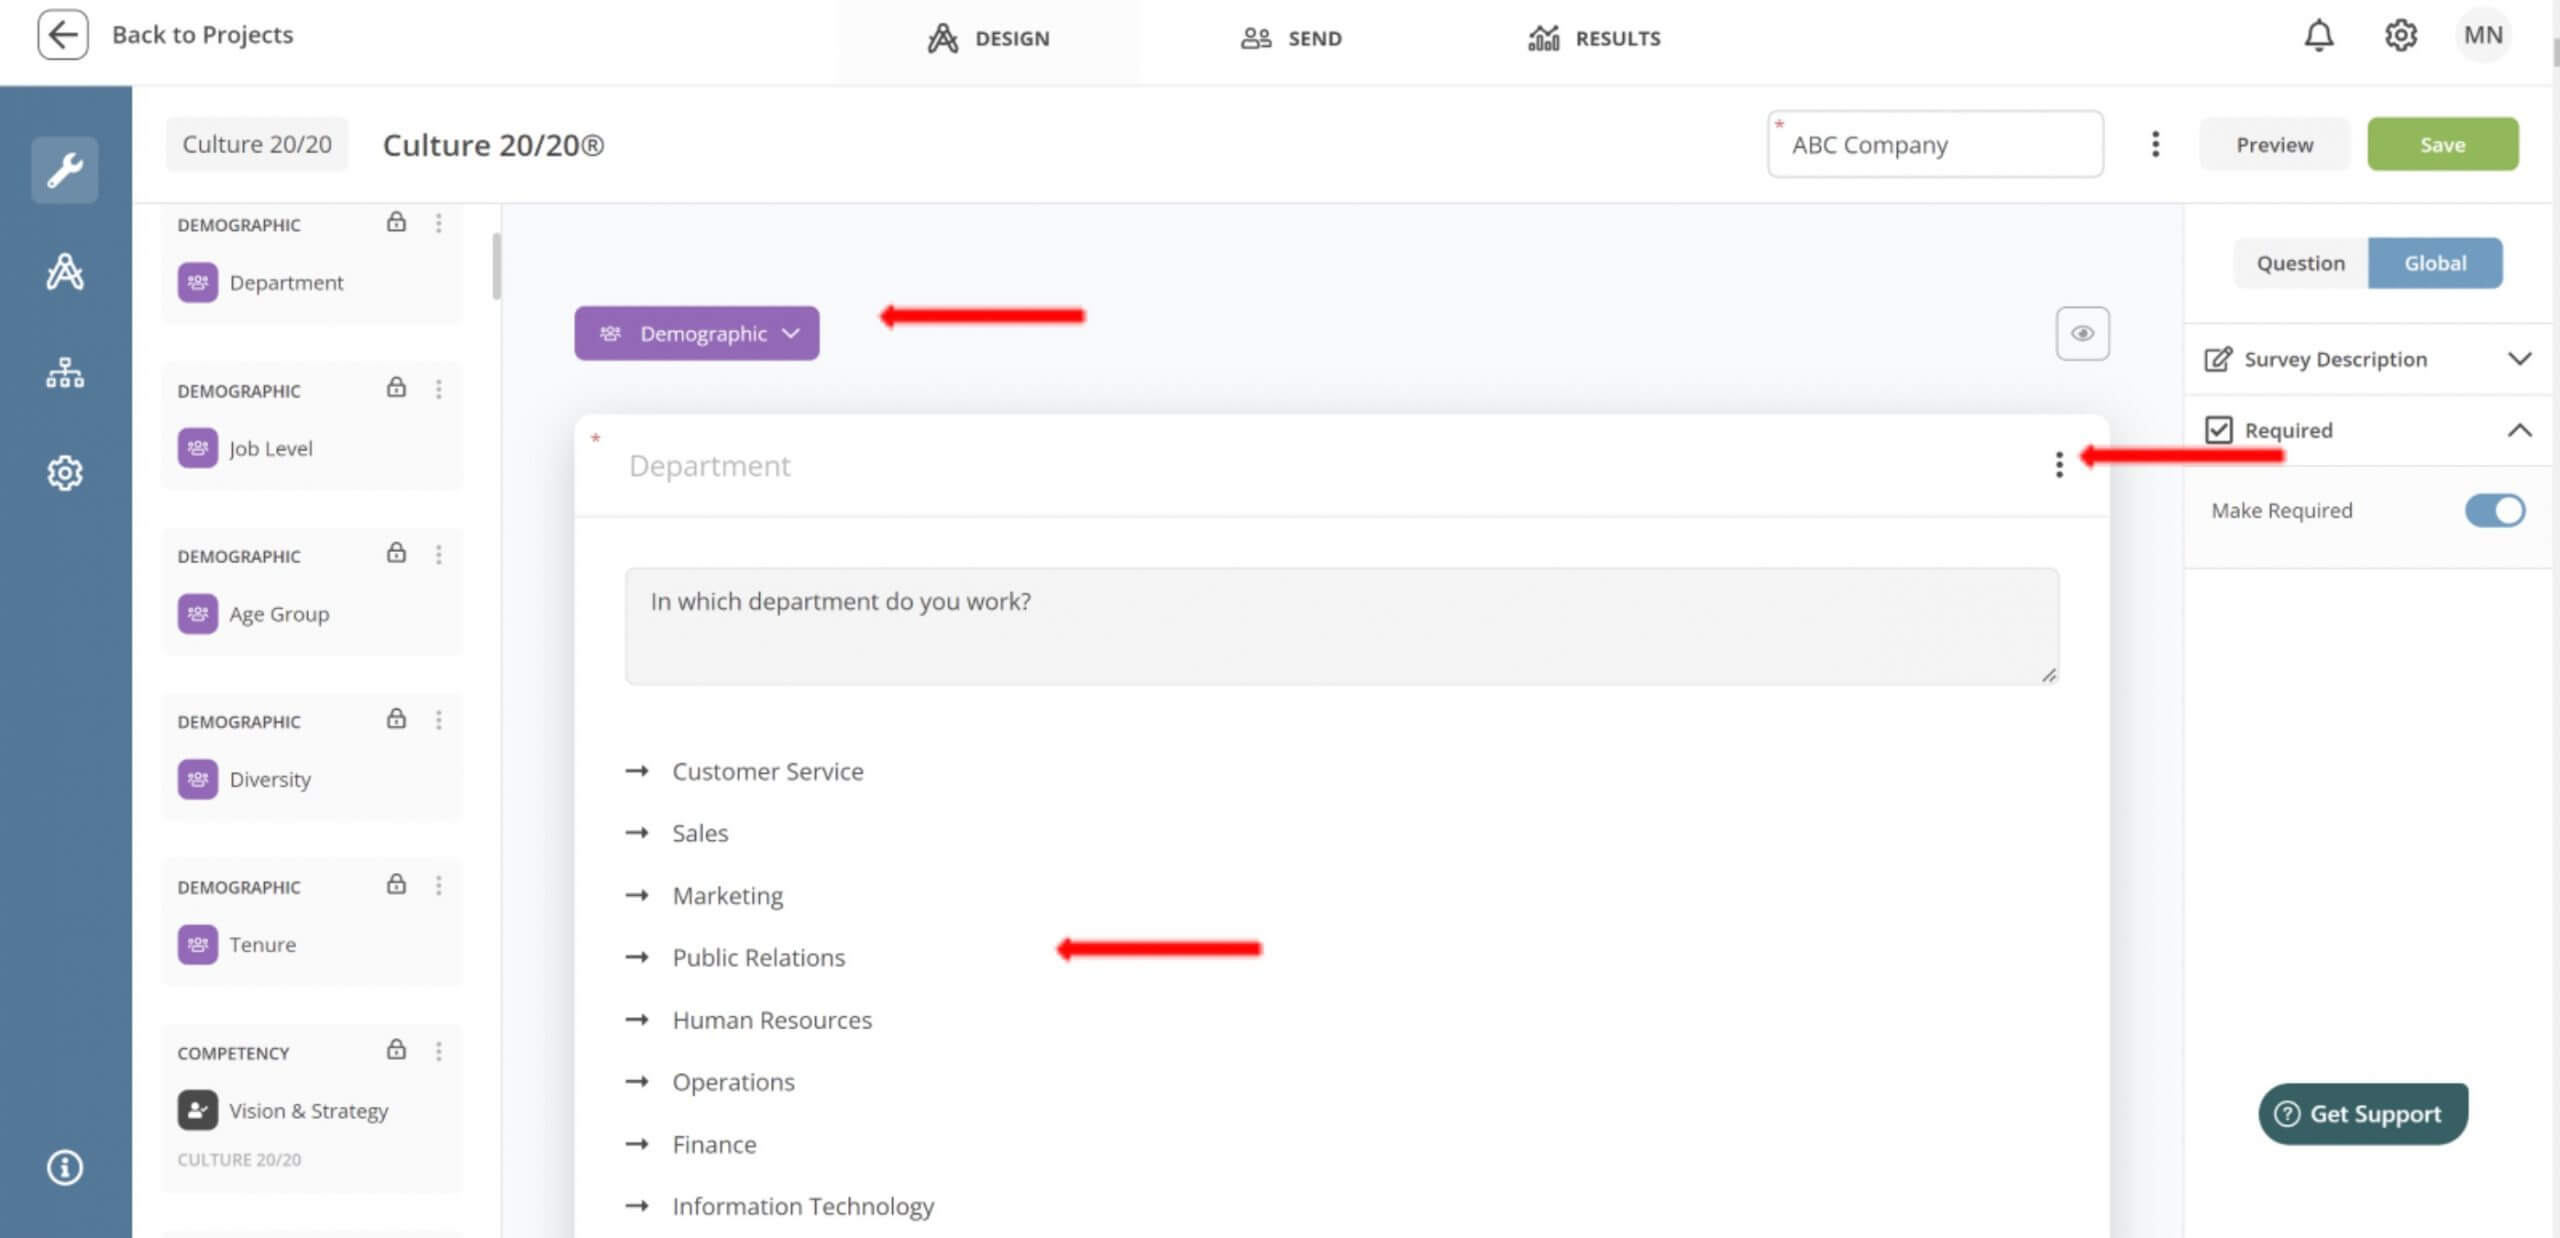
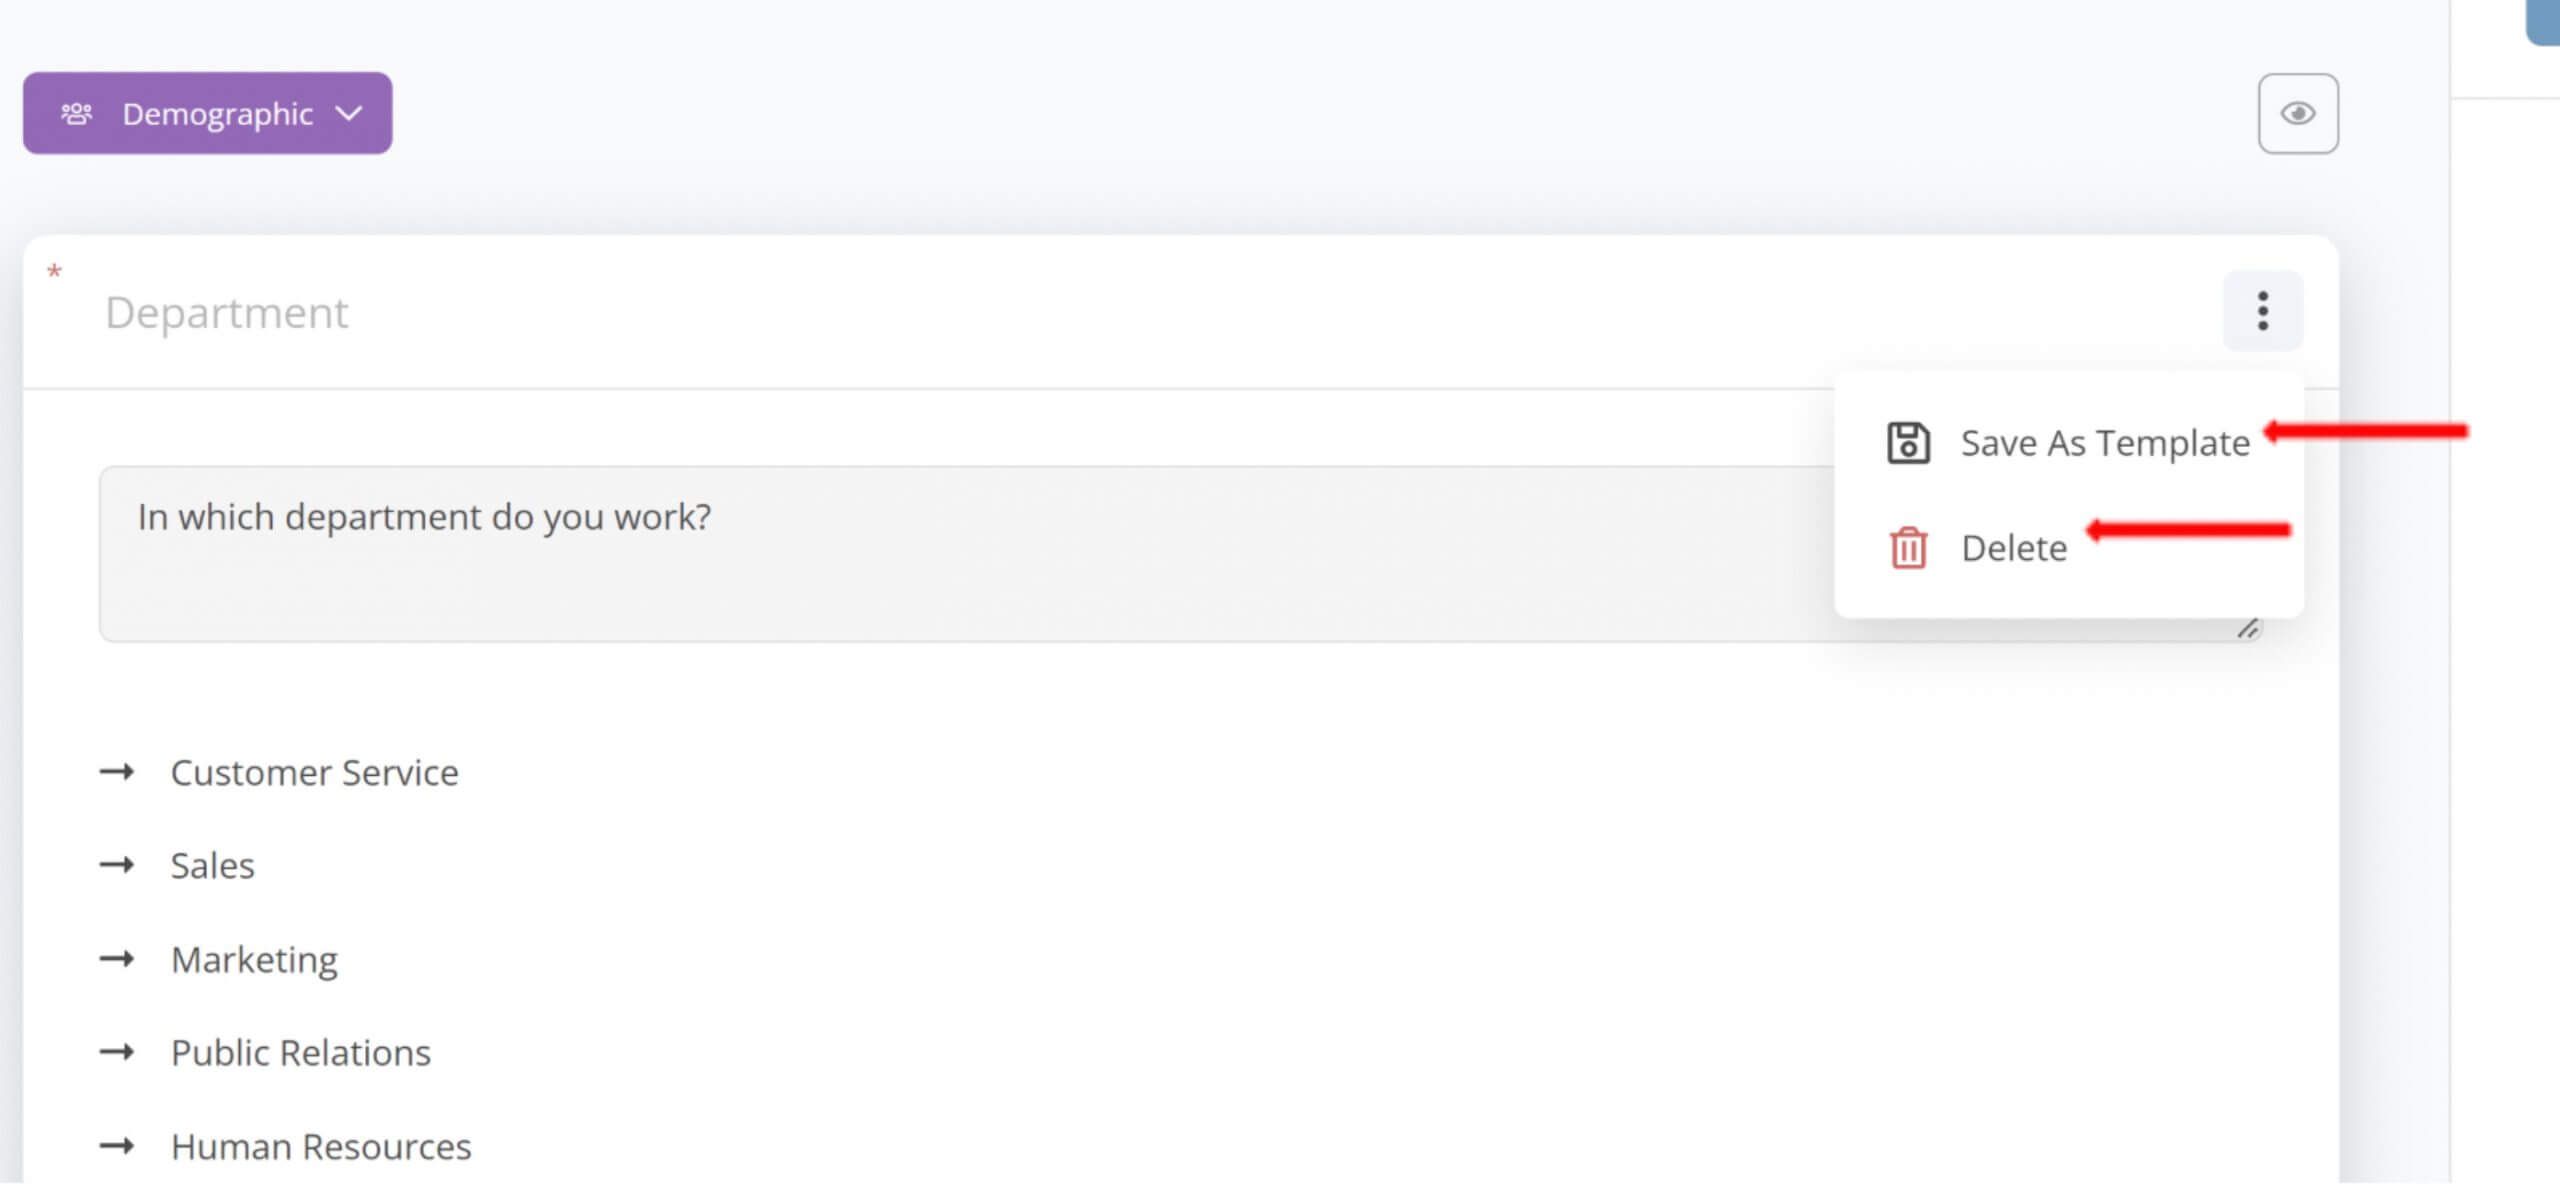
a. You are free to Save as Template or delete any Demographic question. To Save as Template or Delete, click on the three dots to on the right side of the Demographic and select your option.
7. Once you are finished making updates to your survey, make sure to click Save to save the survey. You can also preview the survey by clicking on Preview. Lastly, if you wish to save this survey as a template, click on the three dots next to the company name, select Culture 20/20 Survey and click on Save as template.

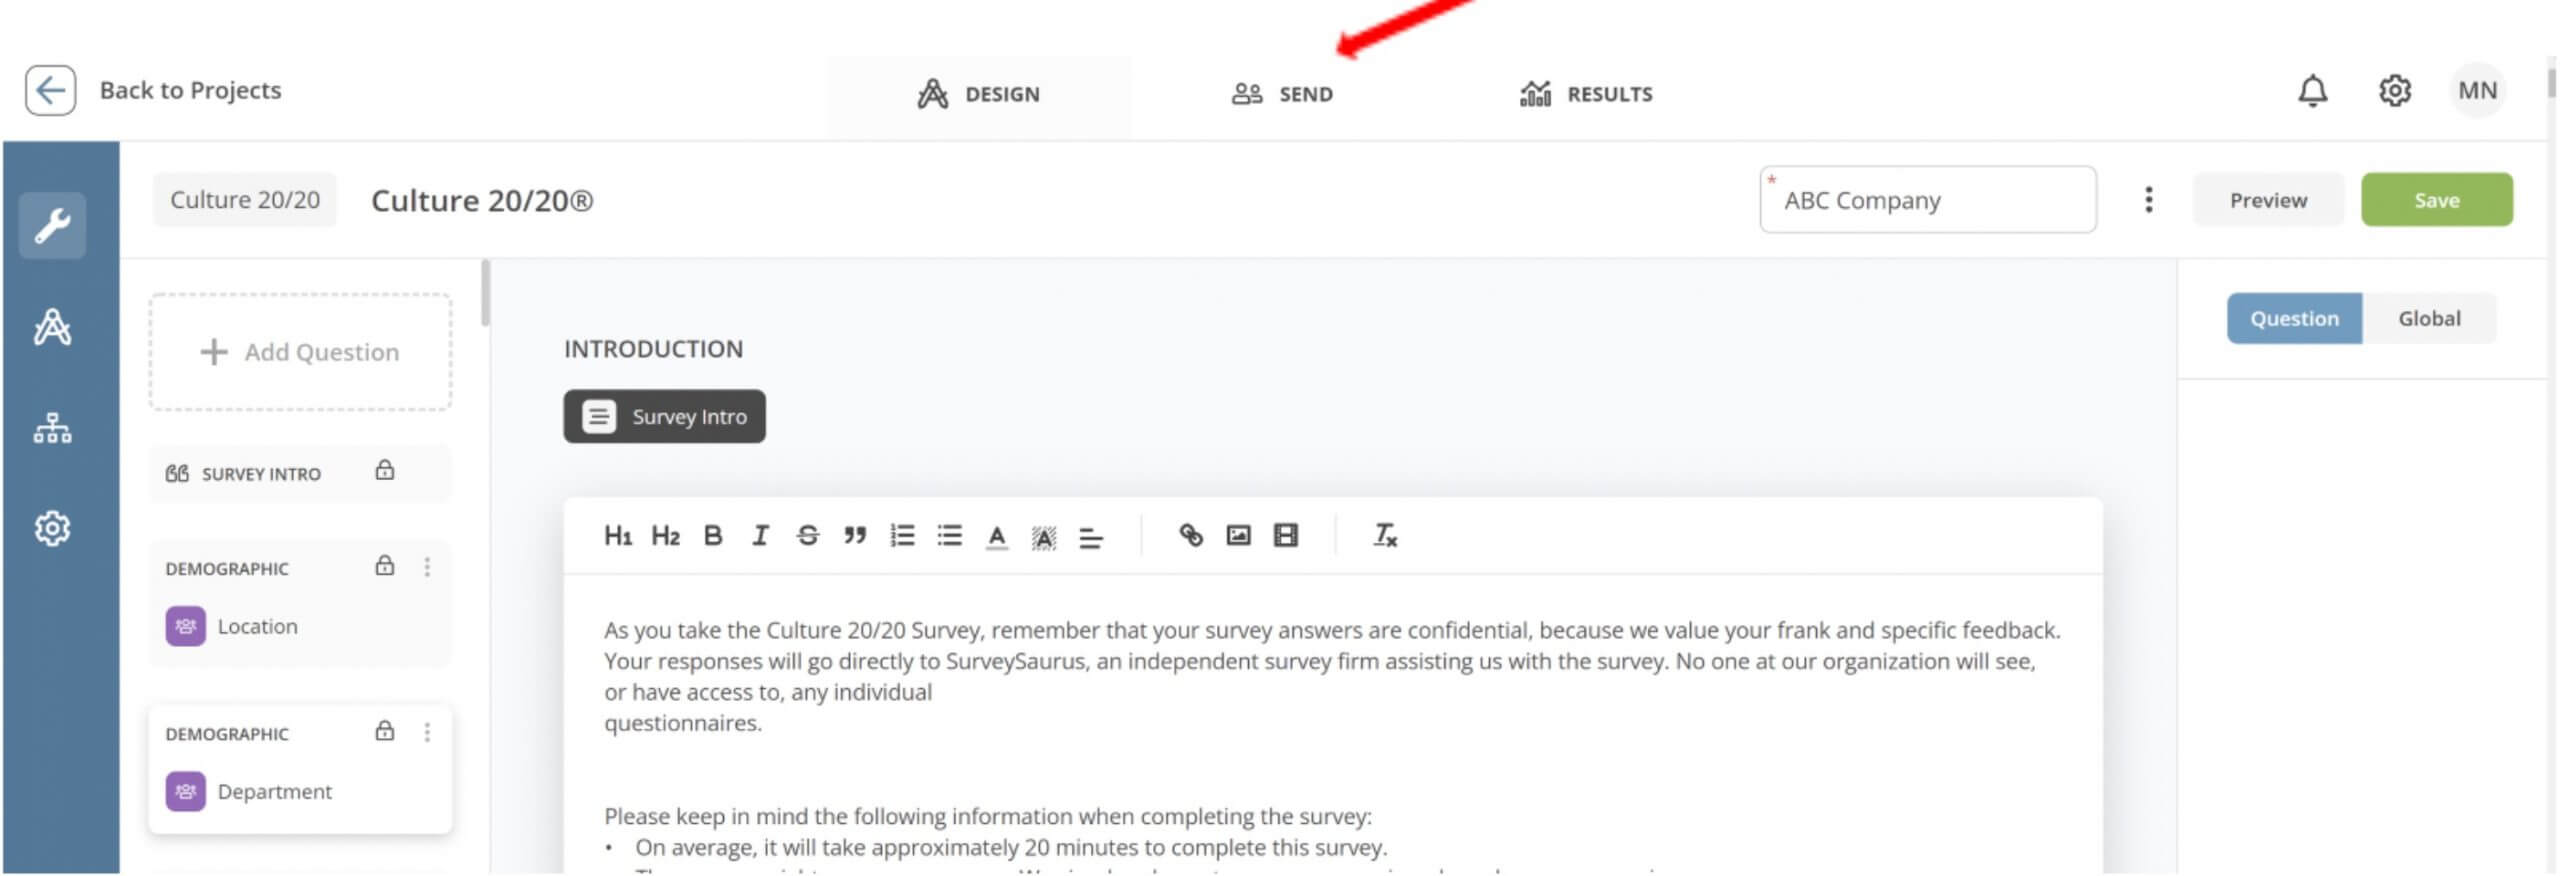
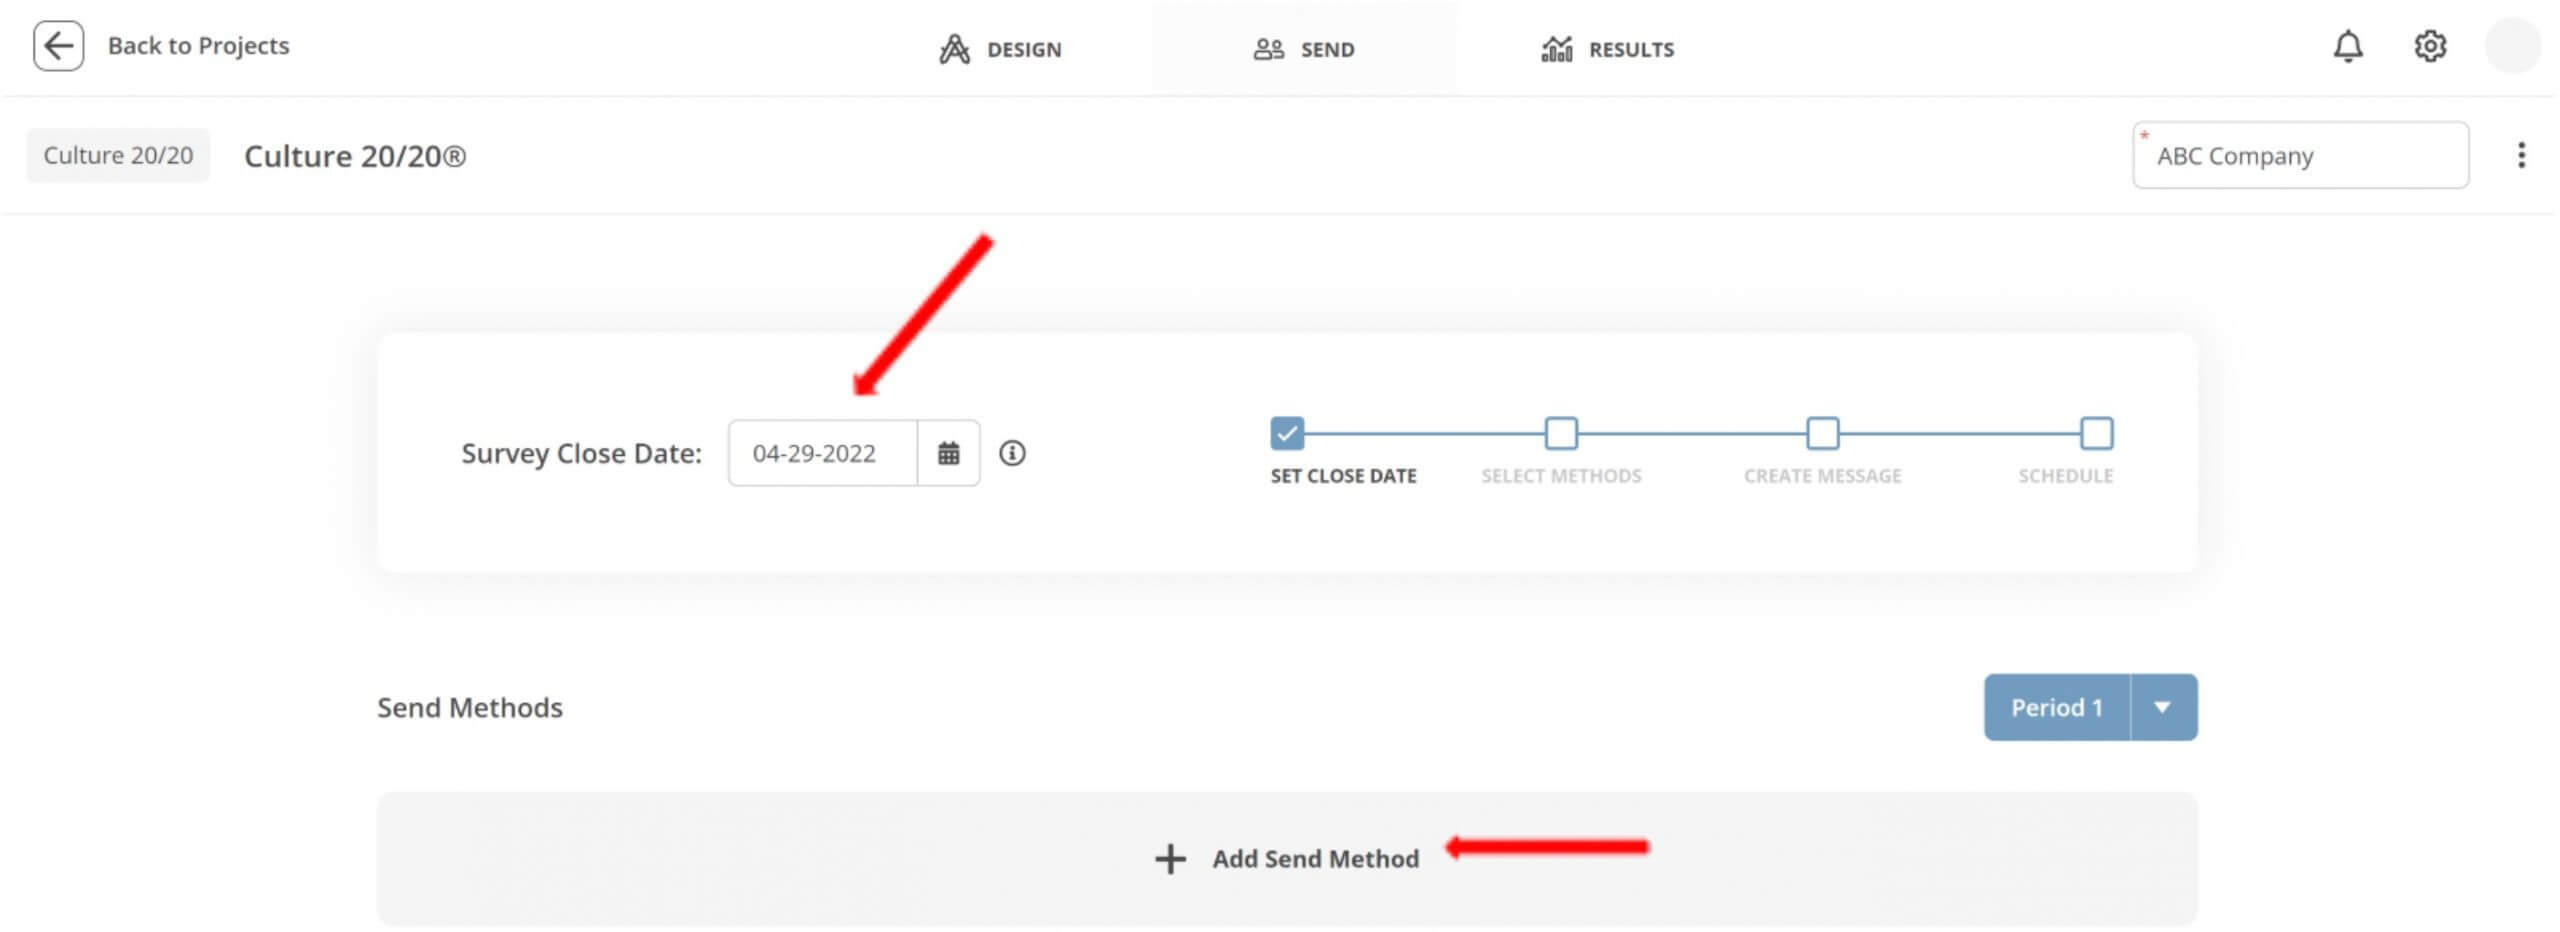
8. Next, to send the survey, click on Send at the top of the page.
9. Next, select the Survey Close Date. Then, Send Methods will appear. Click on the + Add Send Method to continue.
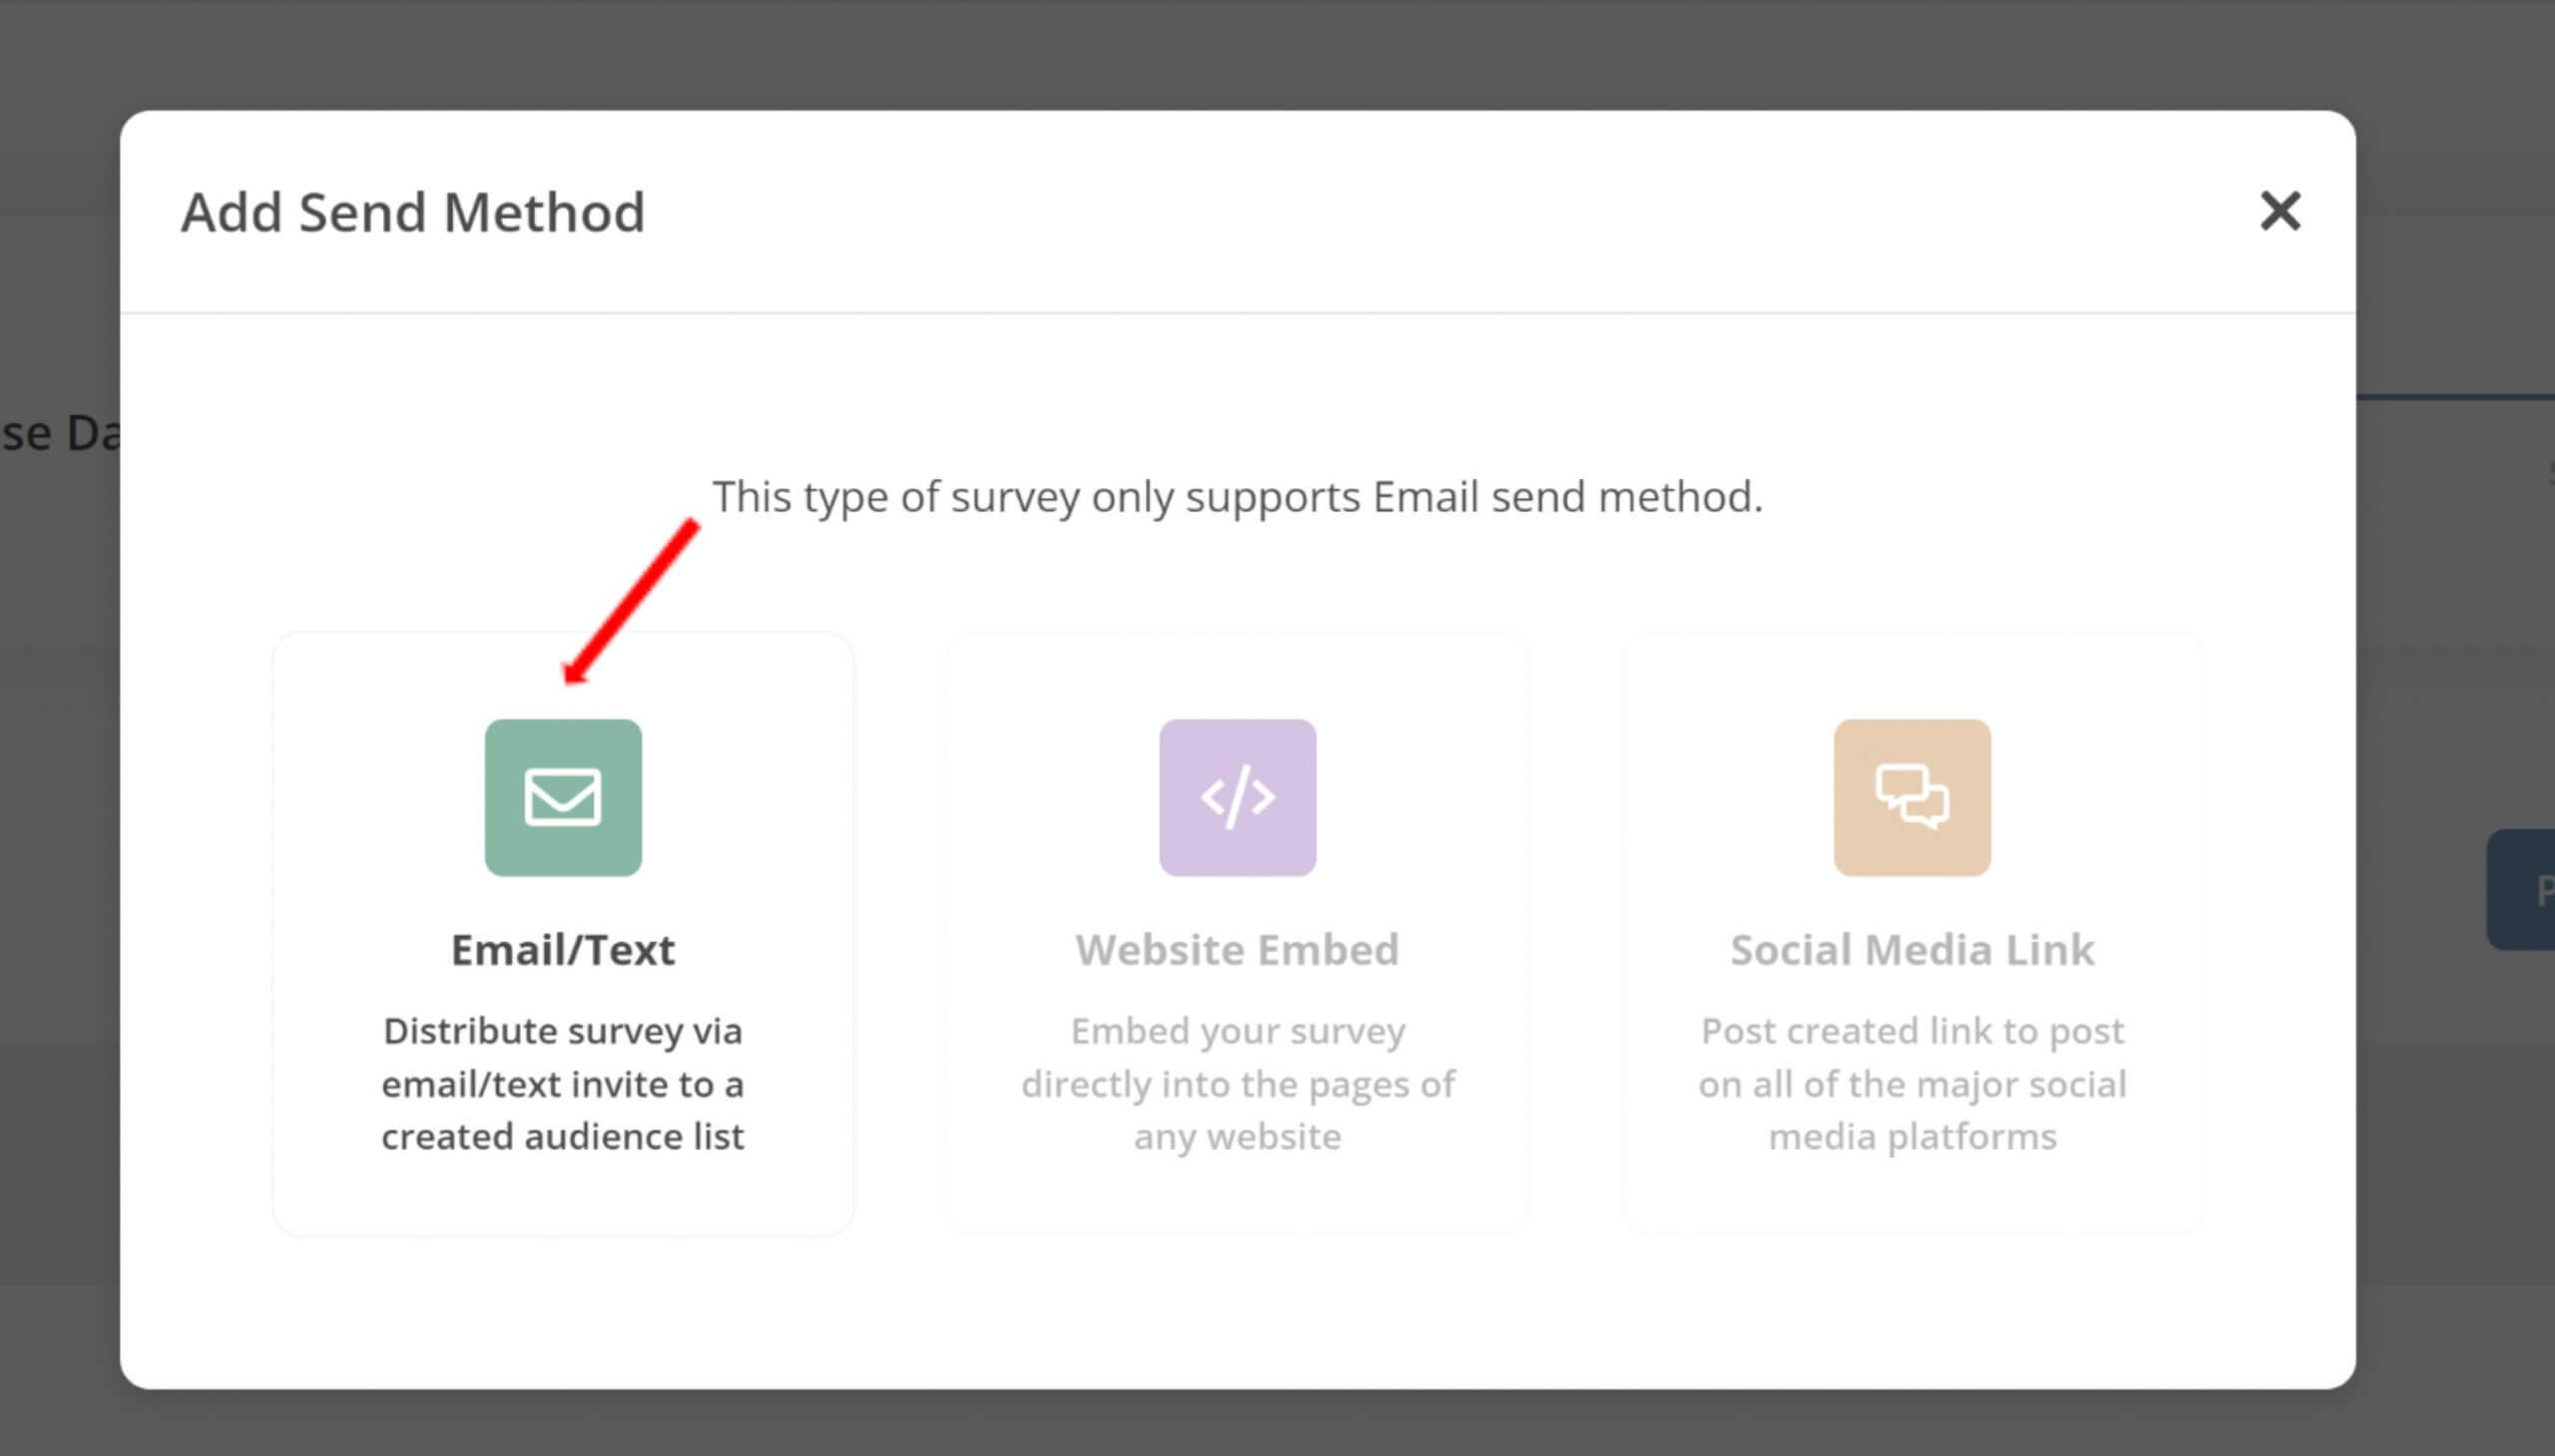
10. Next, click on Email/Text, the only available option for Culture 20/20 Surveys.
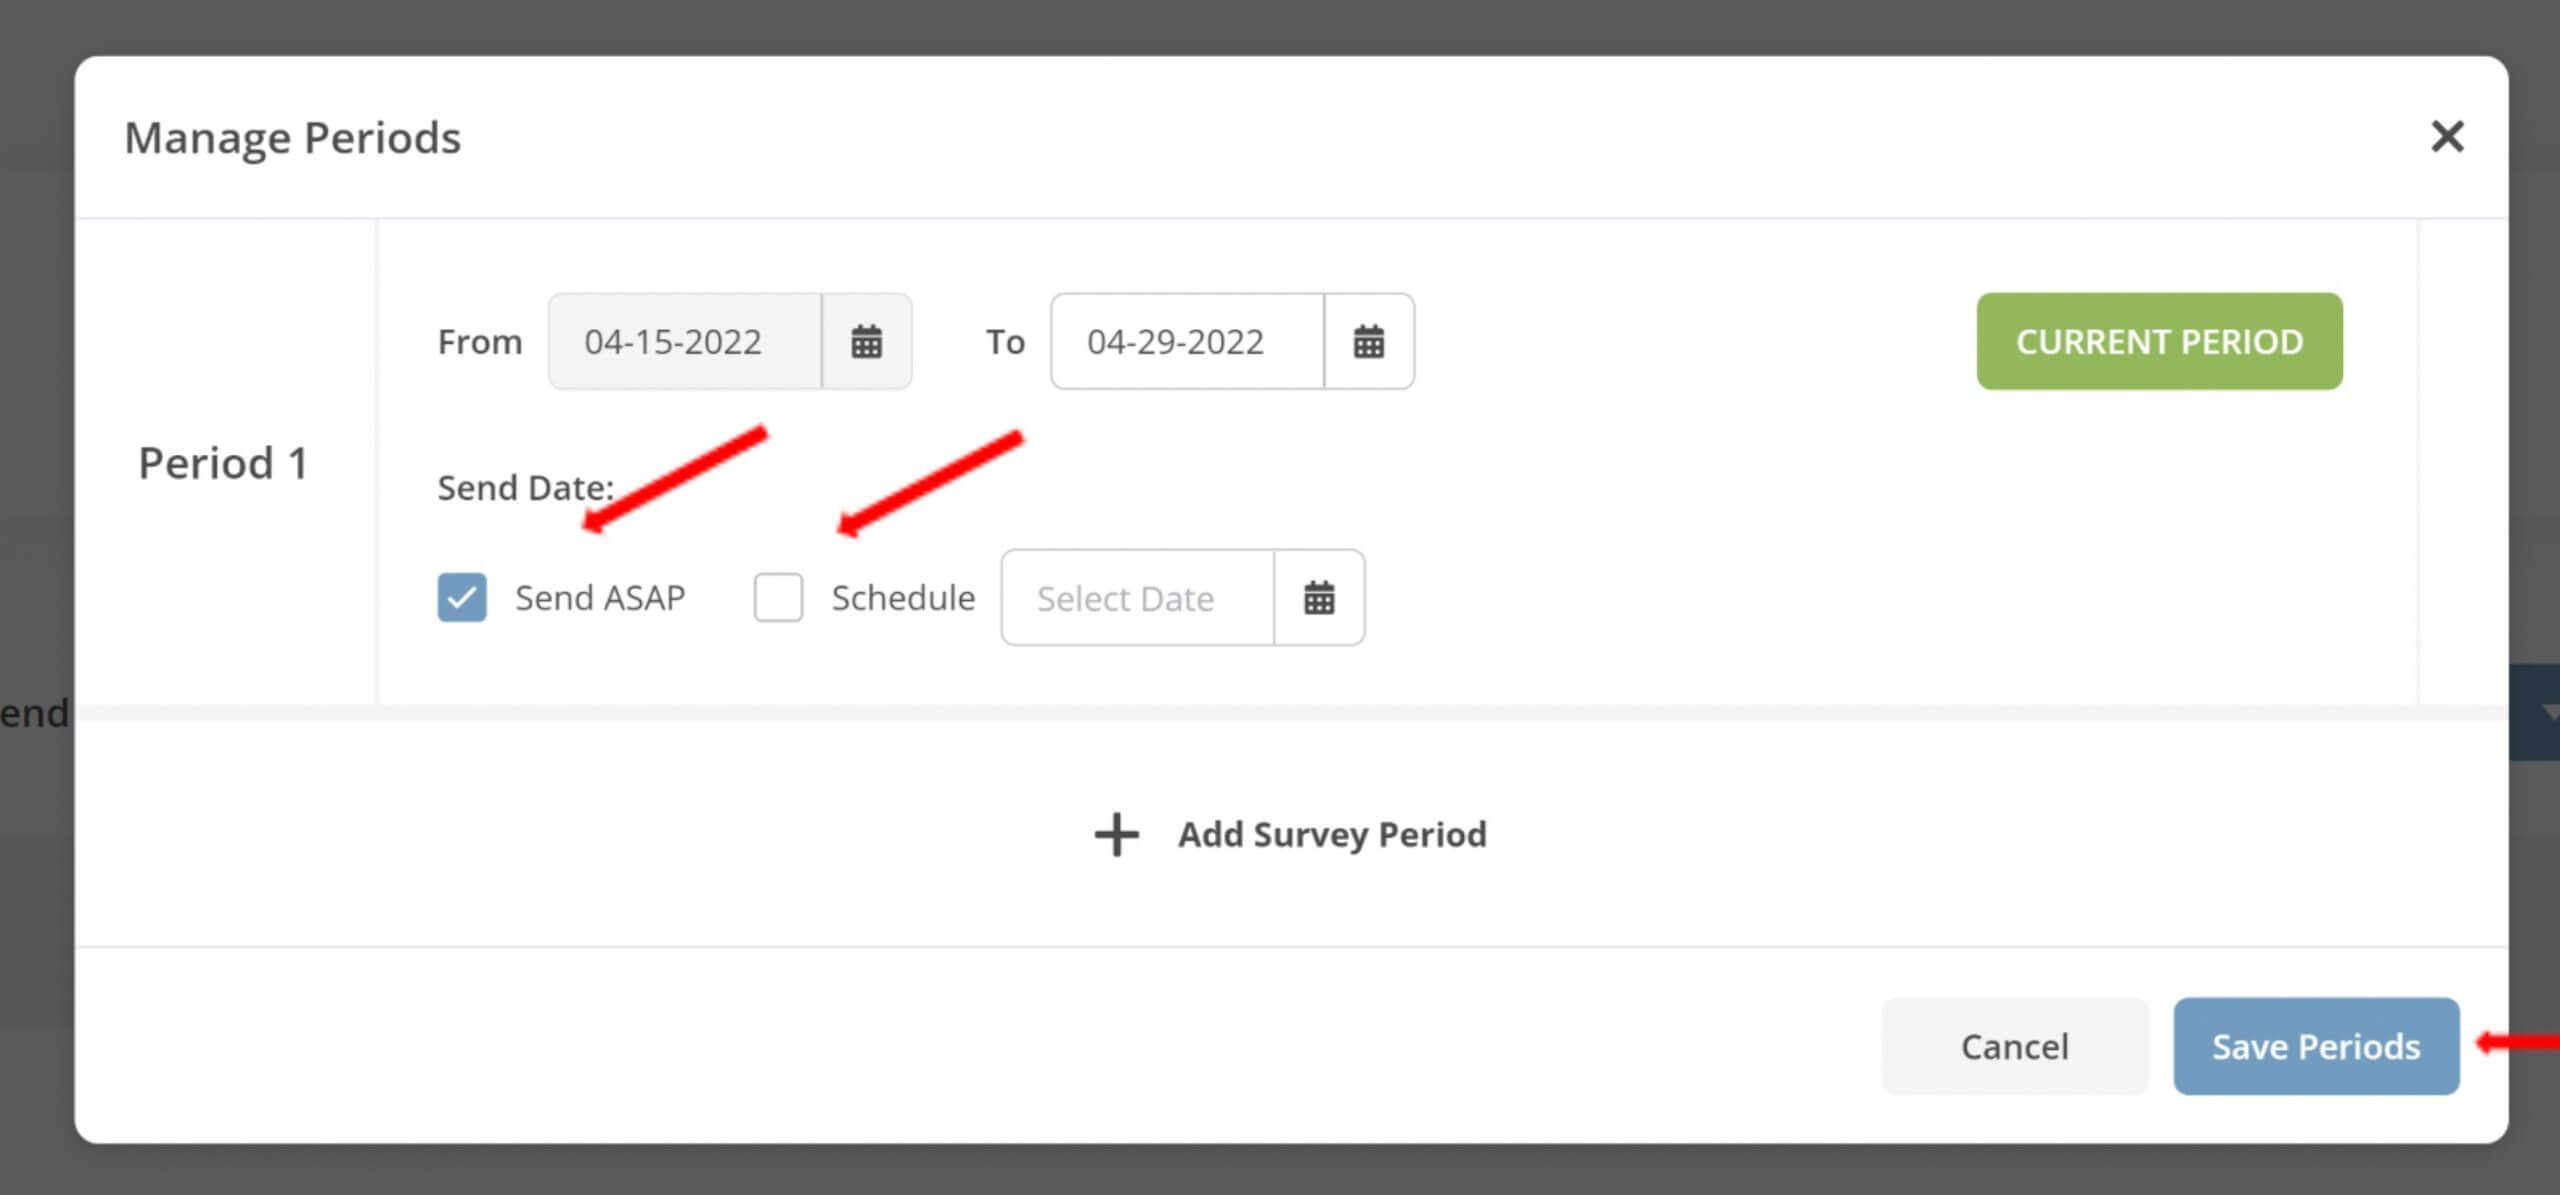
11. A pop will appear. Select Send Asap to send the survey the same day or select Schedule to schedule the survey to go out on a different day. Next, click on Save Periods.
NOTE: You can add additional Periods to your survey. For example, if you launch a survey and want to re-launch the following year, you will click on + Add Survey Period and select the future dates for the survey to go out. If you wish to launch the survey once, simply ignore adding a survey period.
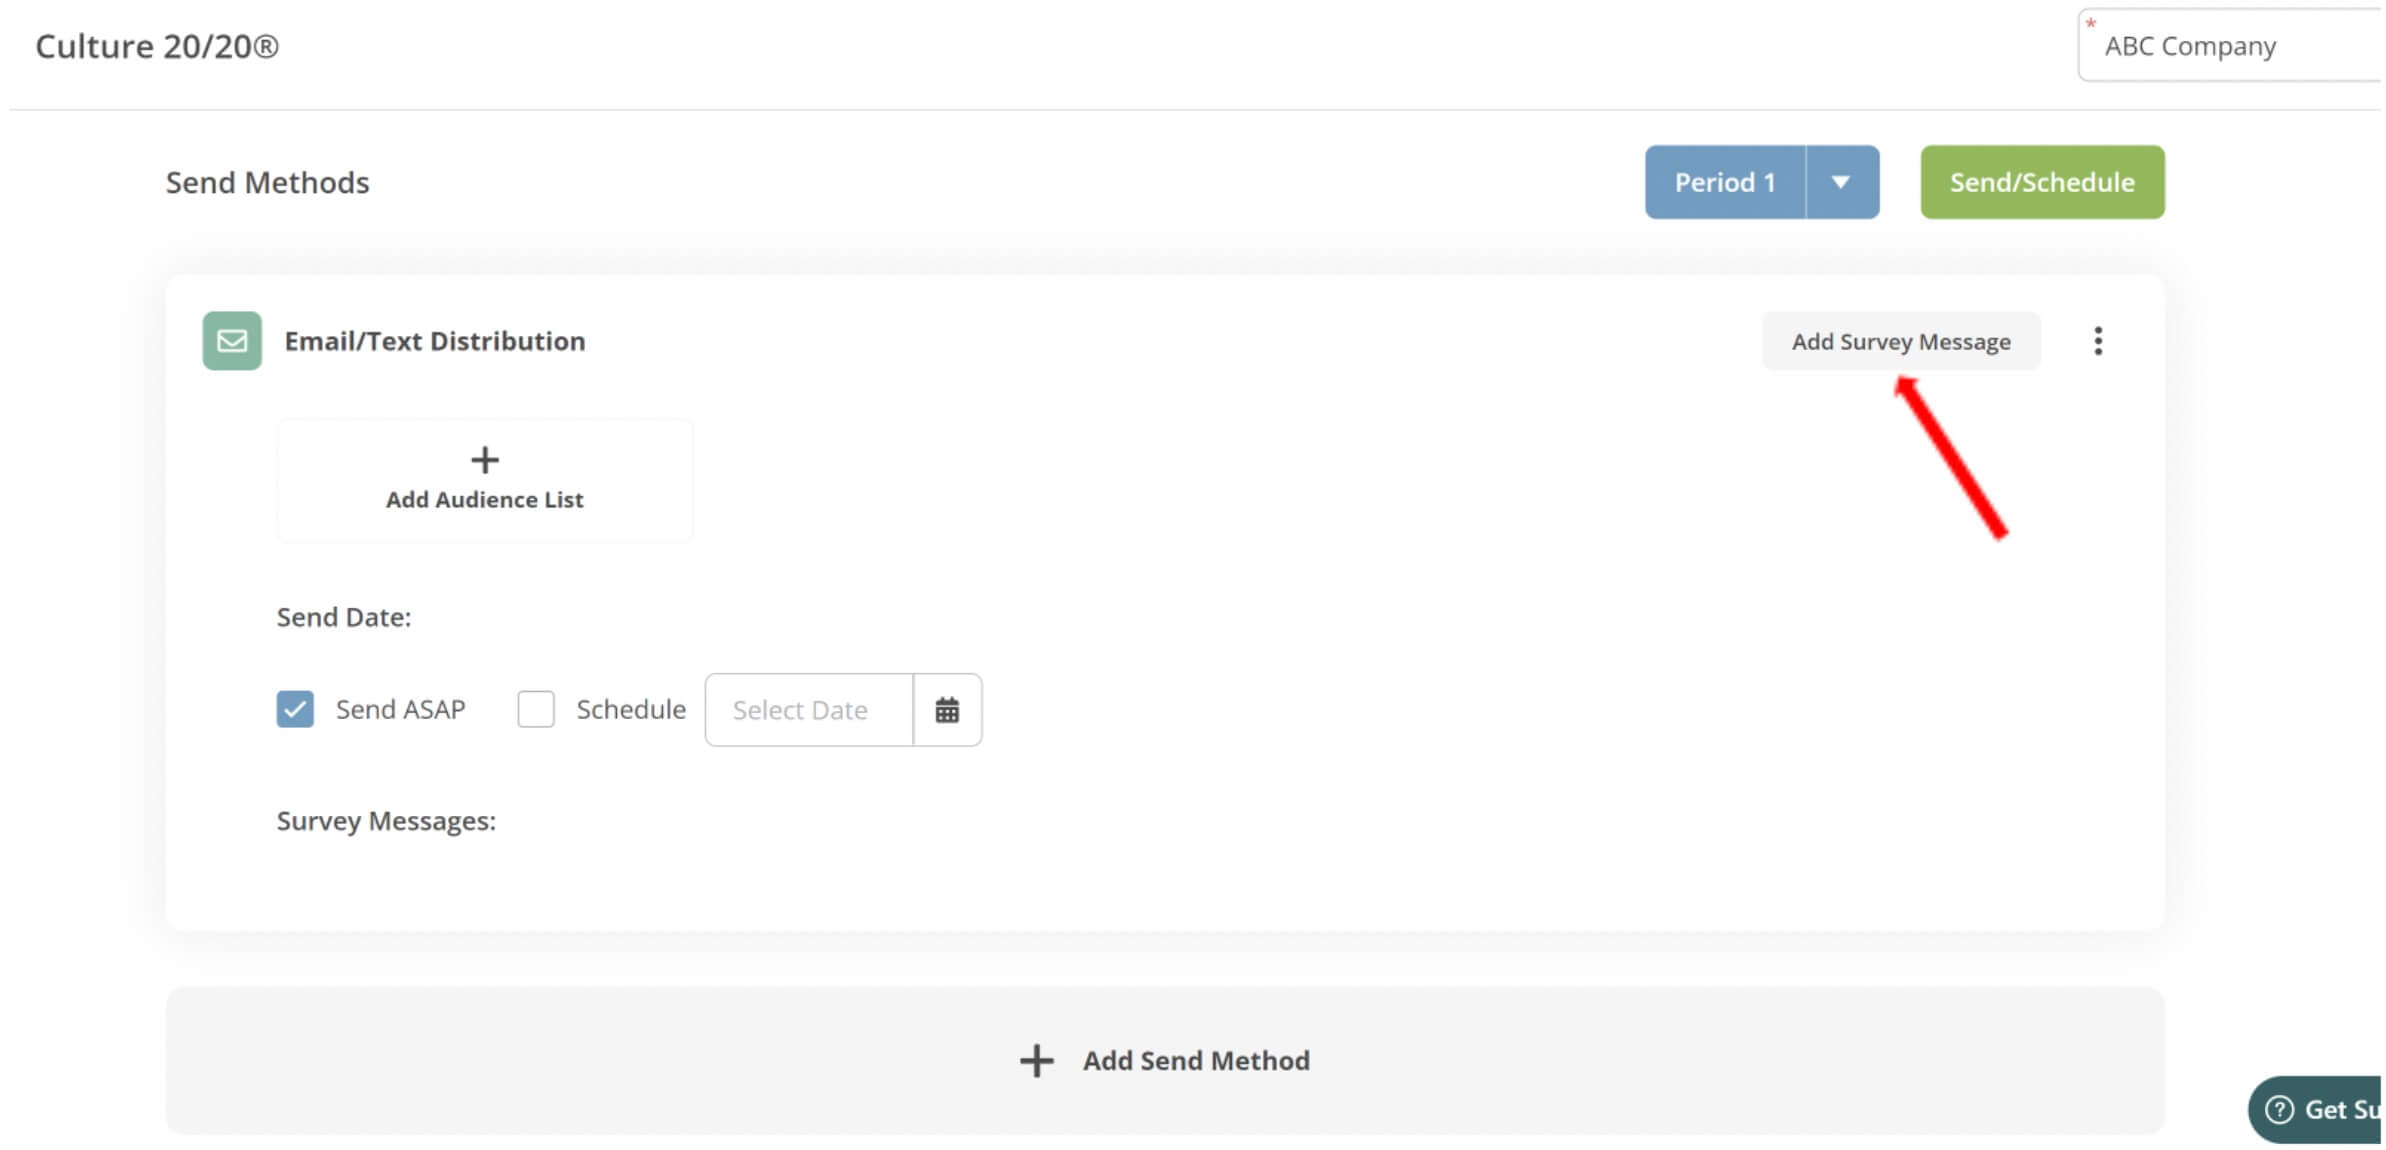
12. Next, another Send Methods screen will pop up. Here you will add your Audience List (participant list) and your Survey Messages, both the initial and the follow up message (reminder message).
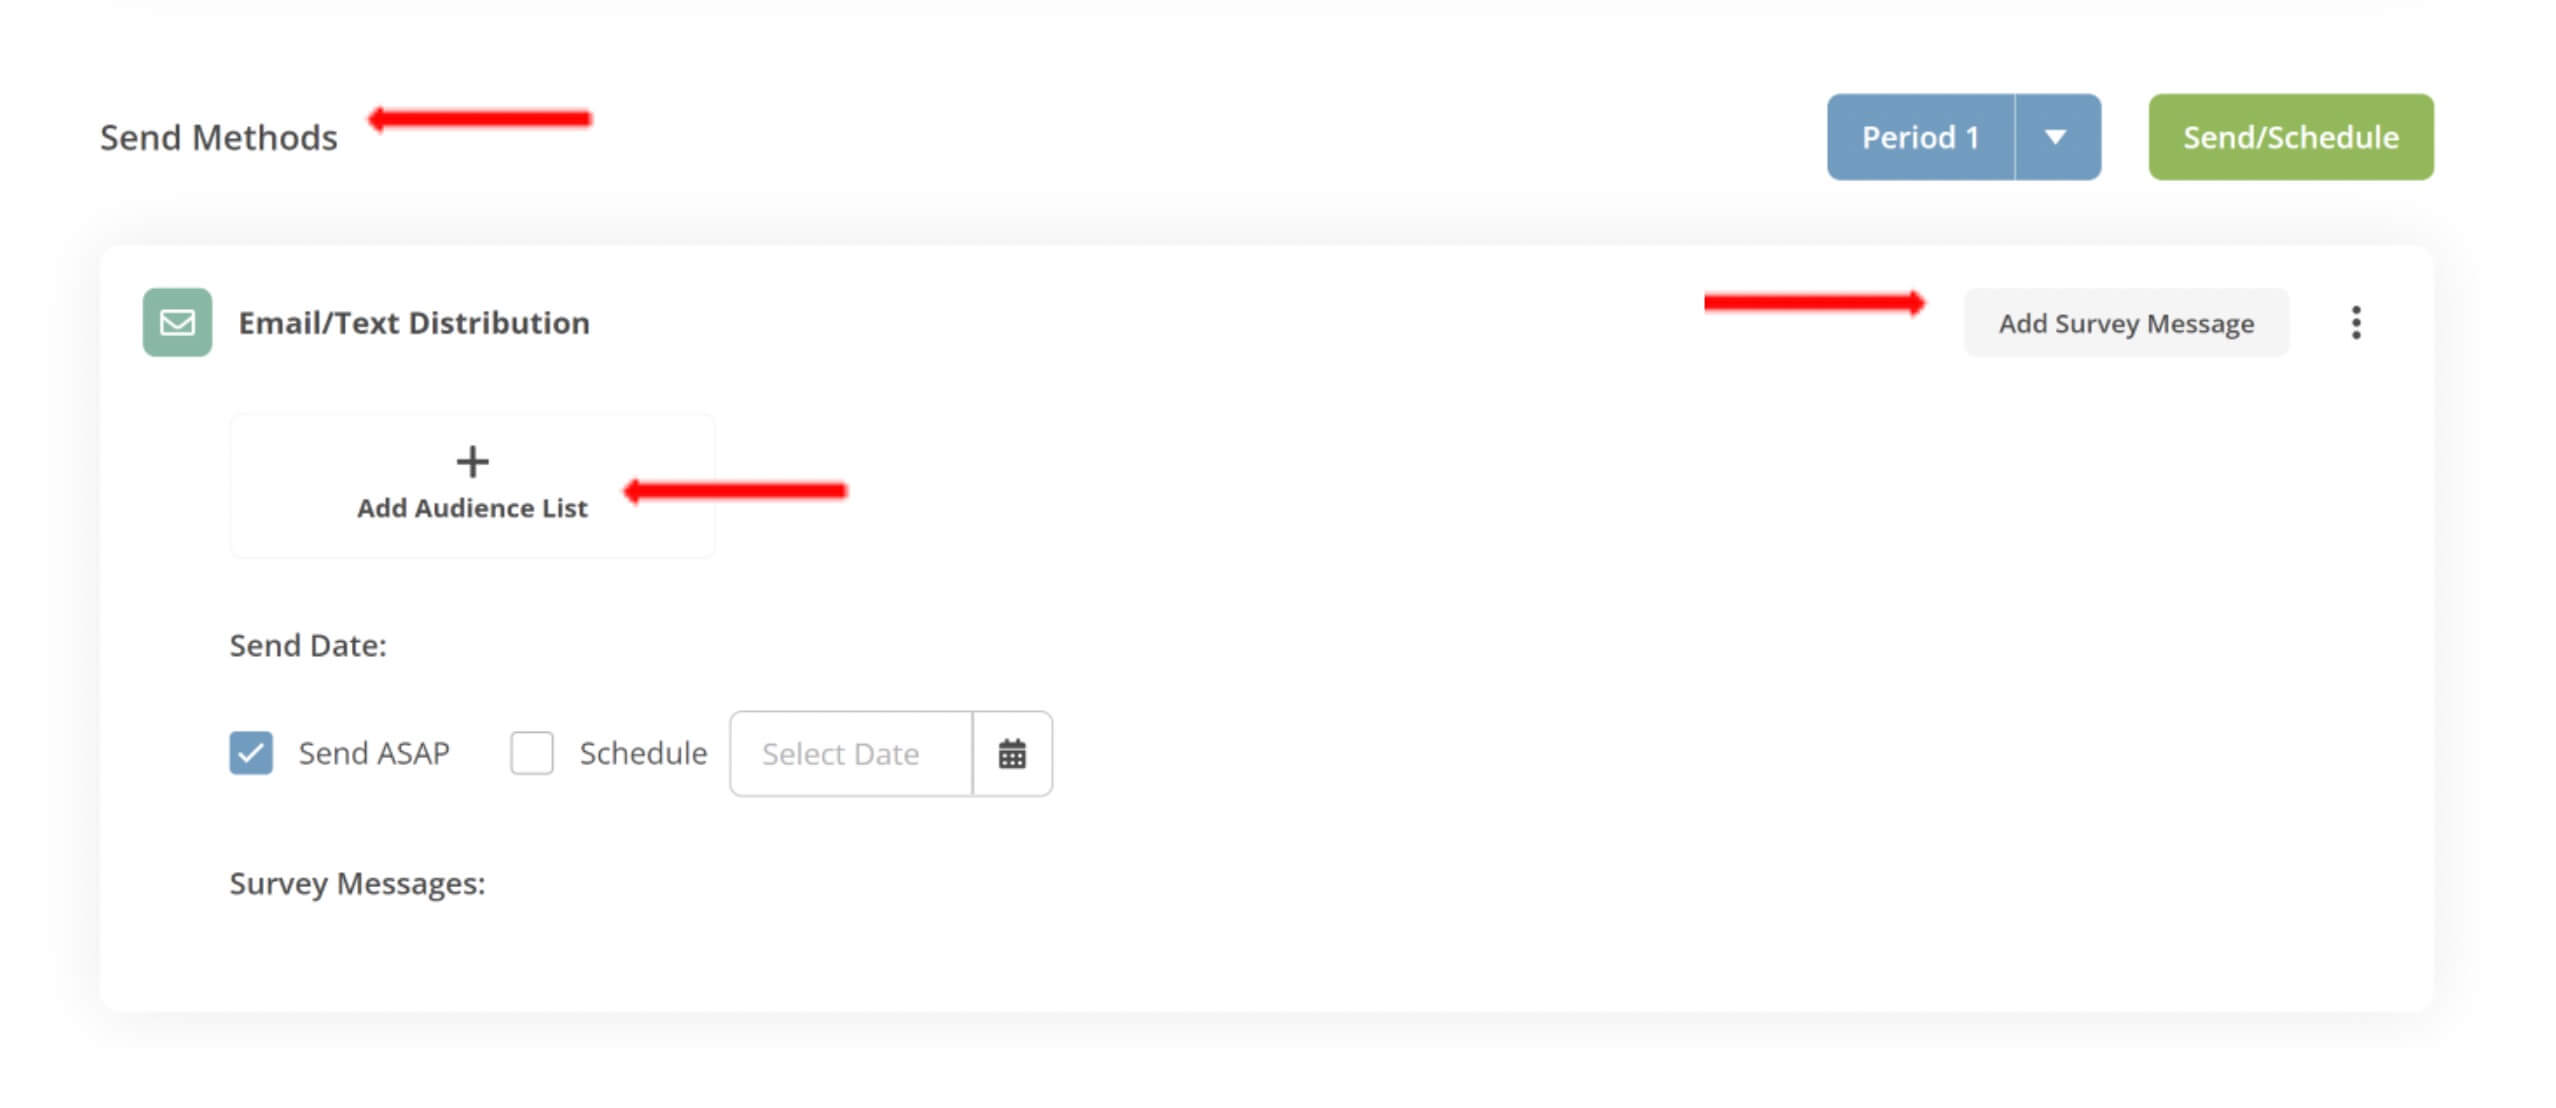
13. First click on + Audience List. A pop-up will appear with two options, Create New List and User Pre-Built List. Click on Create New List. This will let you upload your list before sending.
NOTE: Use Pre-Built List means you would use a previously created list. Please see Pre-Built List guide for instructions on creating that list.
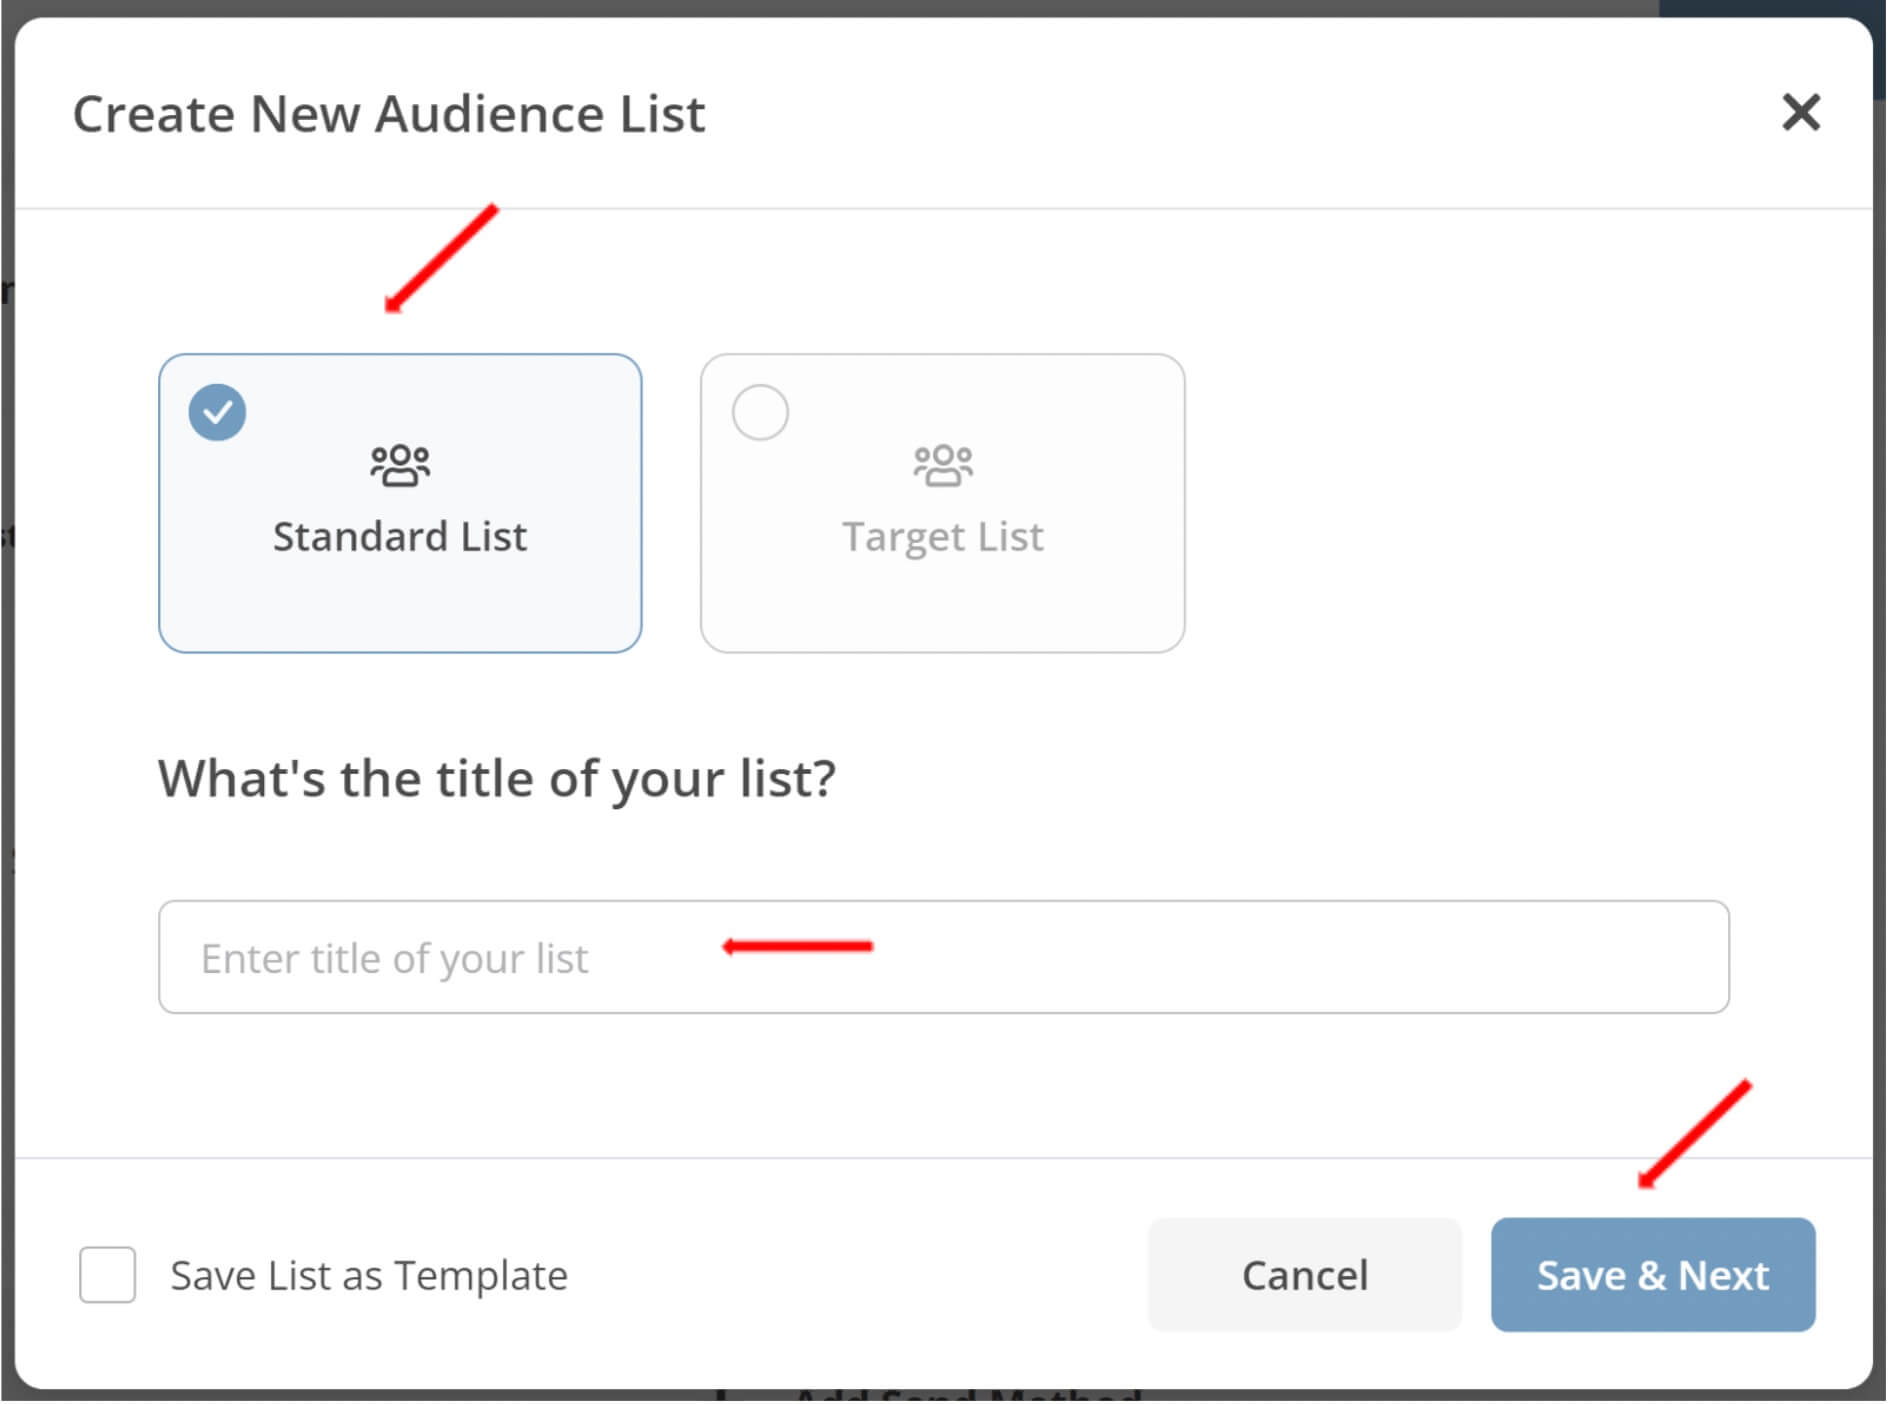
14. After clicking on Create New List, a pop-up will appear. Standard List is the default option for Culture 20/20 Surveys. Next, name your list and click Save & Next.
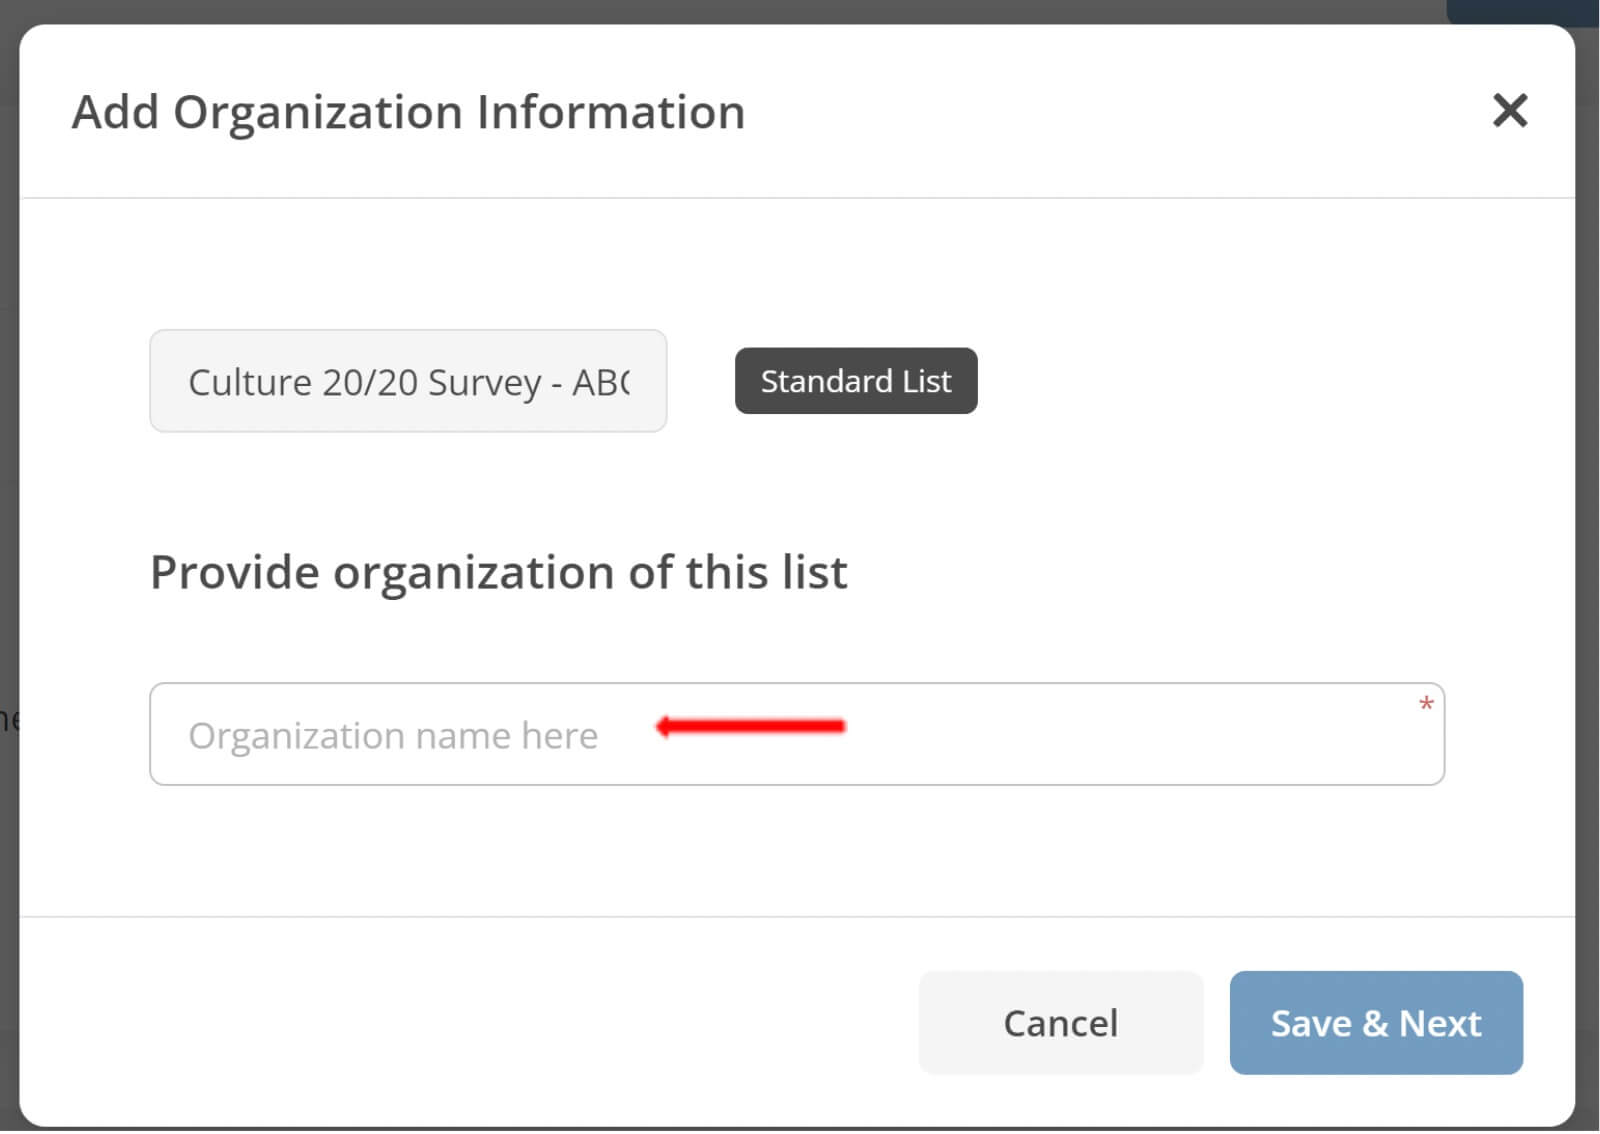
15. Next, enter your organization name. When done updating, click Save & Next to continue.
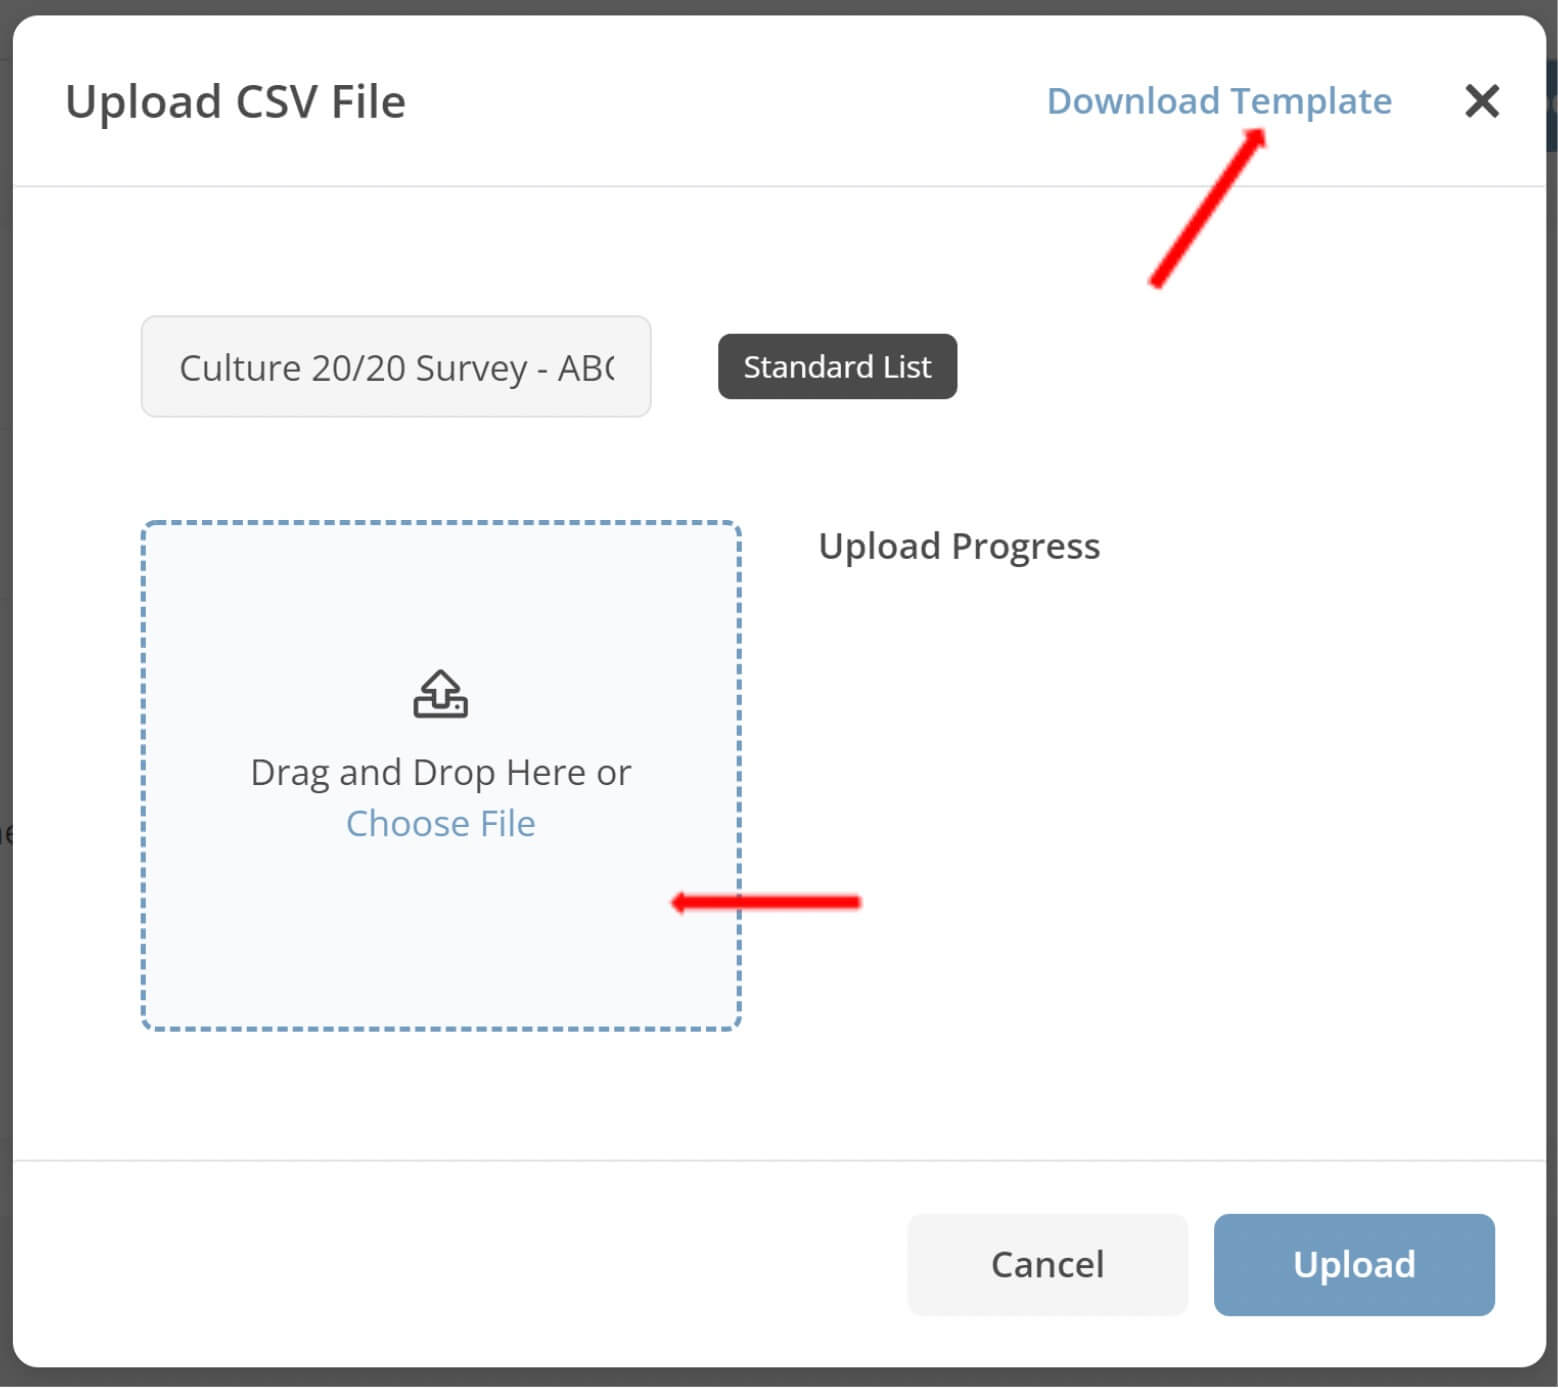
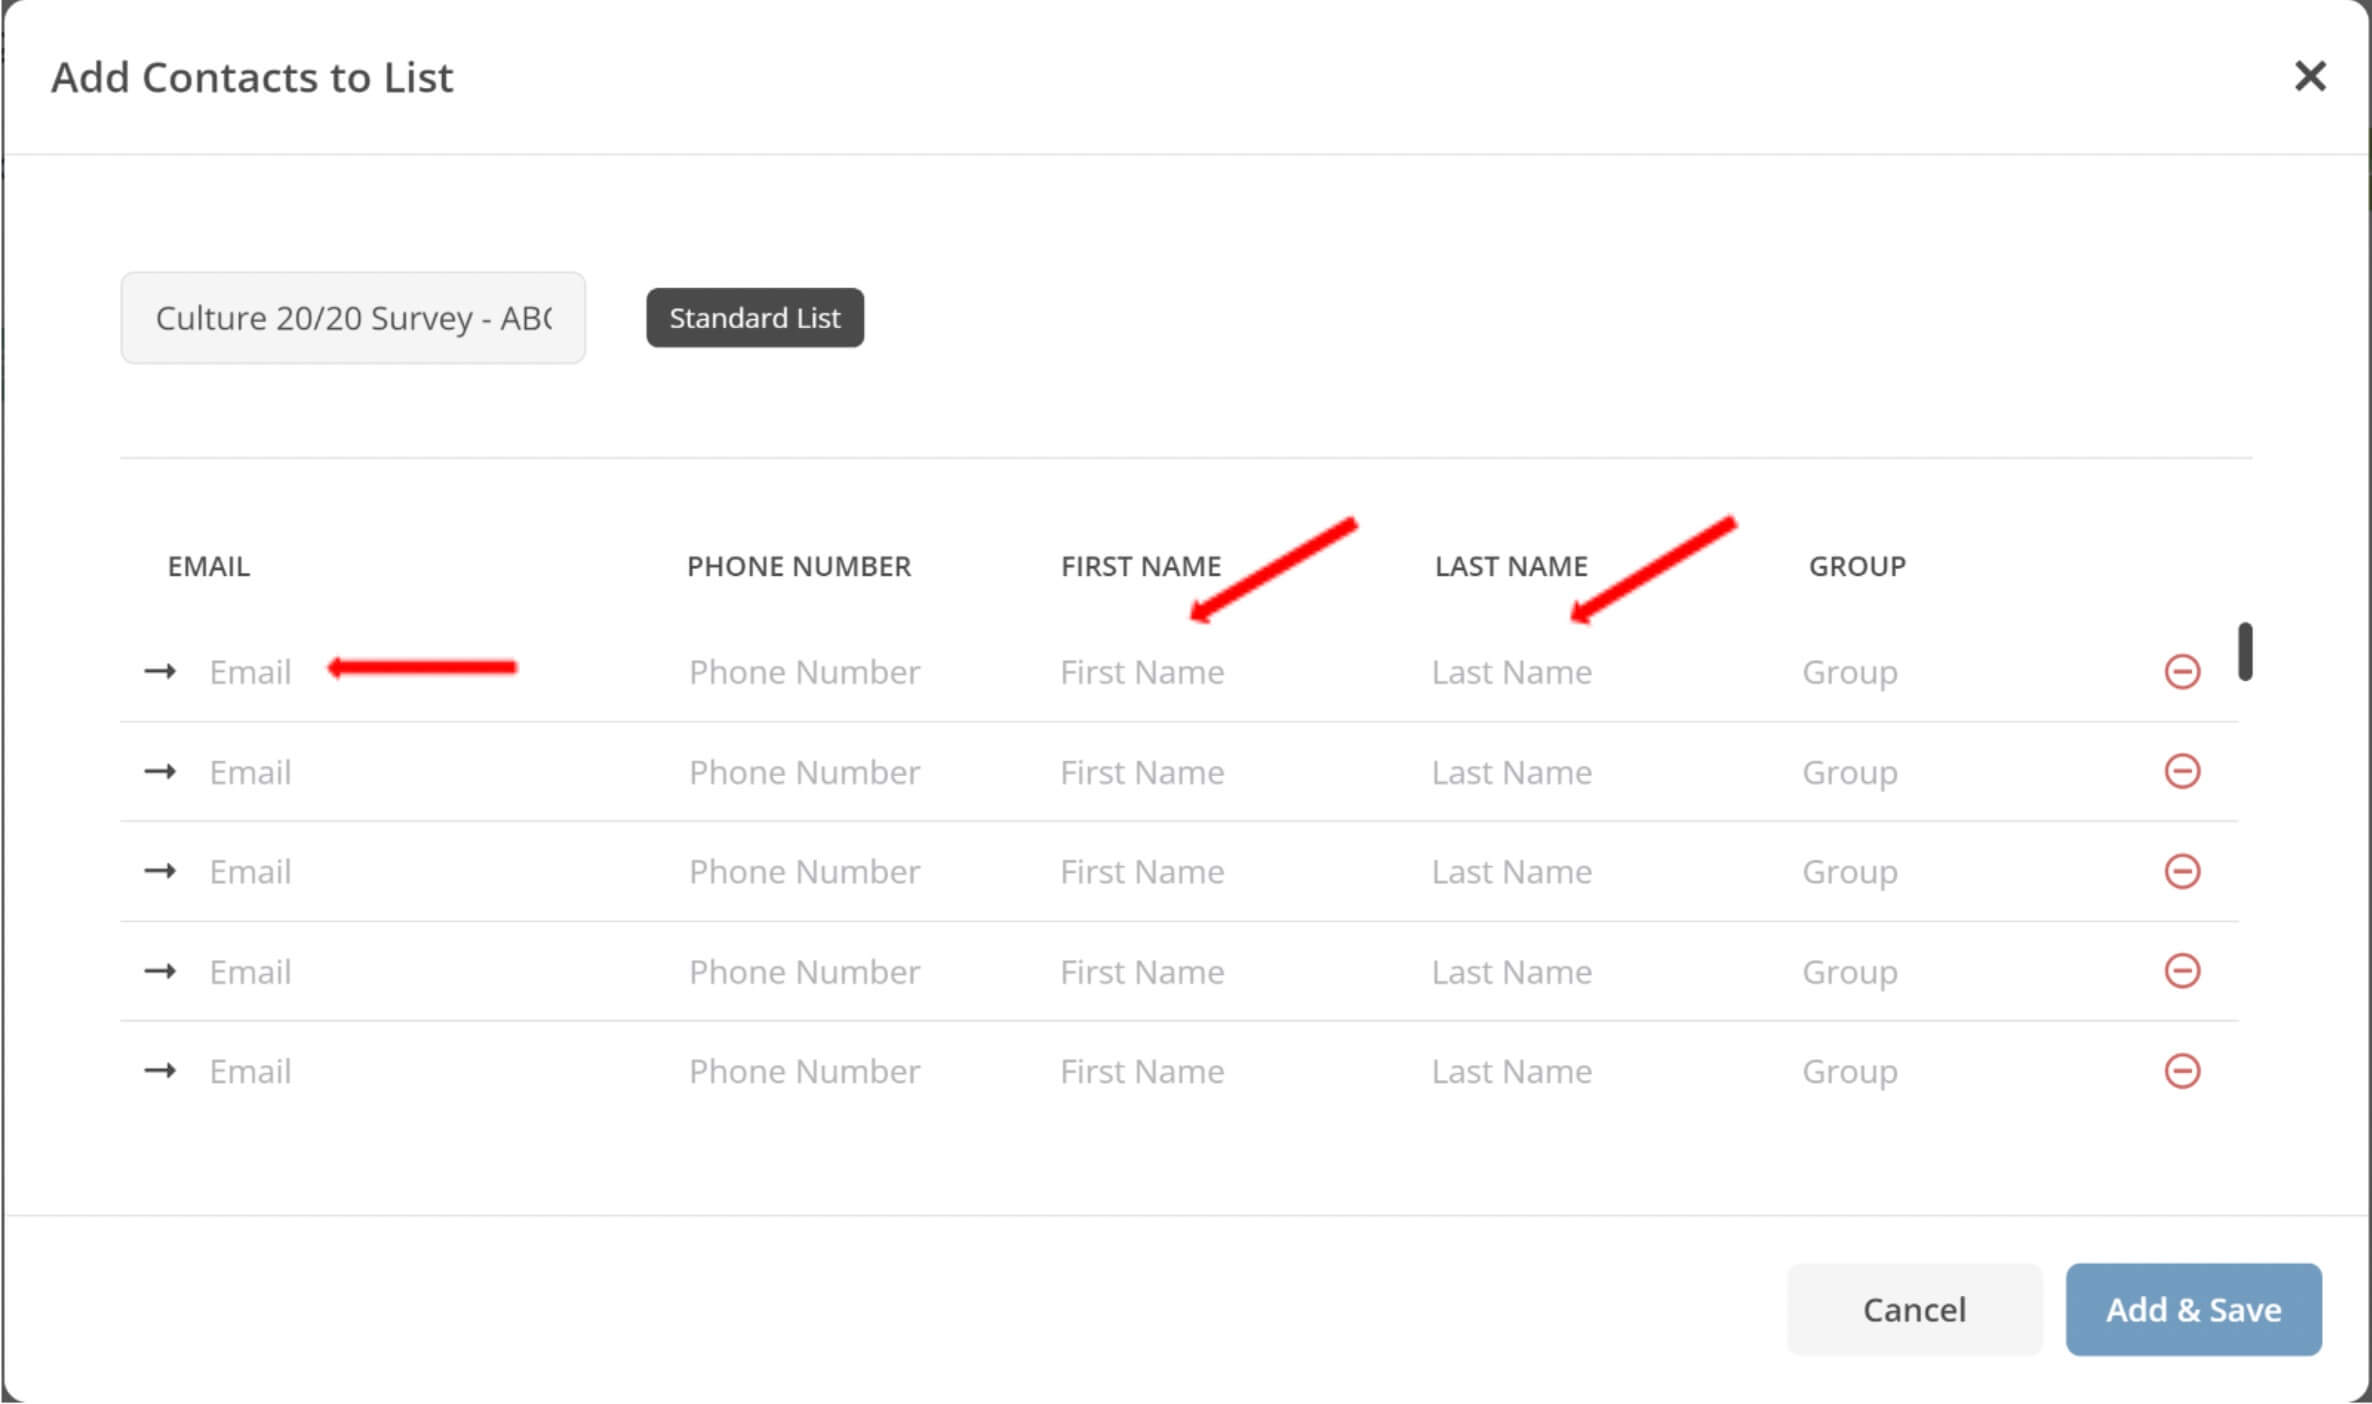
16. Now you are at the part where you add your raters. You will have two options:

a. Upload a CSV file – Click on this option and download the template. Fill out the template and upload the file to add your list of participants. Necessary information includes the name and email address. When done, click Upload.
b. Manual Input – You have the option to manually input your list of raters. Enter the information in the correct fields. Necessary information includes the name and email address. When done, click Add & Save.
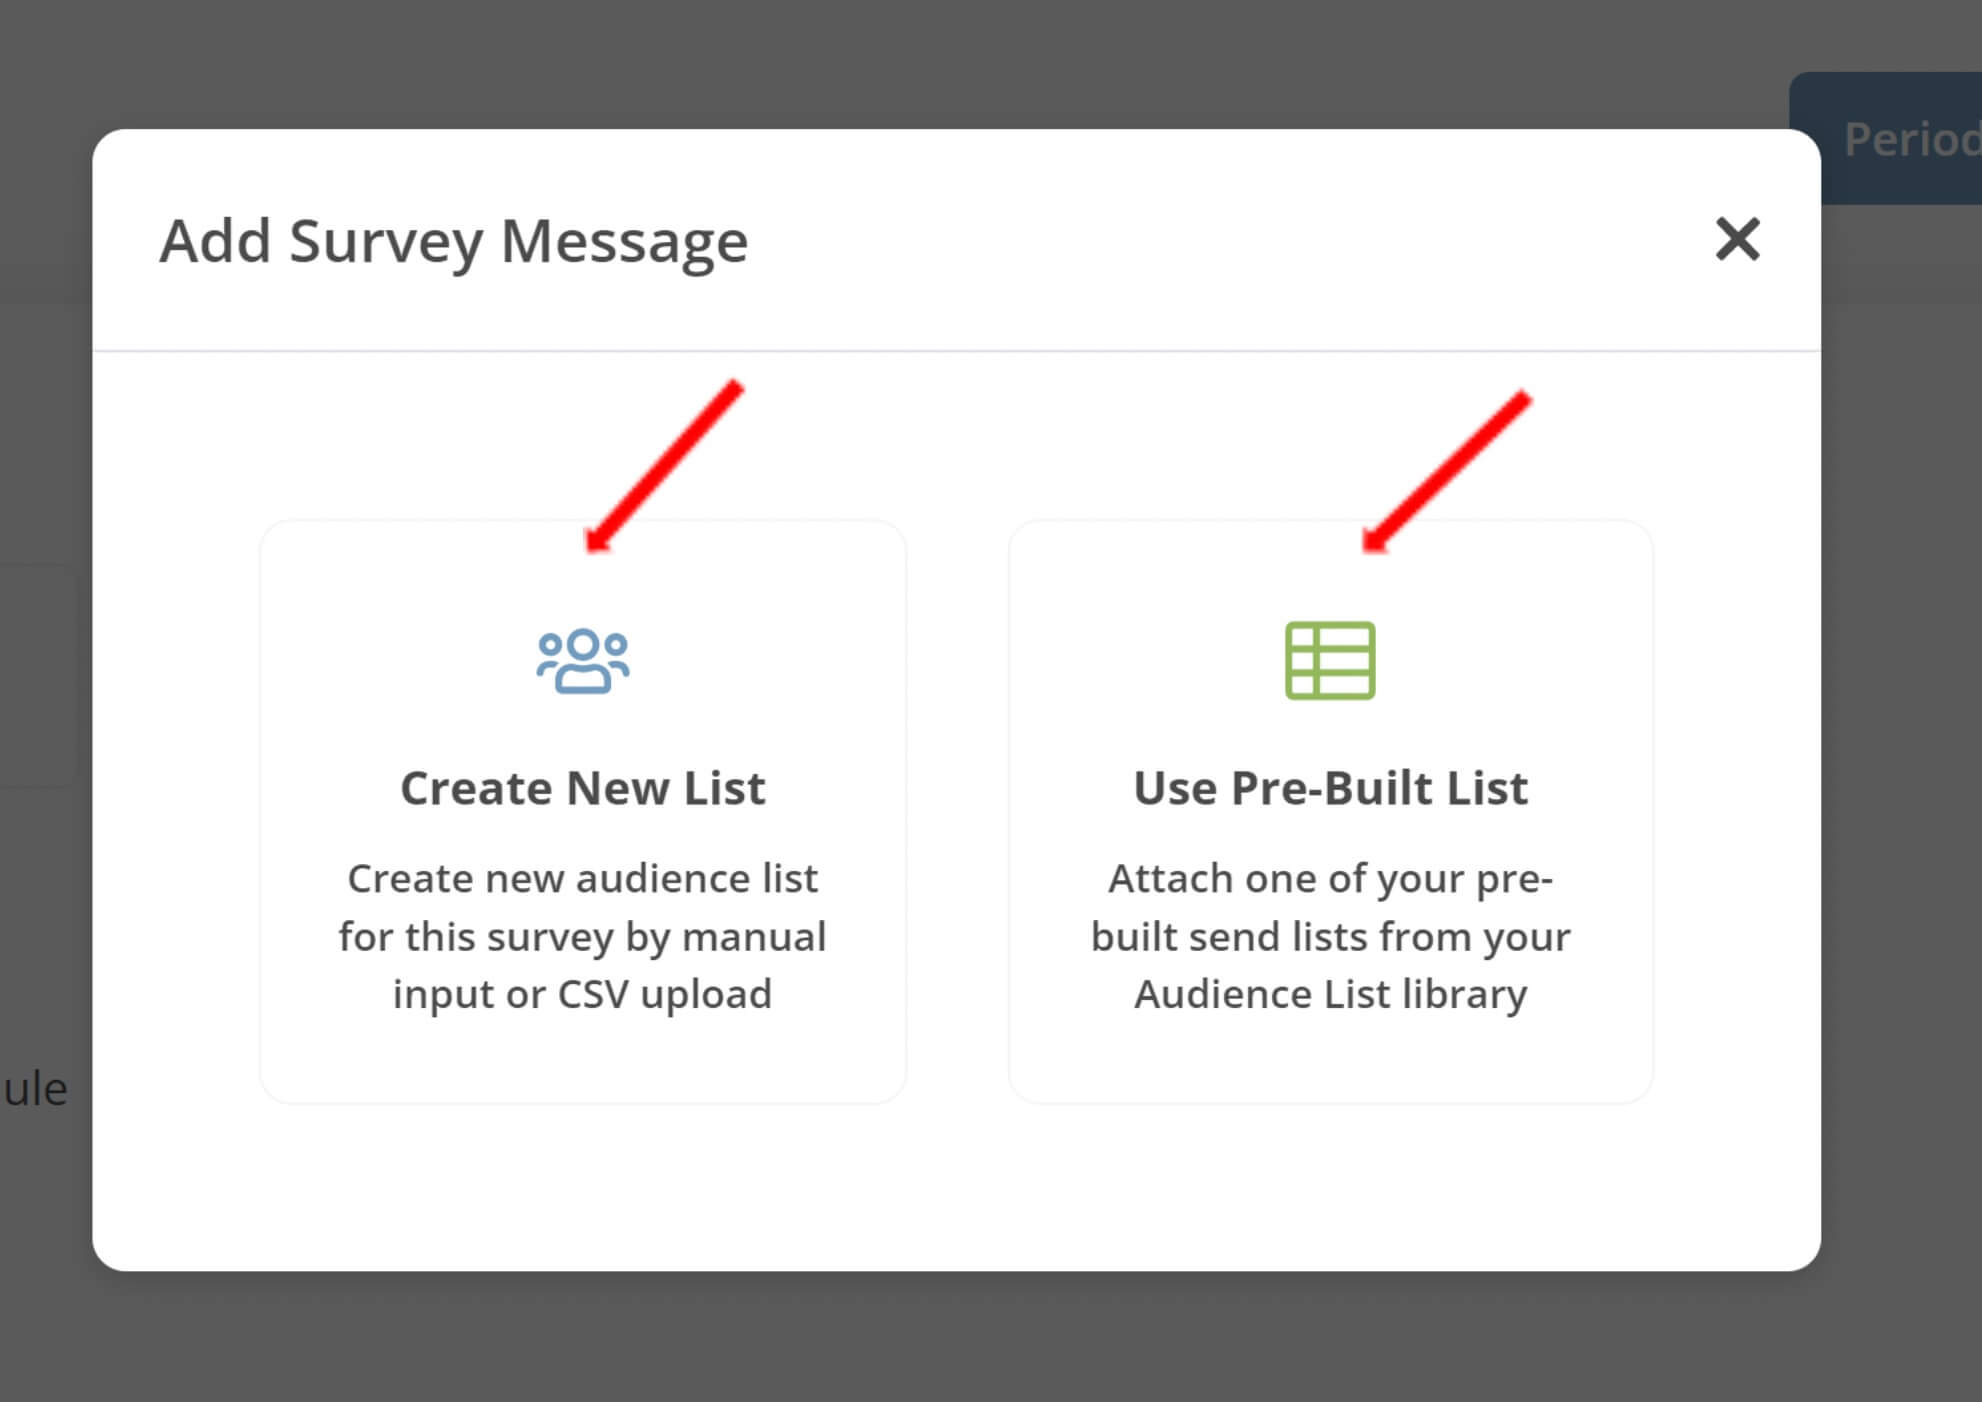
17. Next, add your Survey Messages. Click on Add Survey Message and then select Create Custom or From Template.
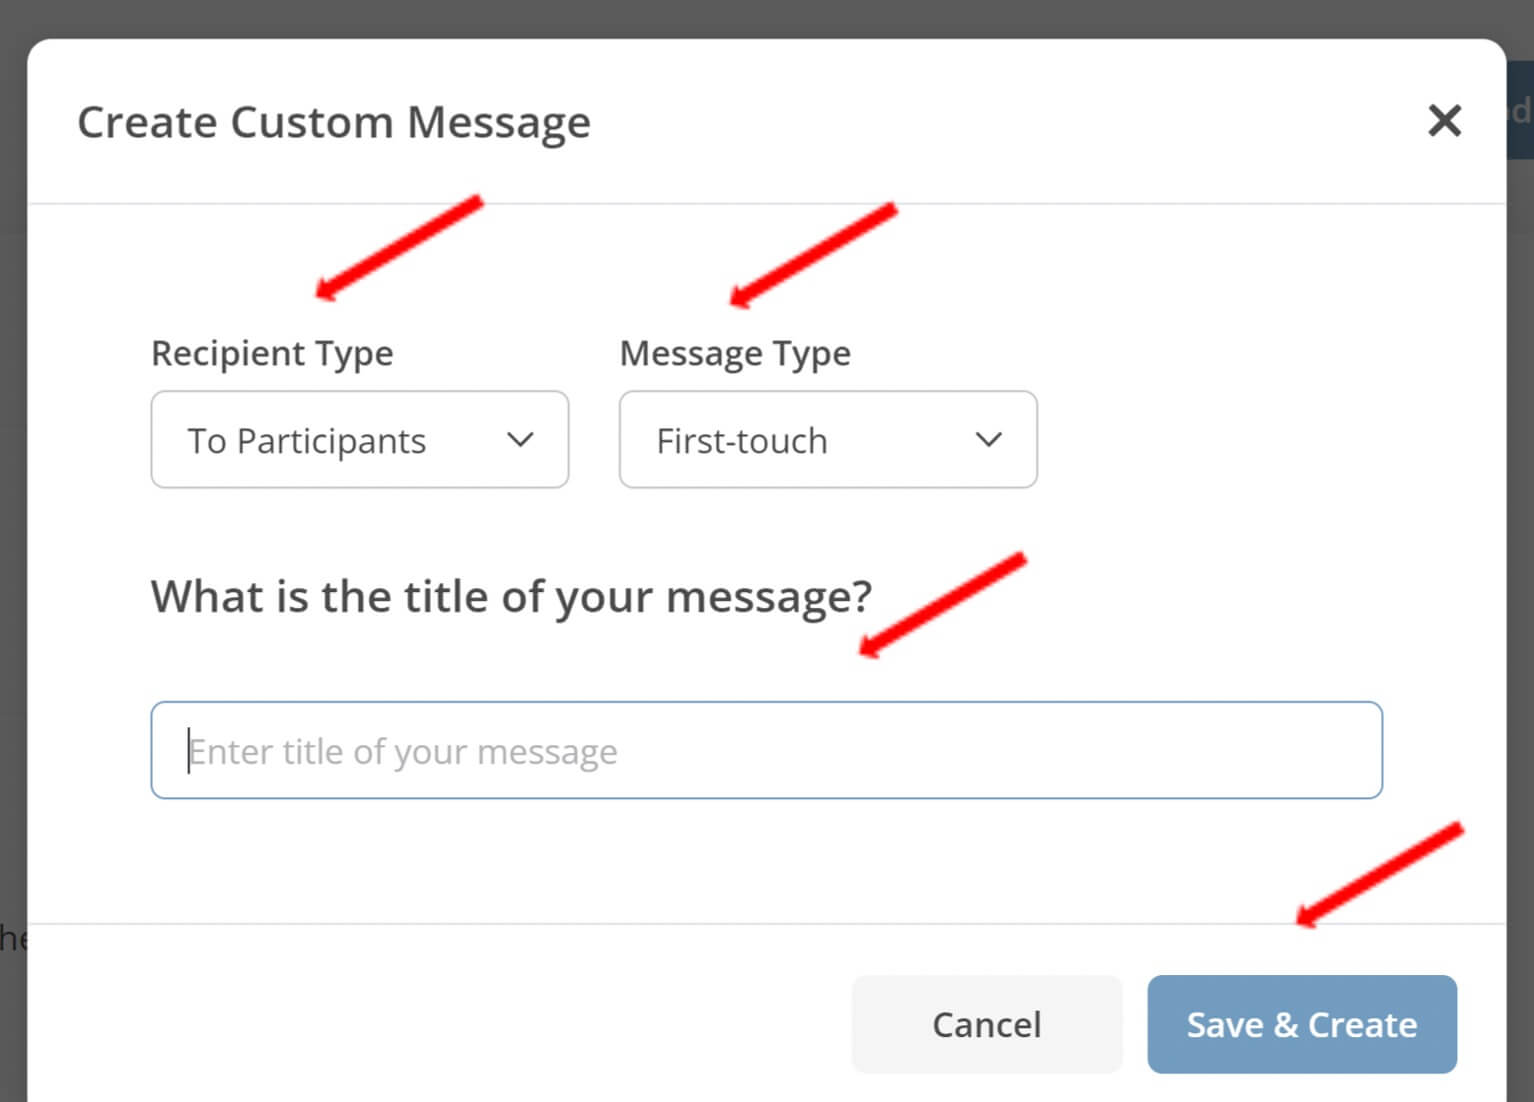
 a. Create Custom – Create your message at this point. Click on Create Custom. Next, designate the recipient type, Participant, select the message type (First touch or Follow Up) and enter a name for your message. Click Save & Create.
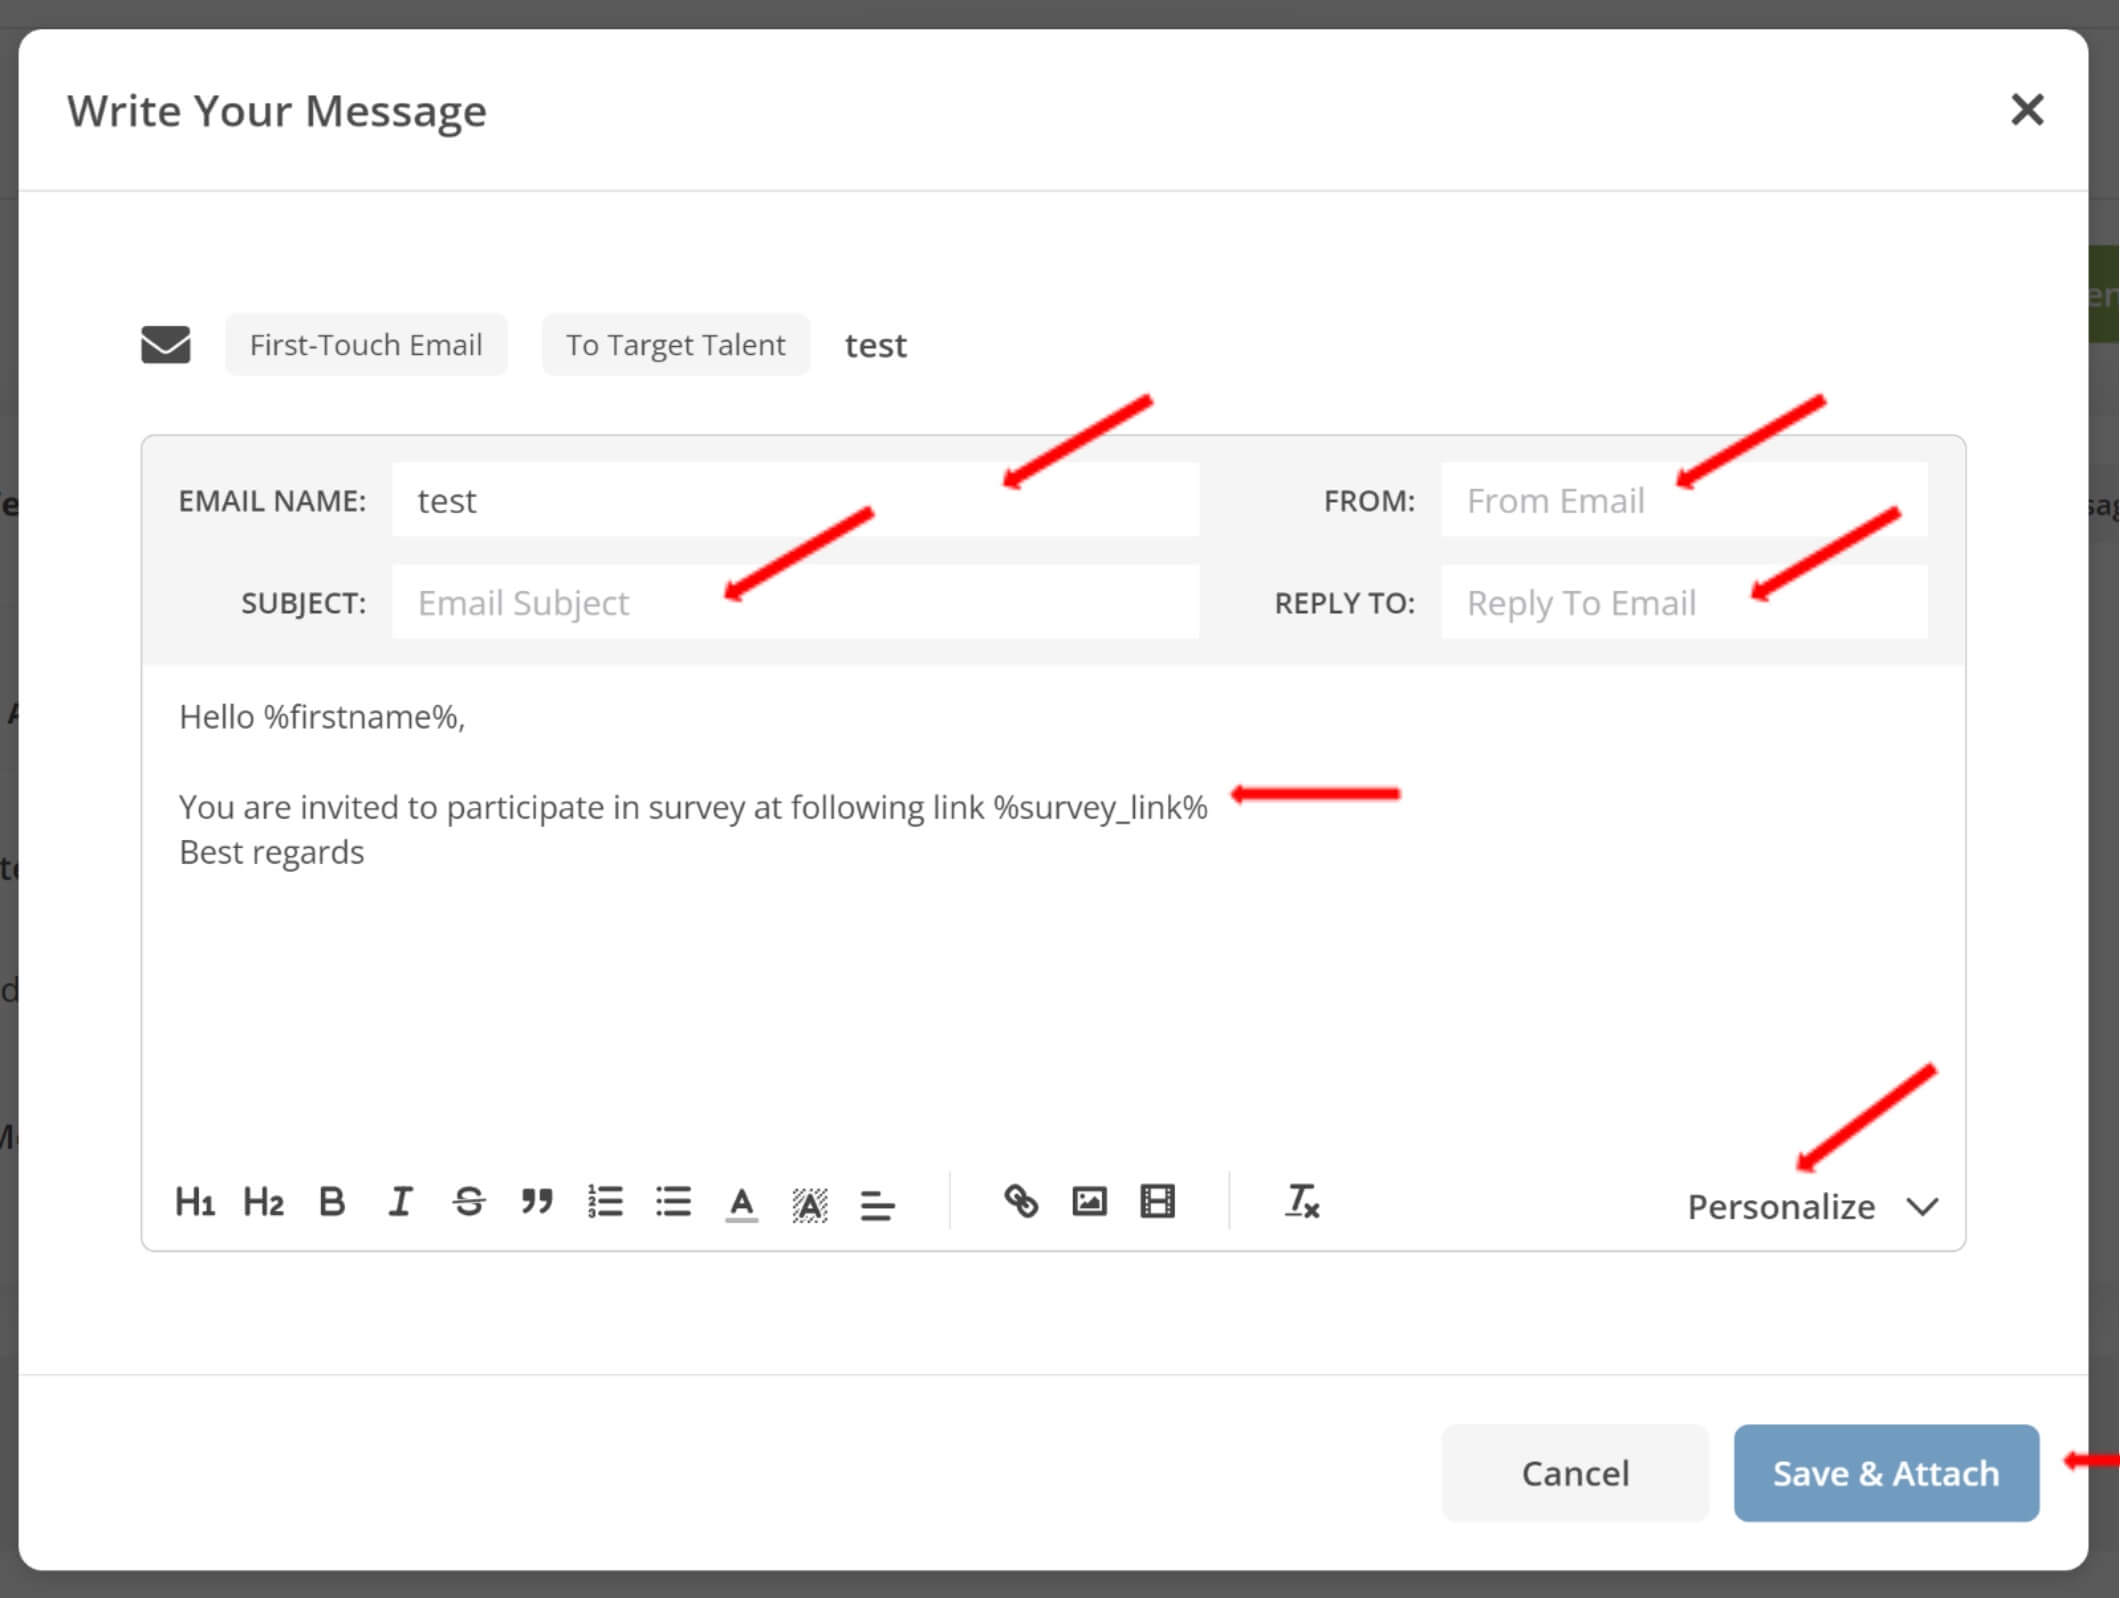
Next, create your message. Click on Personalize on the bottom right to pull up a list of placeholders such a survey link and due date to add to your message. When done, click on Save & Attach.
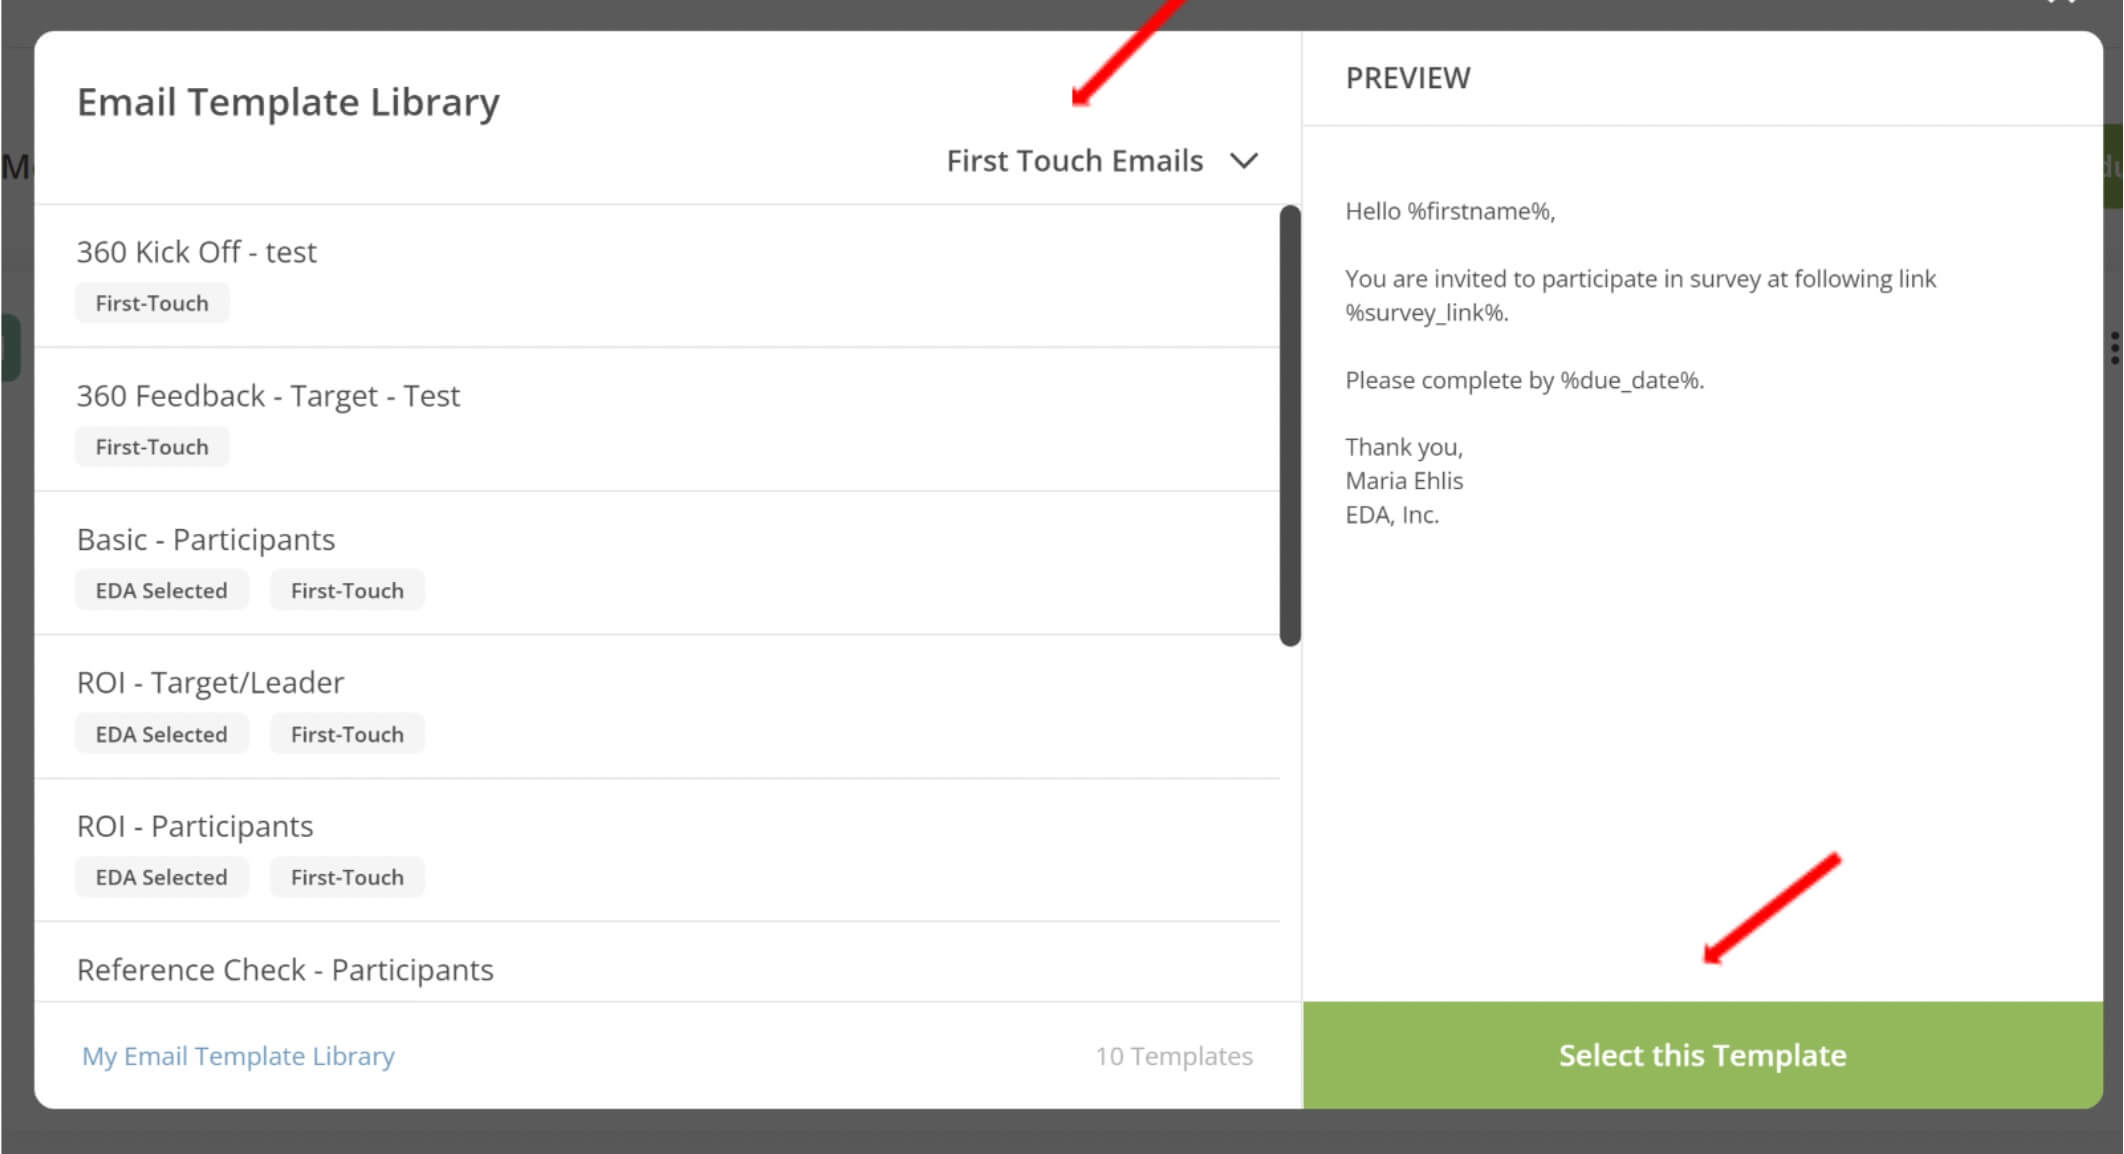
b. From Template – First select either First Touch or Follow Up Emails. Click on Select Template to add the template and continue the process until all of your messages have been added.
c. Add the following:
-
- Participant – first touch (this is the initial survey invitation email for participants)
- Participant – second touch (this is the reminder email for the participants)
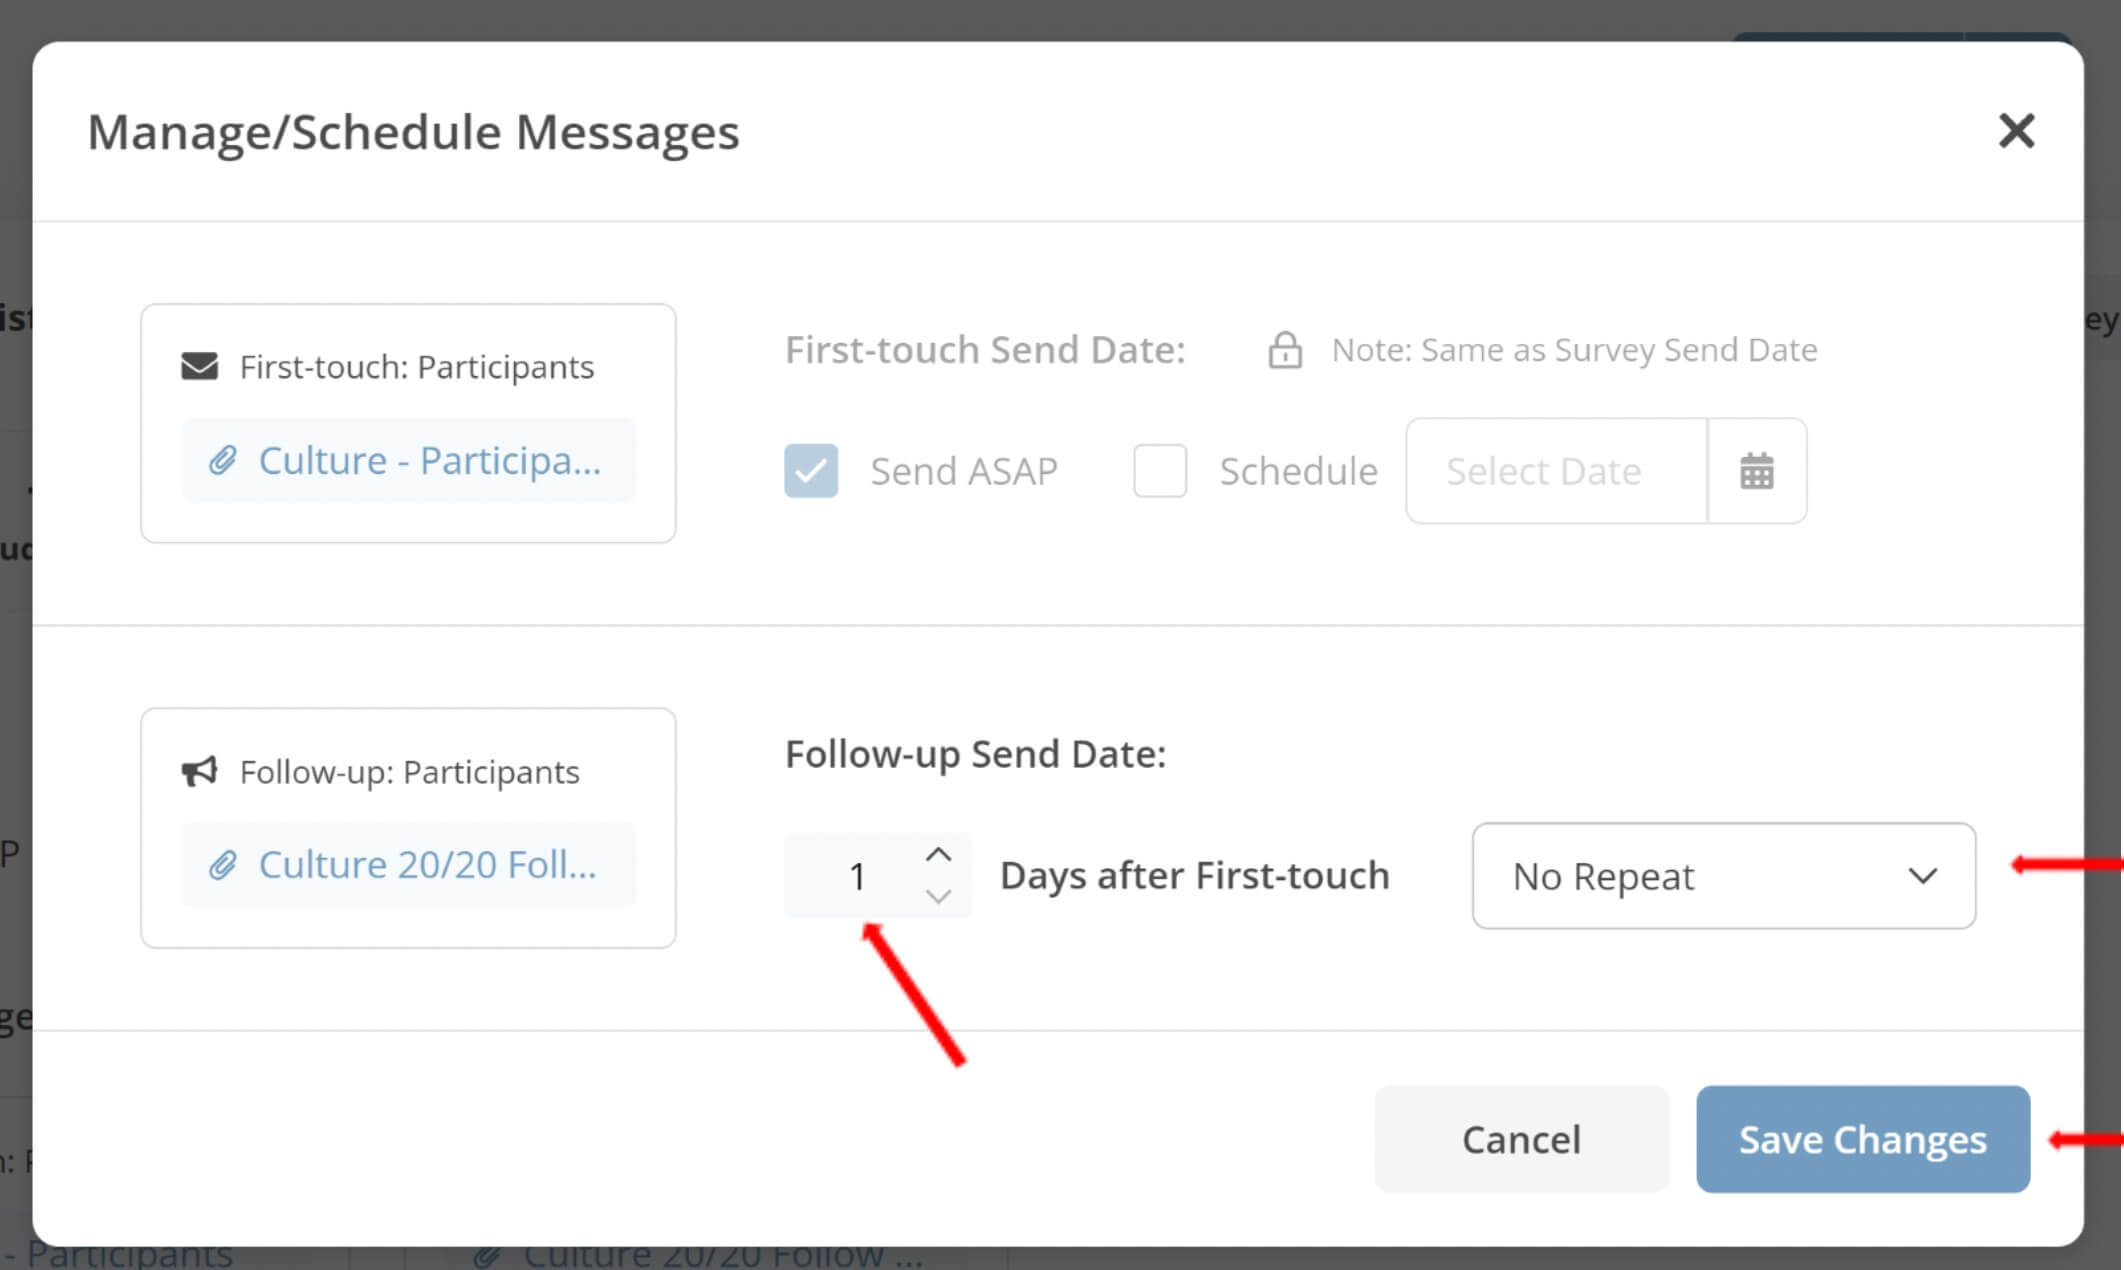
18. Once your messages have been added, click on Manage/Schedule Messages to schedule the reminder messages.
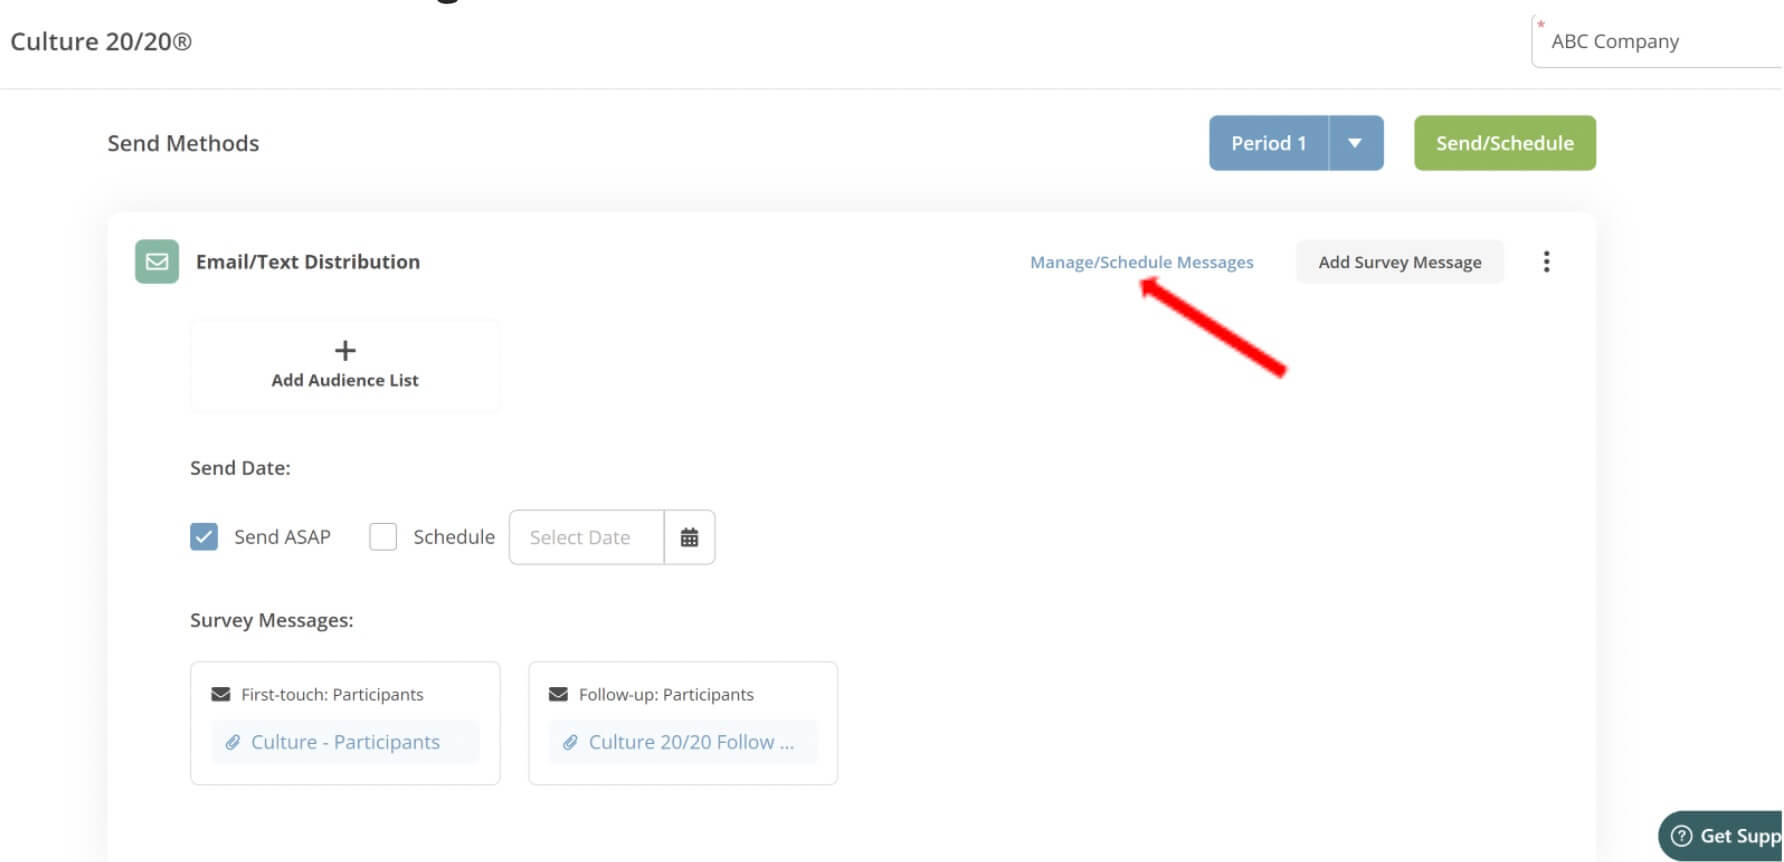
To schedule the reminder messages, select the Days after First-Touch and click if you want to Repeat the reminders or not. Click Save Changes to continue.
NOTE: Always set up a reminder schedule for the first set of reminders. After that, you can select No Repeat and manually send out reminders. You can also send manually send reminders at any point during the survey.
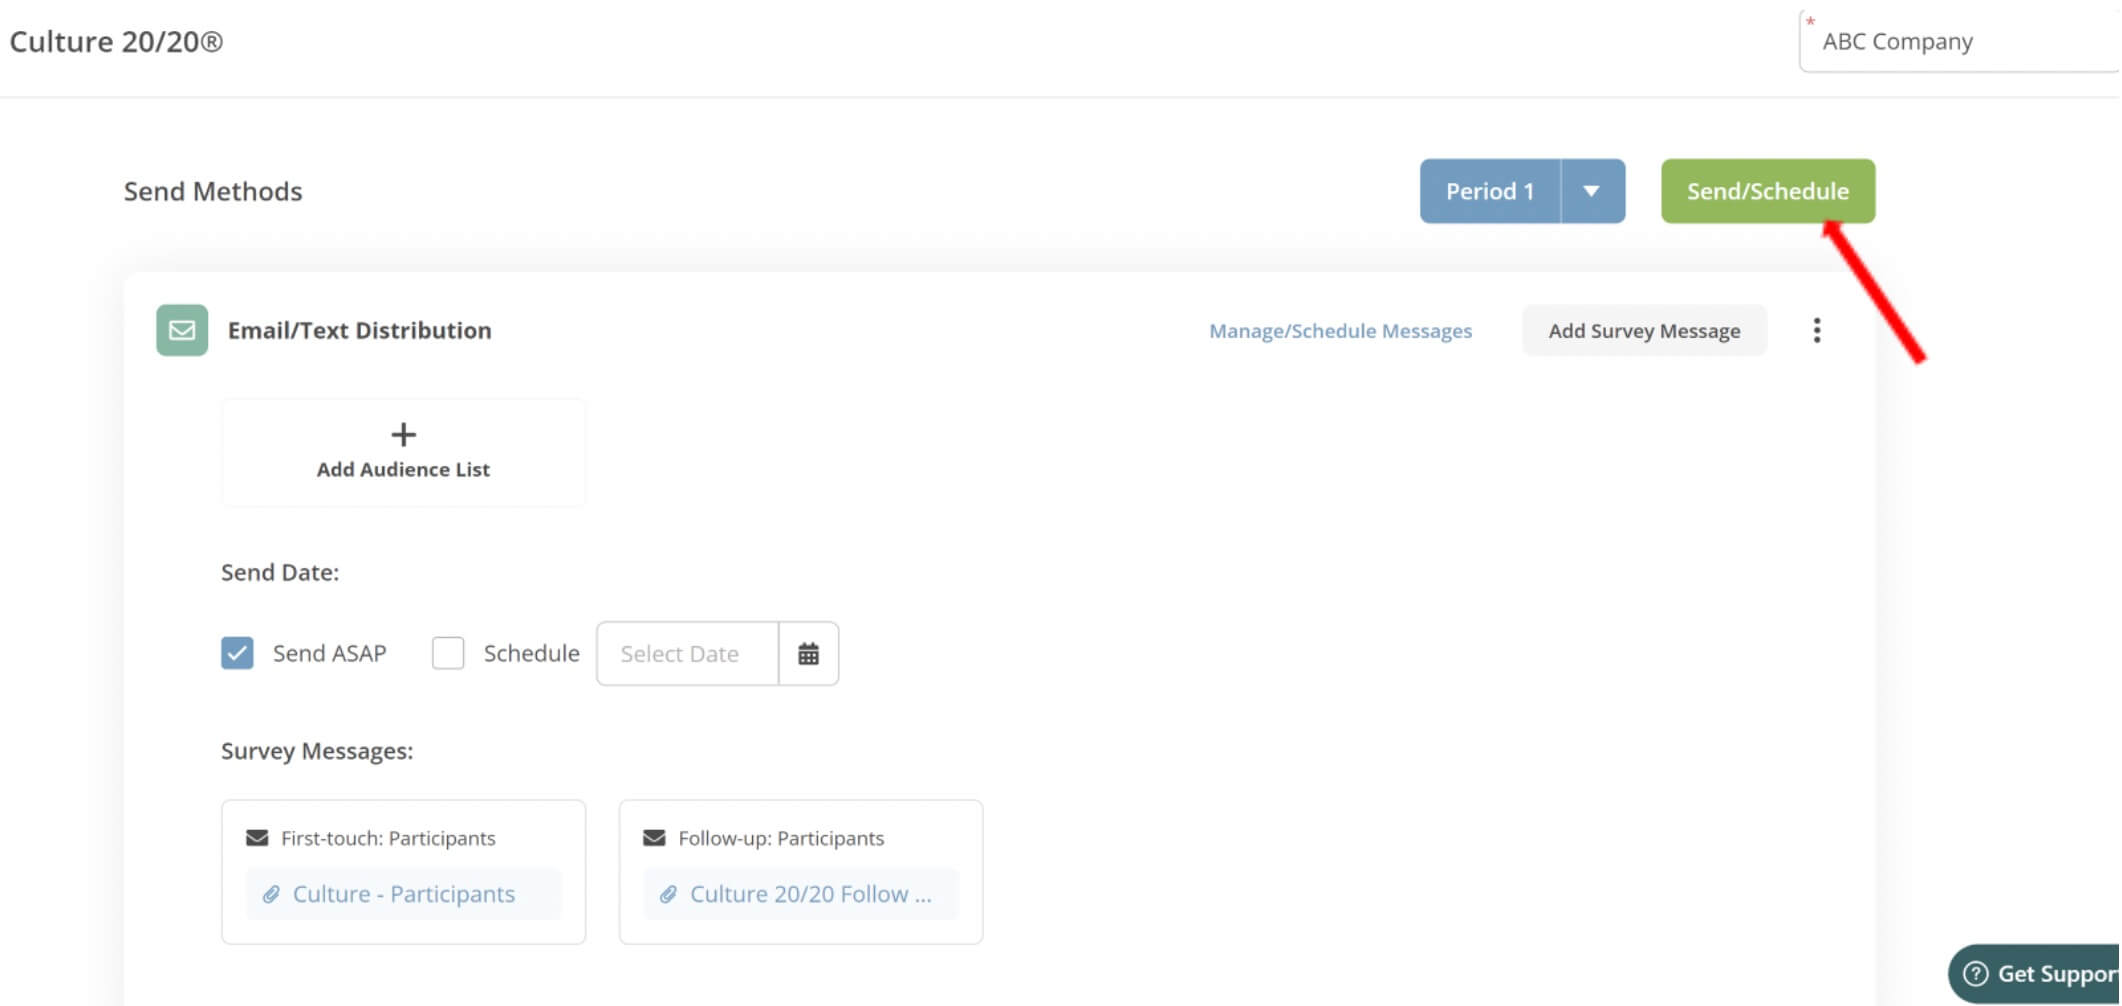
19. Now, you are ready to send out the survey. Click Send/Schedule to launch the survey.
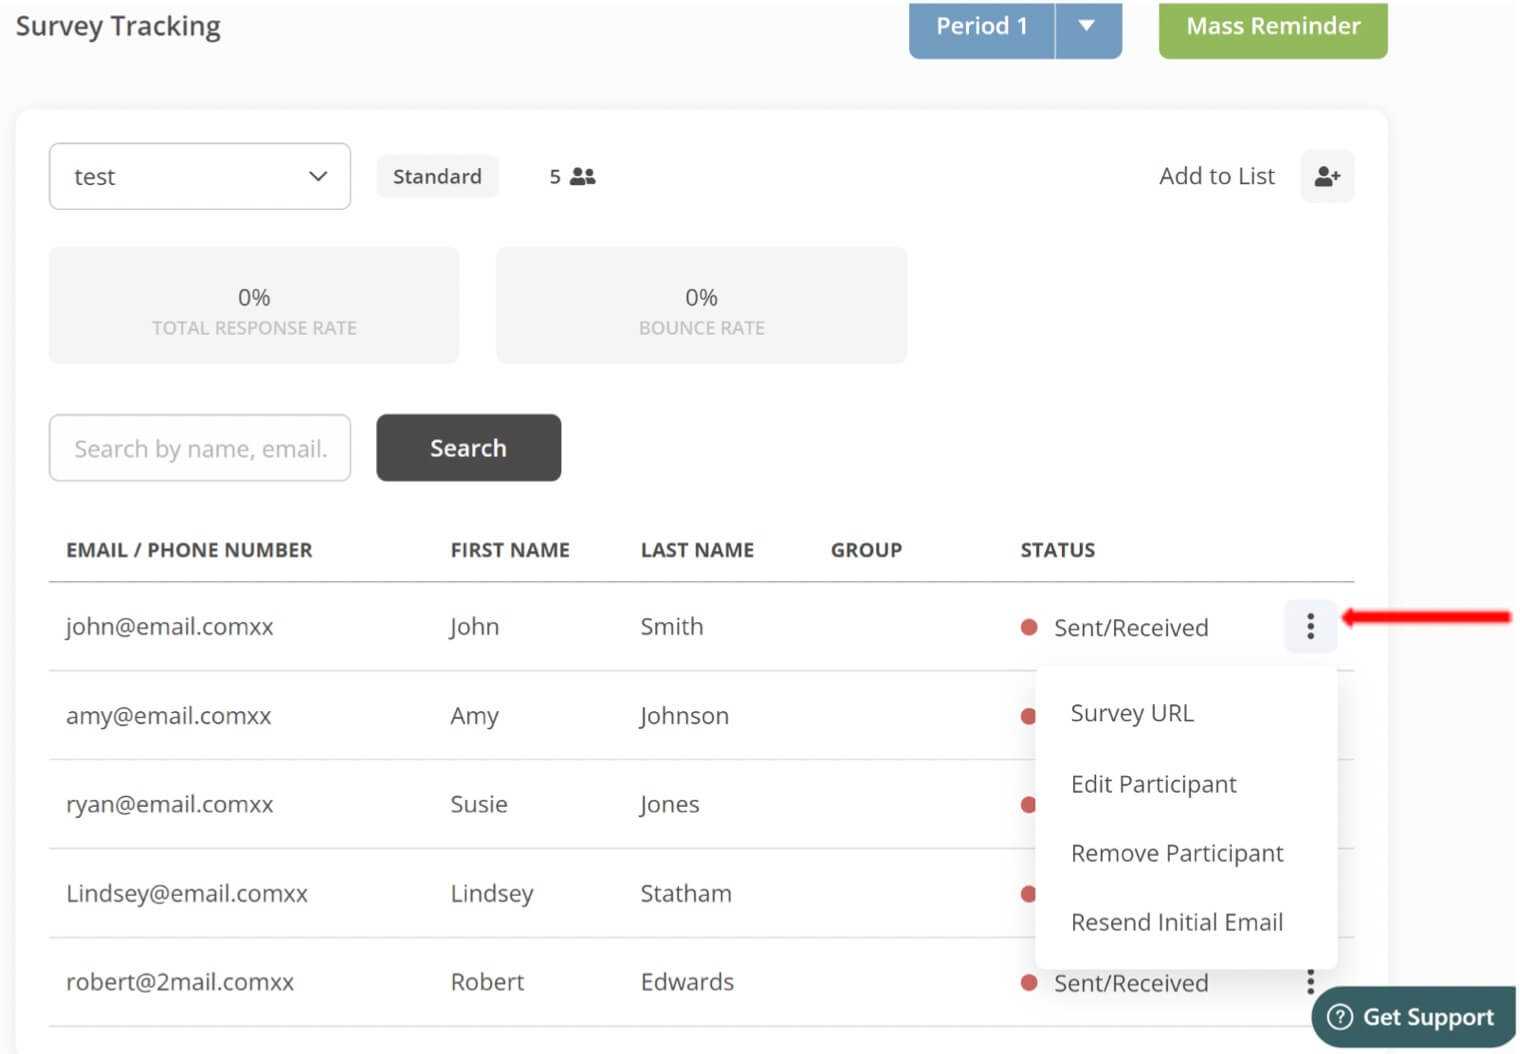
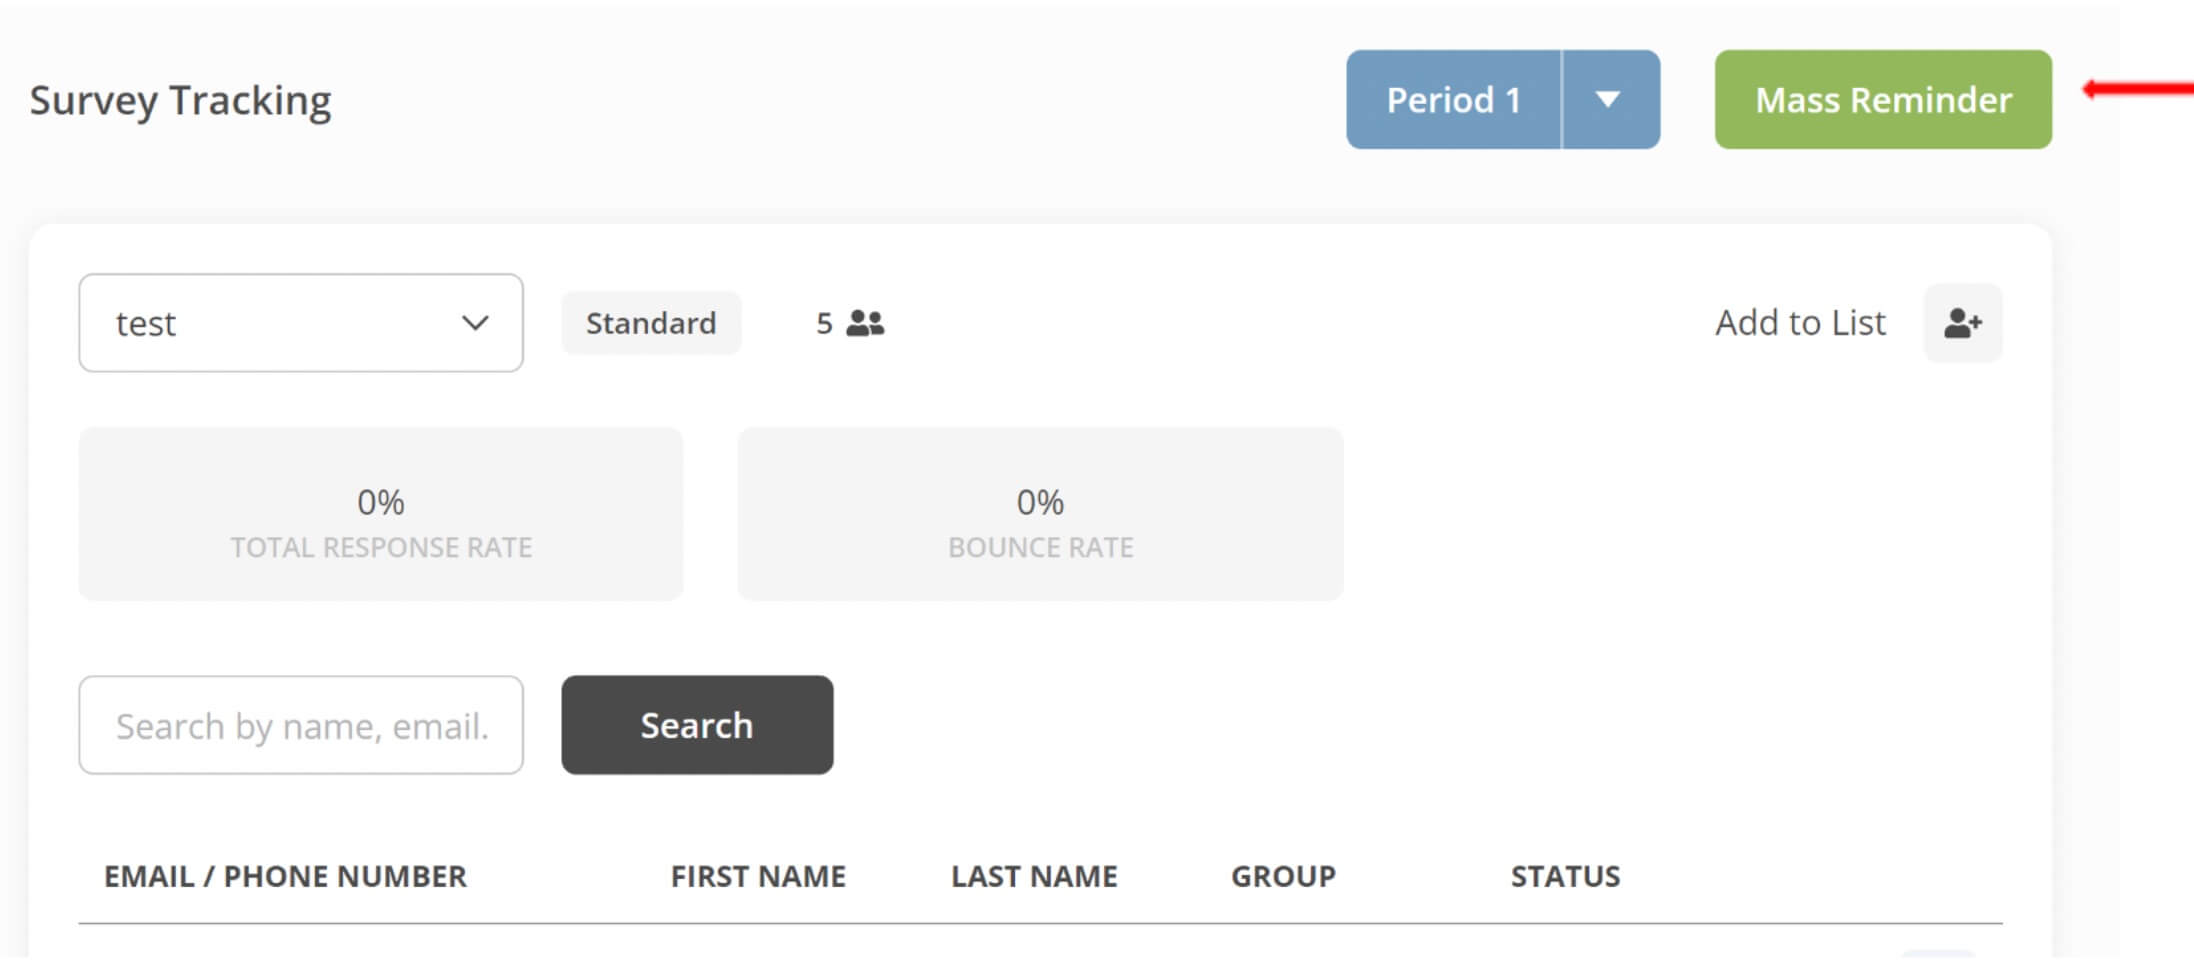
20. After launching, track responses by clicking on the Projects tab on the Home Page. This will take you to the Survey Tracking page. Here you will see the Participant information including the emails, names, group, and the status. In addition, you will be able to edit participant information by clicking on the three dots to the right of the person. You will also be able to send Individual and Mass Reminders.
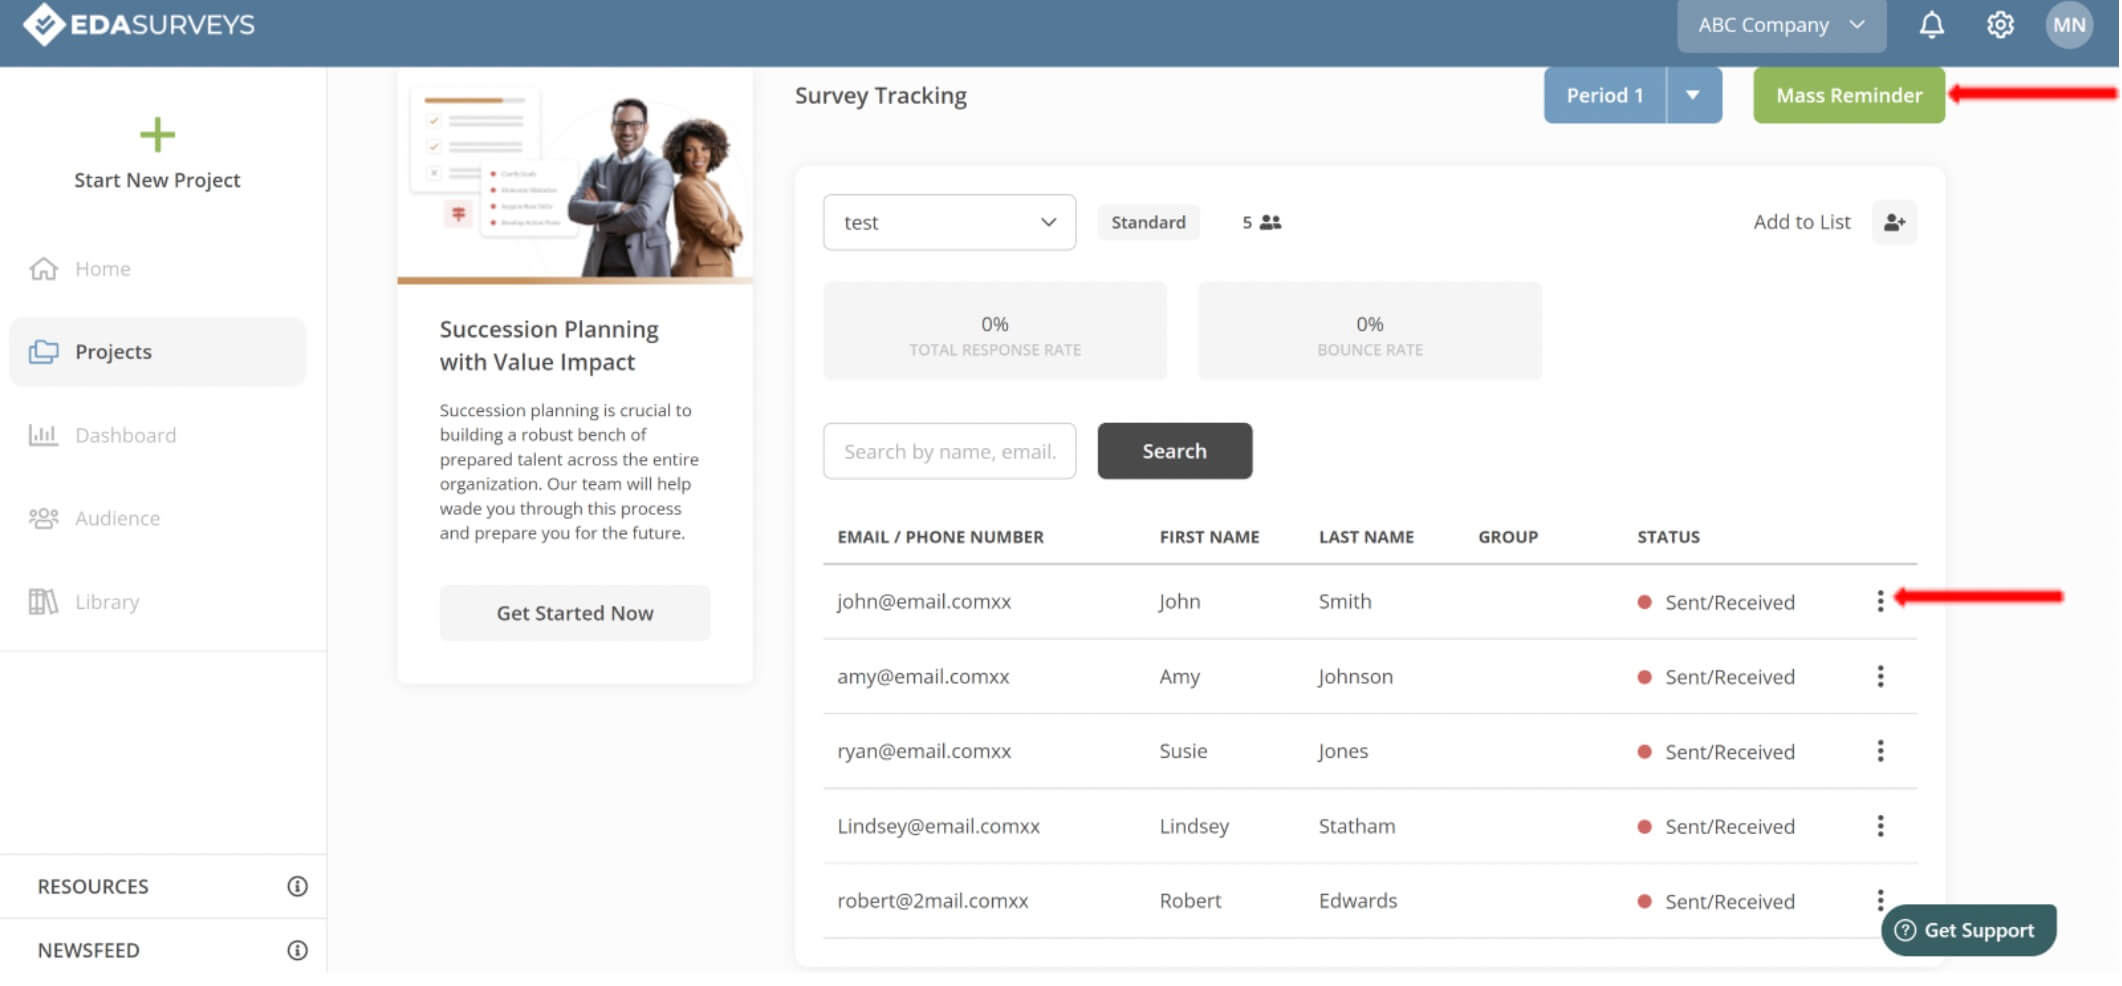
When you click on the three dots, the following options will appear:
- Survey URL – You can view the unique URL associated with the Participant
- Edit Participant – Edit the participant information
- Remove Participant – Remove the participant from the project
- Resend Initial Email - send individual reminder emails to the Participant
Manually send Mass Reminders by clicking on Mass Reminders. Those that haven’t completed the survey will receive a reminder message.
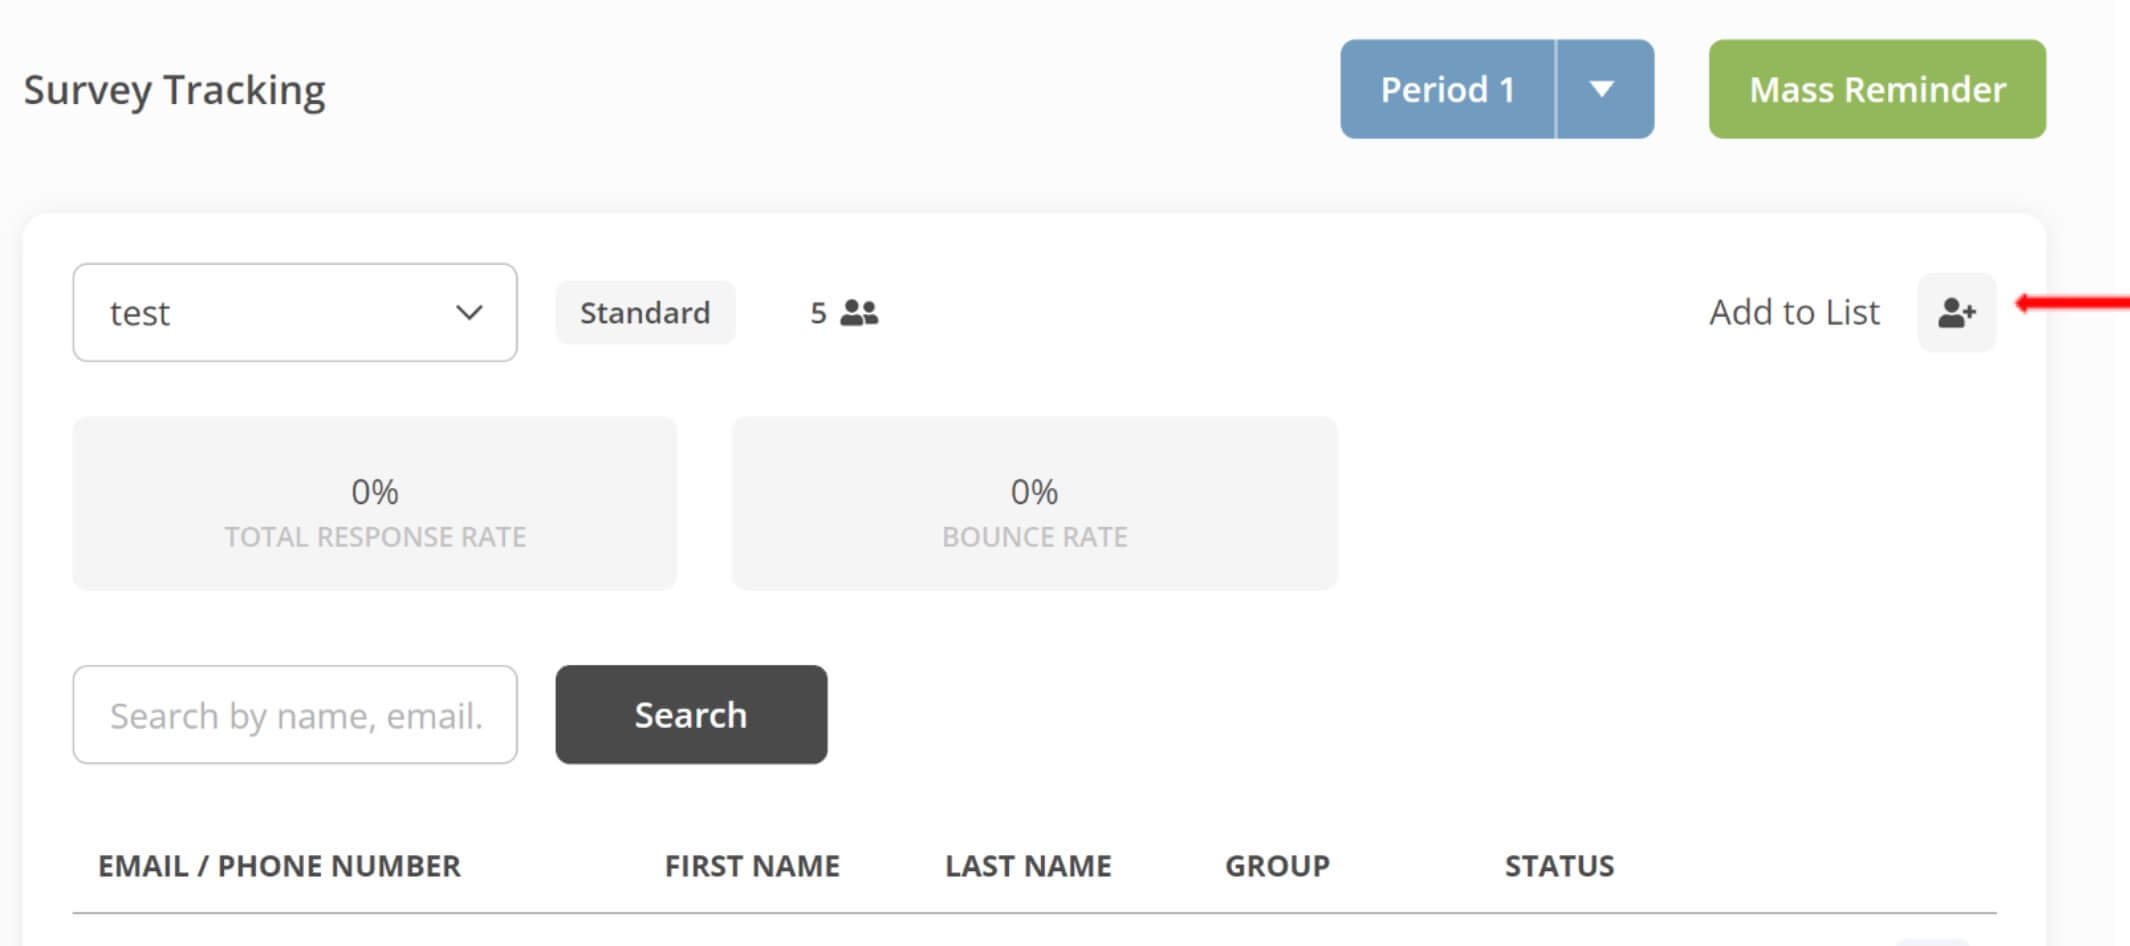
Lastly, to add additional Participants to the project, click on Add to List which will bring up a new window. In that window, add the Participant information (email, name, rater group) and click Add & Save. The initial survey invitation email will automatically go out to any additional Participants.
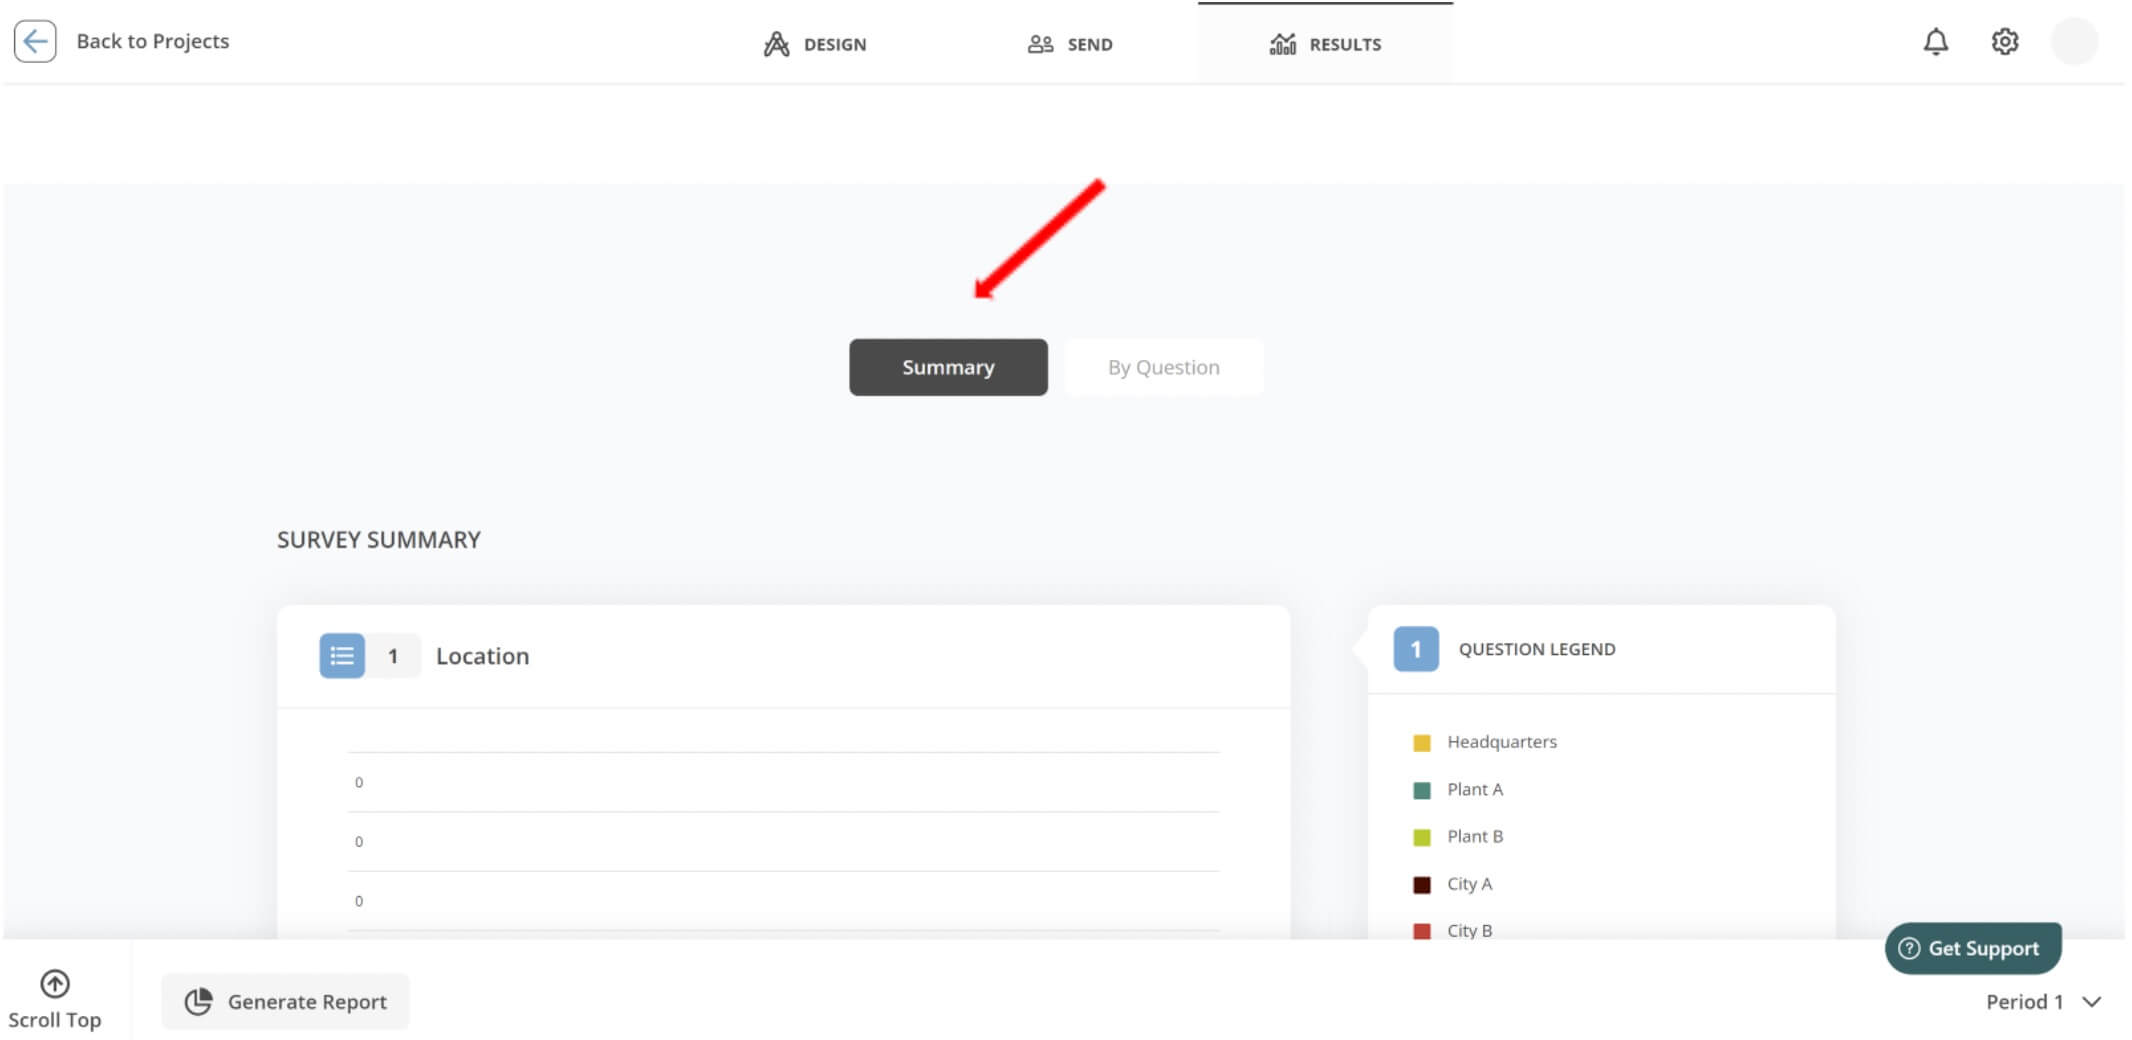
21. To view additional results and insights, from the Survey Tracking page click on Results.
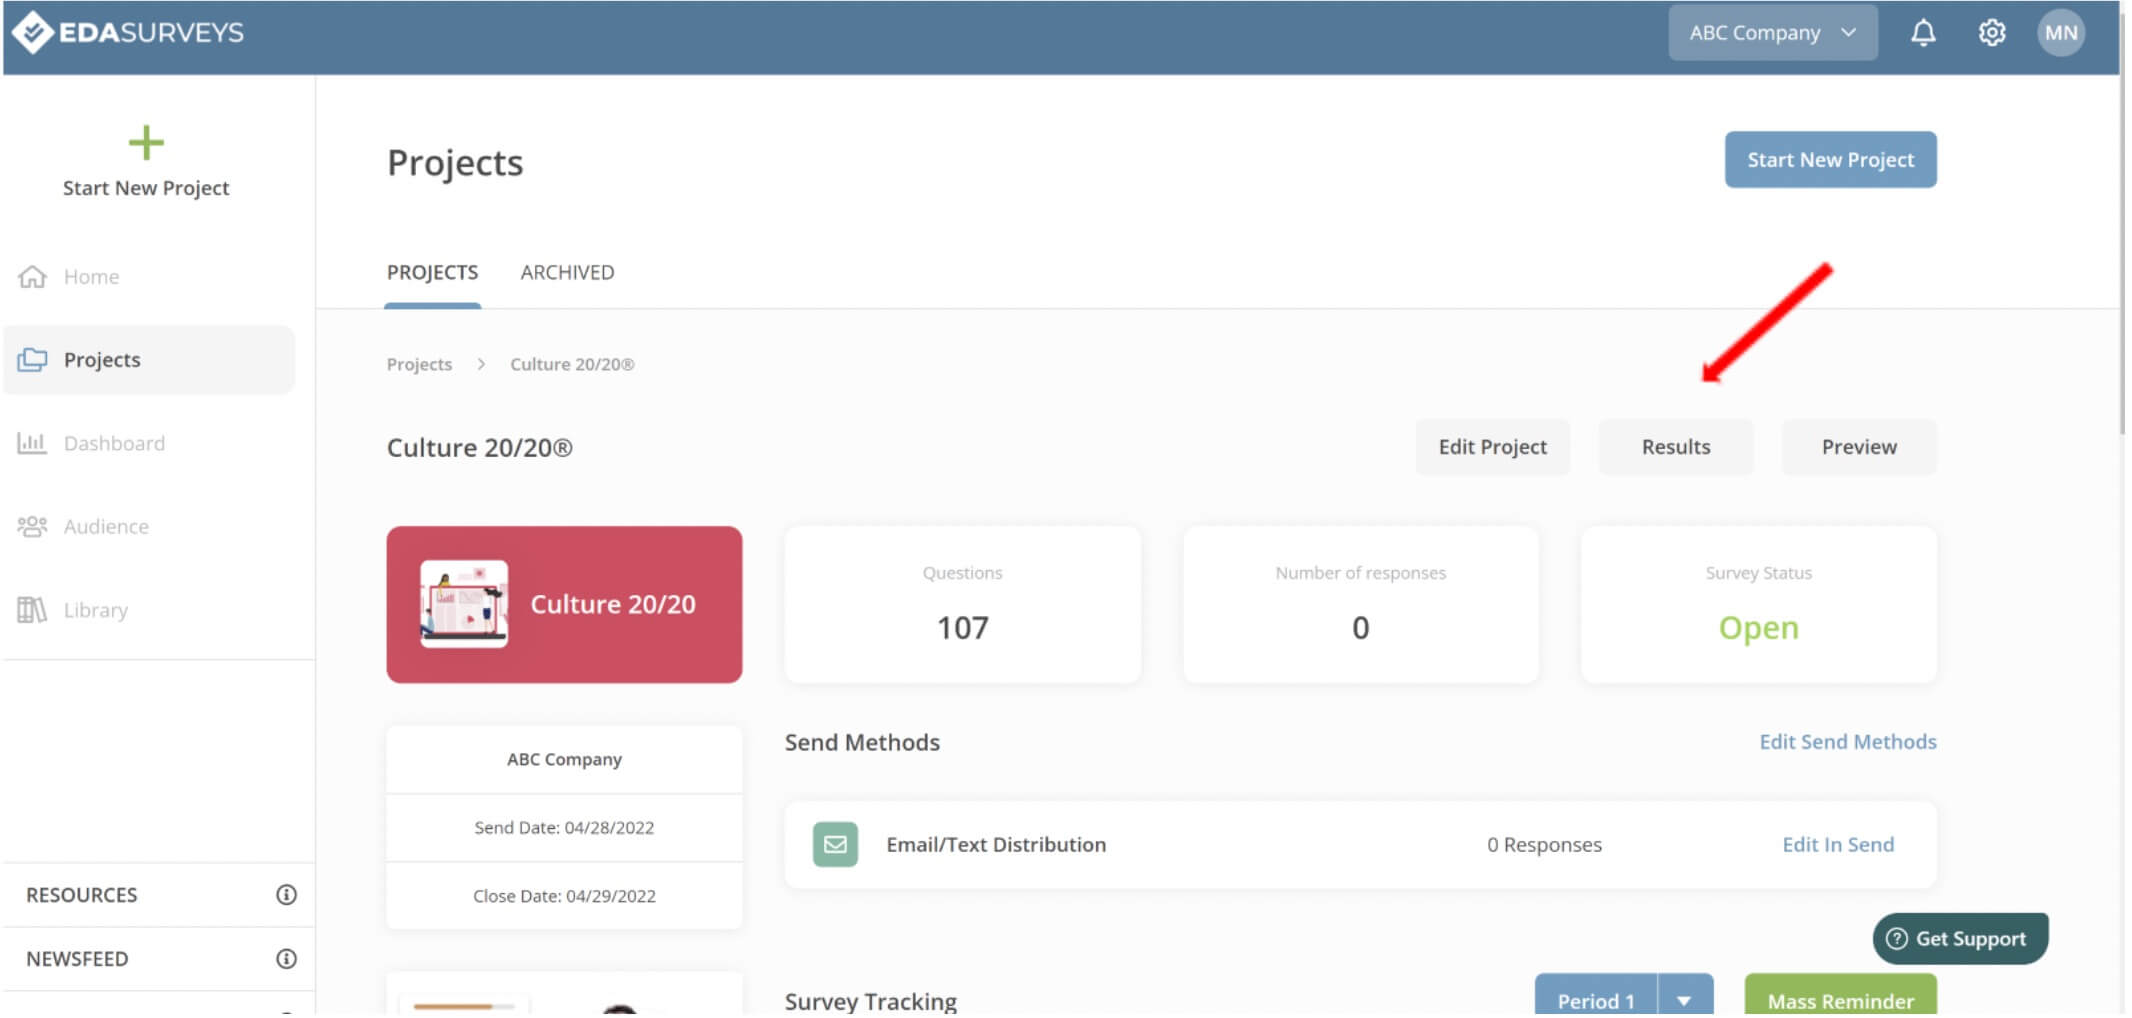
Then, you will have a Summary view of the responses.
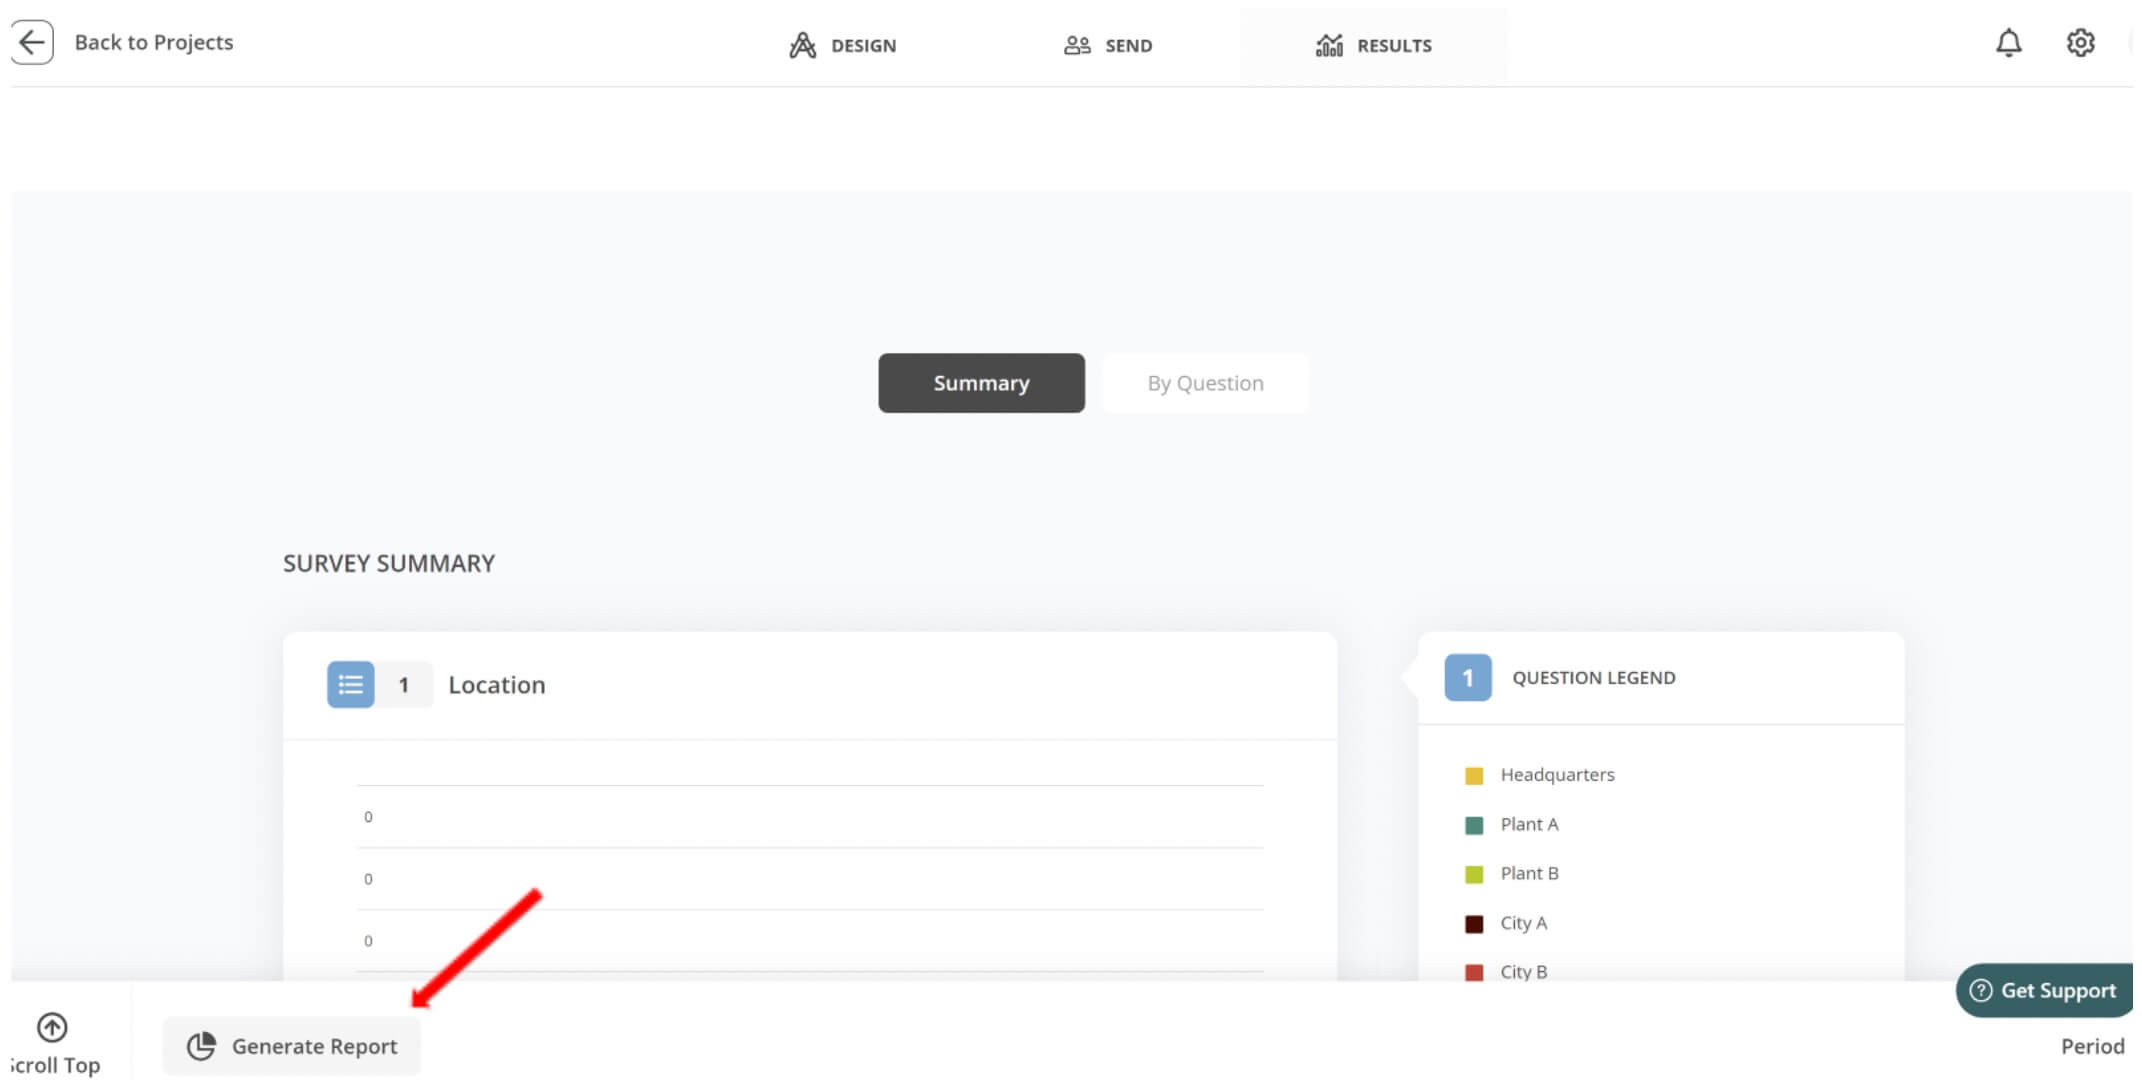
22. When ready to pull the report, go to the Results page by going to Projects > Opening Project > Clicking on Results. At the bottom of the screen, click on Generate Report.
The #1 reason mergers and acquisitions fail is culture clash. Request access to our EDA Surveys platform to begin building a better culture
Schedule a chat with one of our expert coaches
To speak with an EDA professional, please fill out the form. Be sure to identify a solution or product you are interested in pursuing. We look forward to speaking with you!